As well as having the ability to adjust settings within the HD2 unit, VBOX Video Setup Software provides full graphical overlay user configurability. For example, you can create custom dials, choose how large/ where you would like your logo to be and also change where the second camera is located. The scene can then be uploaded on to the unit by saving to an SD card or USB memory and inserting into the powered VBOX.
The Software can be downloaded from here.
When the software is loaded, the first screen that is presented is the Scene Selector. Here you can choose a default, custom or new scene to be loaded into the Scene Editor area.
IMPORTANT
macOS version 10.11 or later is required.

Once a scene has been loaded, the main areas of the software are shown below:
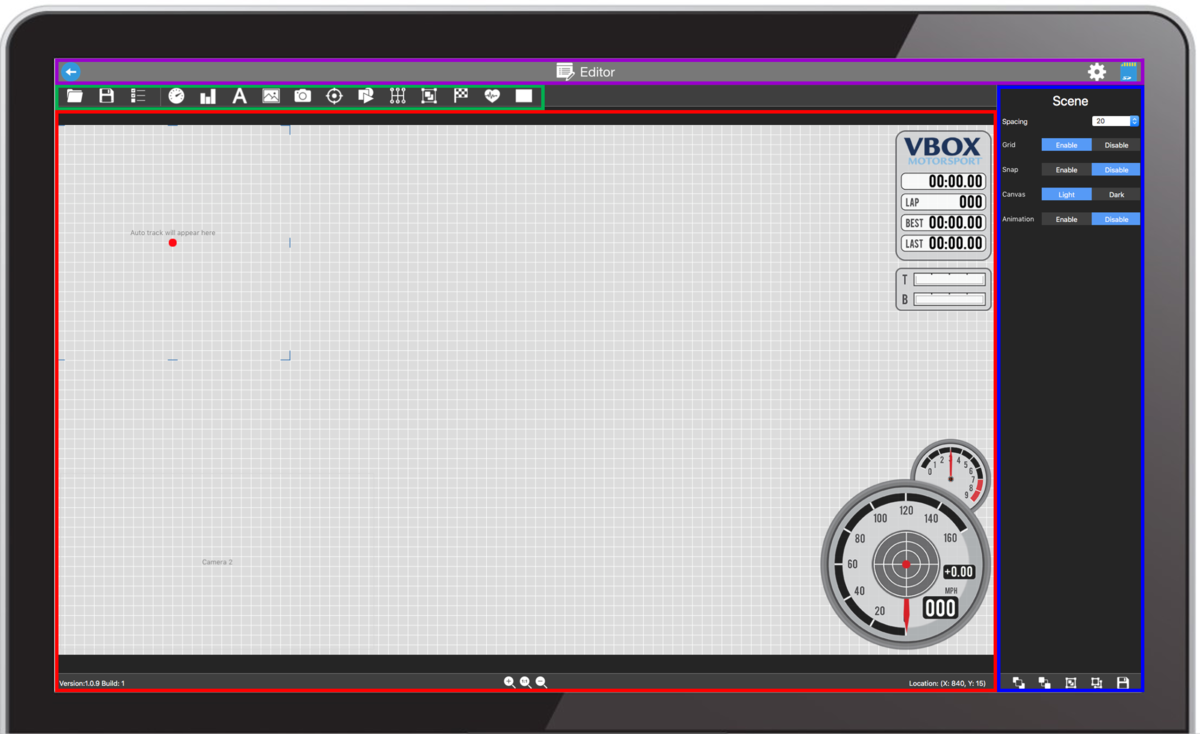
- The purple box is the settings bar. This allows access to the General Settings, to the supplied library of scene files and to save the scene to the SD card or USB stick.
- The green box highlights the top panel buttons which allow access to the CAN and OBD settings, the supplied library of elements, as well as saving and uploading scene files.
- The red box highlights the main view area. This shows the current layout for all elements which will appear in the video overlay.
- The blue box highlights the dynamic settings panel. This will change depending on what is selected within the software, allowing different elements to be configured easily within one screen.
NOTE
Any changes made to the general scene settings within the 'dynamic settings panel' on the right will be saved by the software when it is closed.

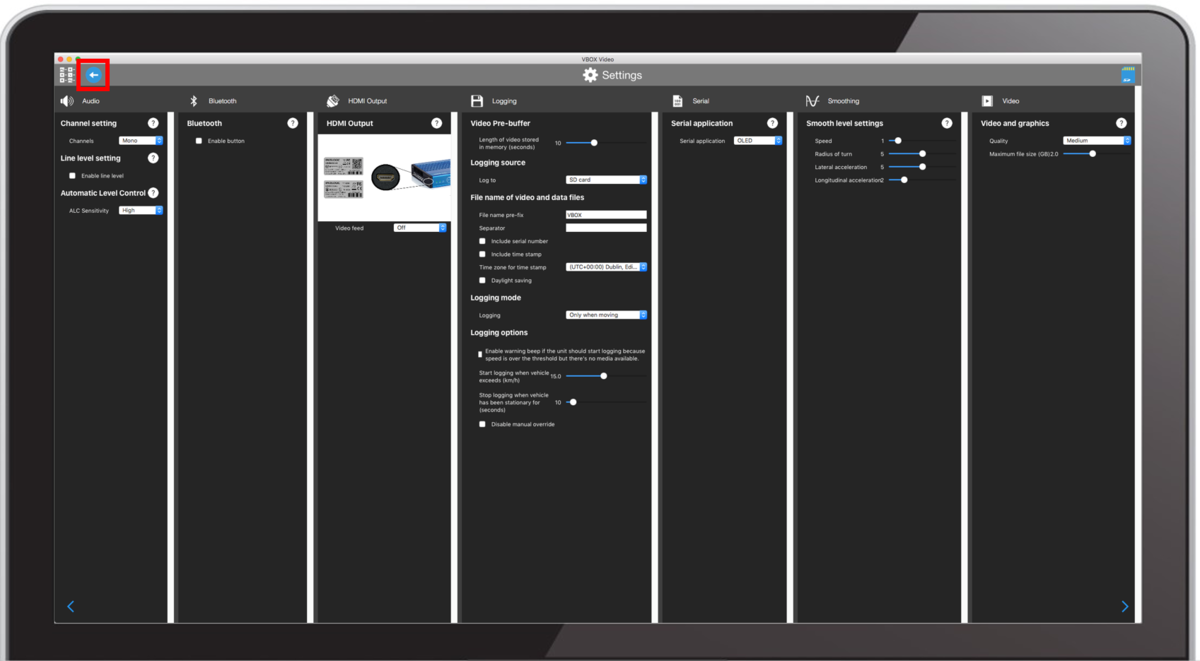
Pressing the Back (left facing arrow icon) button on the left of the settings bar will return to the Scene Selector, more information on this is available here.
The Settings (gear icon) button will take you to the General Settings area, enabling you to define logging conditions, filenames, smoothing, video quality, audio behaviour, serial and Bluetooth settings. More information on this can be found here.
To return to the scene designer, press the Back button in the top left corner of the General Settings area.
Selecting the Scene Library button in the top left corner will take you back to the Scene Selector. If you have made any changes within your current scene, a popup will urge you to save any unsaved changes.
The Save to SD button allows you to save a scene file to an SD card or USB stick, which can then be uploaded to the VBOX Video HD2.
IMPORTANT
Scenes cannot be named as 'default'.
NOTE
If a scene is saved and a file with the same name exists on the card/stick, the original will automatically have the file type suffix changed from '.vvhsn' to '.bak' and the new one will be saved as normal. To open the old one, manually change the file type suffix back to '.vvhsn' and it will work as normal.
Once a scene file has been saved to the SD card or USB stick using the 'Save to SD' button:
- Power up the VBOX Video HD2 unit with cameras connected.
- Load the SD card or USB stick into the front panel - the OK LED will flash green fast as the scene is loaded.
- The HD2 will double beep when the upgrade is complete - the OK LED will change to solid green.
These buttons are used to load scene files, view CAN and OBD settings, access the library of elements as well as set up lap timing.

The Load button enables you to load a new scene file. Click here for more information on importing a scene.
Selecting the Save button will save the new or edited scene to the software scene library, more information on this is available here.
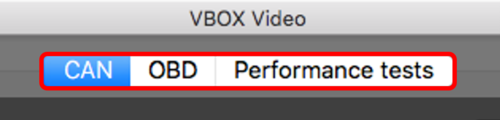
The Channel Settings button opens up a Channel Settings window where you can configure CAN, OBD and Performance tests channels.
For more information on each of these settings area, click on the relevant options below:
These buttons access the library of default and saved gauges allowing them to be easily added to any scene.

Click below for more information on each specific element:
When no element is selected, the dynamic settings panel will show settings for mouse navigation. See the ‘hotkeys’ table below for all mouse functions.
Elements can be selected by clicking and dragging the left mouse button. Once selected, they can also be moved by holding the left mouse button and manually dragging to a new location, or by using the keyboard arrow keys as explained below.
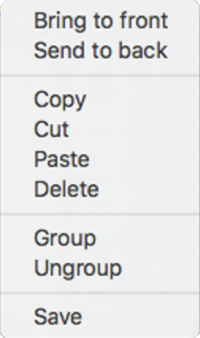
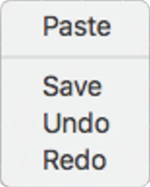
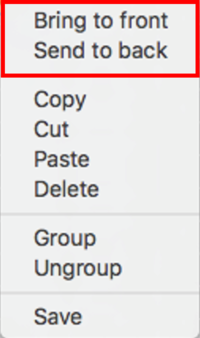
Right-clicking within the scene will open an Options menu which will vary depending on whether you have clicked on an element or within an empty area. Available options include element order, Copy, Cut, Paste, Delete, Group, Save, Undo and Paste.


There are manual zoom options available at all times at the bottom of the software. Here, you are able to zoom in, zoom out, or return to full screen mode at any time.
When no element is selected, the dynamic settings panel will show general settings for the scene editor.
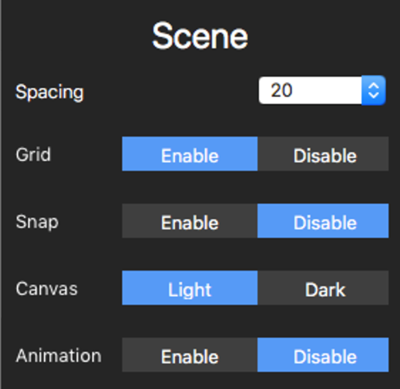
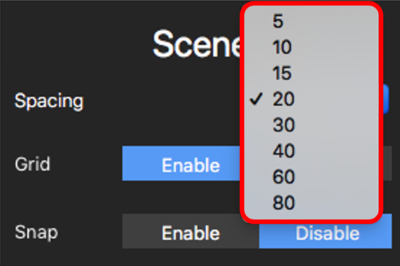
Grid spacing can be changed to suit your preference or screen.
The background grid can be enabled or disabled, it is useful when aligning elements.
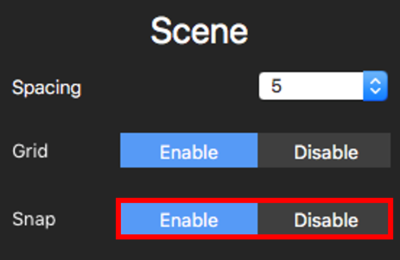
This setting can be turned on to aid with aligning text elements more easily. It is not recommended to leave this setting on all the time, as it will move elements slightly to snap to the grid every time they are re-located.


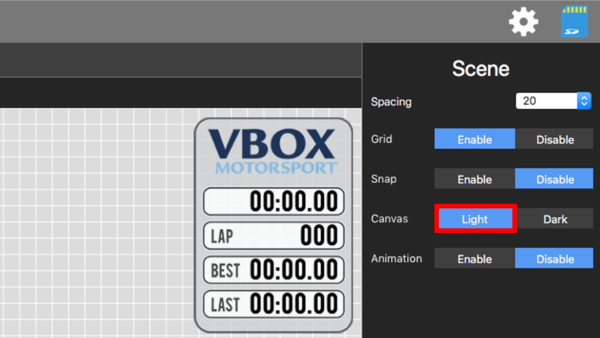
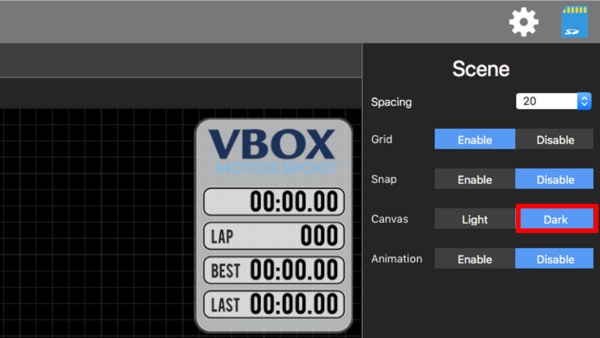
This setting enables you to choose between a light (default) and dark canvas scene editor background.


Selecting this option will animate elements such as Gauge needles, G-Ball, Range, etc, so that you can see the expected output within the video.
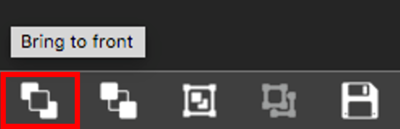
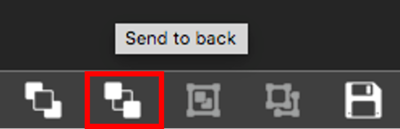
When elements are included within the scene, you can use the 'Bring to front' or 'Send to back' buttons at the bottom of the settings bar to arrange the order in which they are viewed when overlapping each other.
Elements can also be ordered by right clicking on the element(s).

The Apple menu bar contains software version information and a list of software functions.
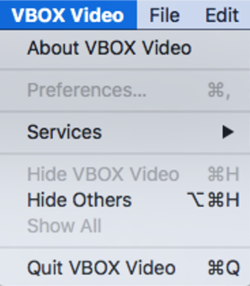
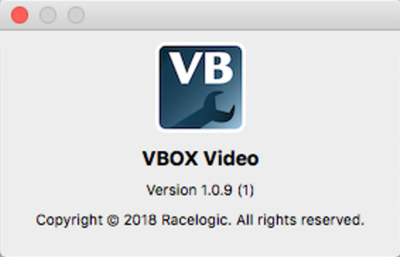
This menu contains an 'About' option which will display the current software version being used.
These menus contain a list of functions and their corresponding hotkeys/ shortcuts that can be used within the software.


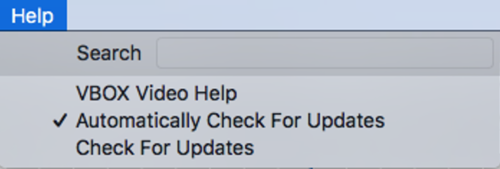
Selecting 'VBOX Video Help' will open this software manual online within the Racelogic Support Centre.
VBOX Video software will automatically check for any updates every time it is started up on a computer with an internet connection. This feature can be disabled here – however we would recommend keeping this turned on.
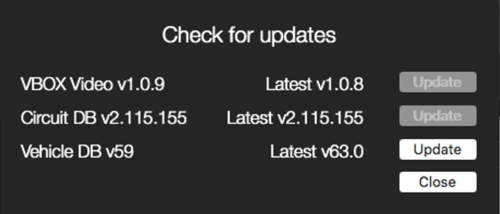
Selecting 'Check for updates' will open a new window which displays the currently installed software version, circuit database and vehicle database version being used. Providing there is a valid internet connection, clicking on 'Update' next to any of these will manually check to see if any updates are available.
| Controls | Function |
|---|---|
| Left click | Select |
| Left click + drag | Multi-select/temporary group* |
| Left click + shift | Multi-select/temporary group |
| Right click | Right click menu access |
| Left arrow ← | Move selected element left |
| Right arrow→ | Move selected element right |
| Up arrow↑ | Move selected element up |
| Down arrow ↓ | Move selected element down |
| Command + Left arrow ← | Move selected element left slowly |
| Command + Right arrow→ | Move selected element right slowly |
| Command + Up arrow↑ | Move selected element up slowly |
| Command + Down arrow ↓ | Move selected element down slowly |
| 0 | Zoom reset |
| = | Zoom in |
| - | Zoom out |
| Backspace | Delete selected element |
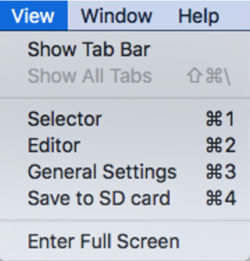
| Command + 1 | Switch to the scene selector window |
| Command + 2 | Switch to the scene editor window |
| Command + 3 | Switch to the general settings window |
| Command + 4 | Save scene to SD card/USB stick |
| Command + B | Send selected element to back |
| Command + C | Copy selected element |
| Command + F | Bring selected element to front |
| Command + G | Group selected elements |
| Command + L | Open channel selector window |
| Command + O | Open scene file |
| Command + Q | Quit VBOX Video |
| Command + S | Save scene to library |
| Command + U | Ungroup selected elements |
| Command + V | Paste copied element |
| Command + X | Cut selected element |
| Command + Z | Undo |
| Command + Shift + Z | Redo |
| Magic mouse double tap | Zoom in/out |
| Magic mouse swipe | Swipe left/right through general settingsPan when zoomed in |