This page provides a detailed history of firmware versions for the VBOX Touch, including the features, behaviour, and user interface associated with each version.
For each firmware version, you can find:
- New and updated features
- Changes to behaviour and functionality
- How the user interface looks and operates in that version
This information can be used to understand version-specific behaviour or to compare how the product has changed over time.
The units are now able to perform circuit or point-to-point tests, with "time at" and "speed at" results given for up to 6 separate split gates.
The Lap Timing settings configure start and finish gates and splits for lap timing purposes.
There are 2 Lap Timing Settings screens:
- Lap Timing Settings - Gate Survey
- Lap Timing Settings
Lap Timing Settings - Gate Survey
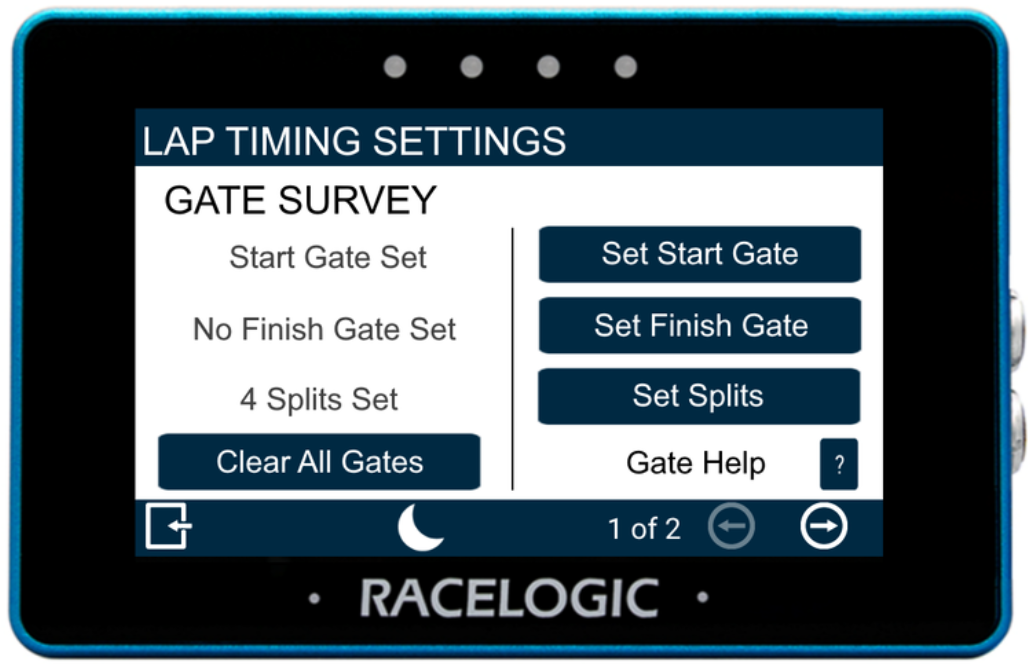
Clear All Gates
Clears all active lap timing gates.
Selecting this option begins the clearing process and displays a progress screen. Tap the screen before the process completes to abort and keep the current gates.
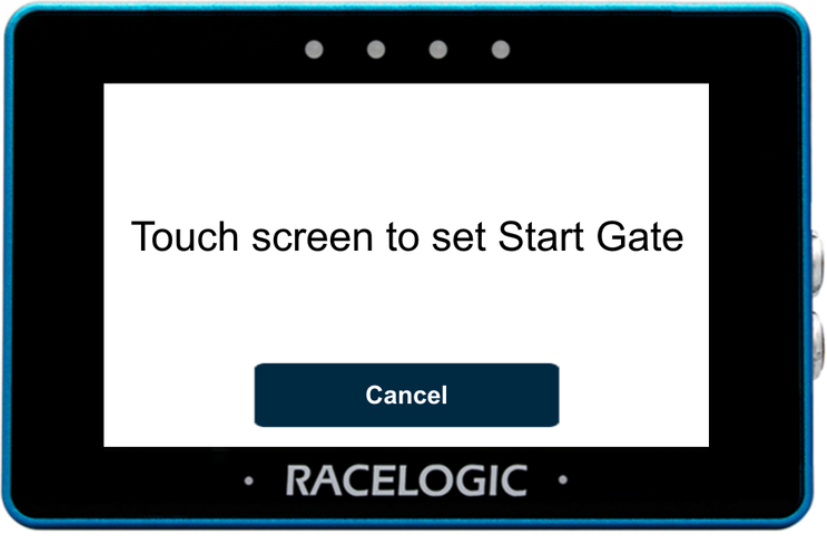
Set Start Gate
Tap the Set Start Gate button to open the Set Start Gate screen.
Drive to the required location on the track, then tap the screen to set the start gate.
The start gate is used as both the start and finish gate by default. Set a separate finish gate only if required.
Select Cancel to return to the Lap Timing Settings without setting a gate.
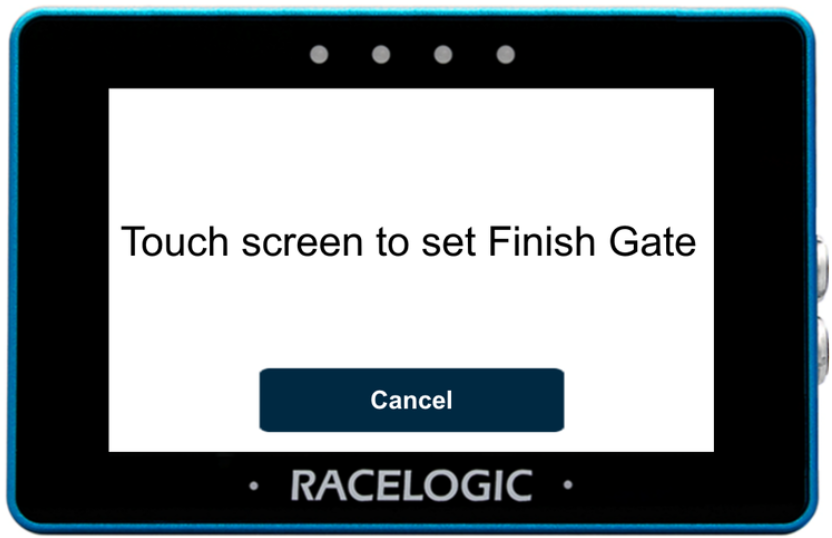
Set Finish Gate
Tap the Set Finish Gate button to open the Set Finish Gate screen.
Drive to the required location on the track, then tap the screen to set the finish gate.
Select Cancel to return to the Lap Timing Settings without setting a gate.
If a separate finish gate is not set, the start gate will also be used as the finish gate.
Splits
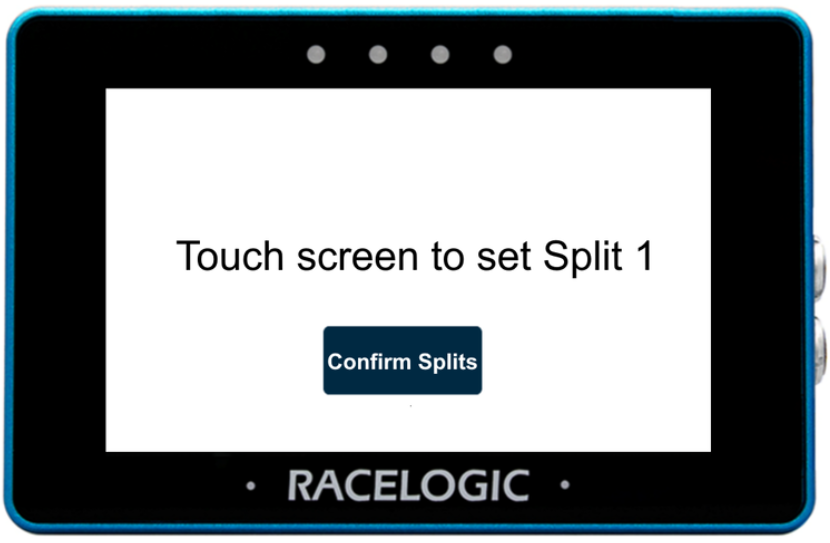
Set Splits
You can set up to 6 splits for lap timing.
Drive to the required location on the track, then tap the screen to set a split. The screen will automatically change to set the next split. Tap the screen again when you want to add the next split.
Select Confirm Splits at any time to save the configured splits and return to the Lap Timing Settings.
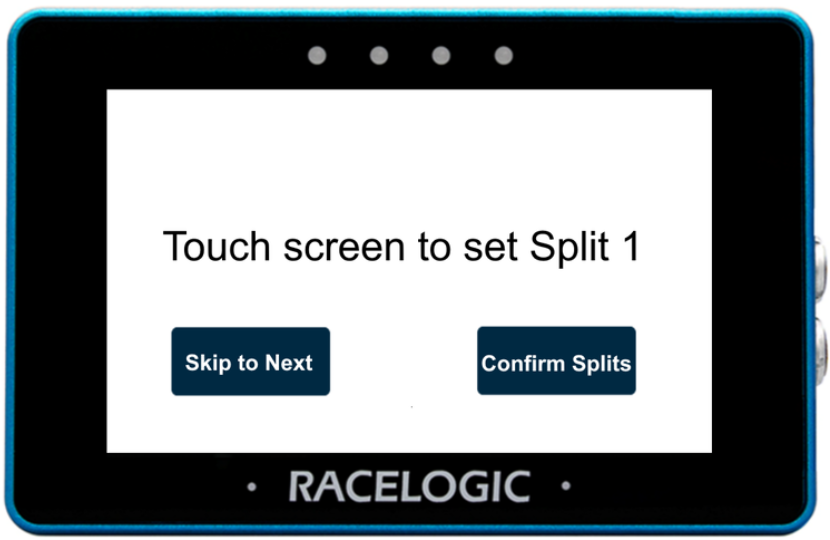
Edit Splits
Once splits have been created, you can return and edit them.
You can:
- add additional splits (up to a maximum of 6)
- change the location of existing splits
Use the Skip to Next button to move past splits you want to keep. When the required split is shown, tap the screen to set the split at the vehicle's current location.
Select Confirm Splits at any time to save the configured splits and return to the Lap Timing Settings.
Gate Help
Select the ? button to view help for start/finish and split gates.

Select the ? button to view help for start/finish and split gates.

Lap Timing Settings
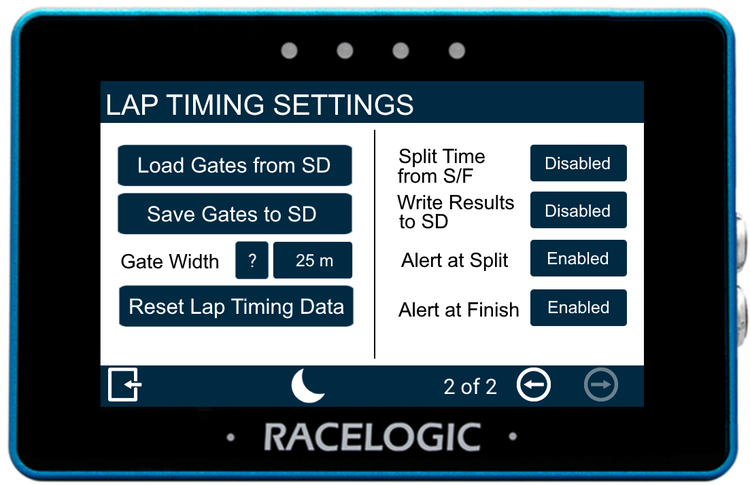
Load Gates from SD
Import gates from a gates file stored on the inserted SD card.
Selecting this option opens the Select Gates File screen, where you can choose from the available files.

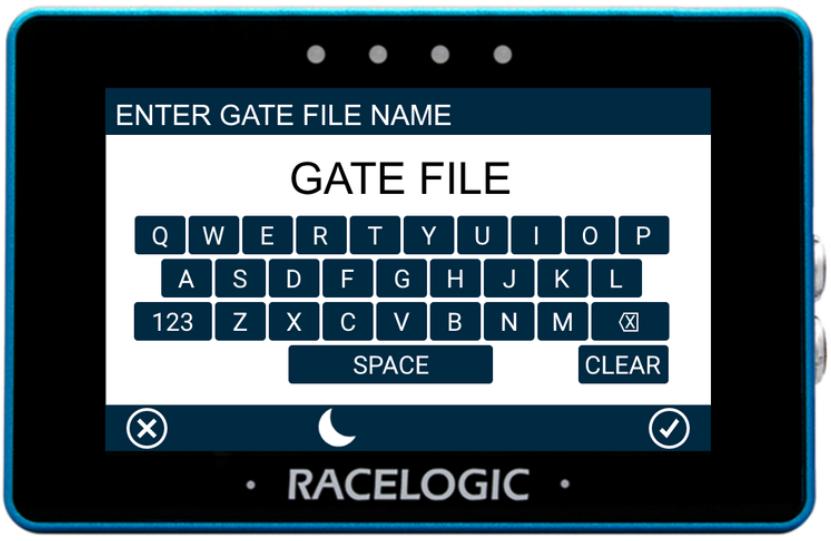
Save Gates to SD
Save the configured start/finish and split gates to a gates file on the SD card.
Selecting this option begins the save process. Tap the screen while the file is being saved to abort.
Gate Width
The gate width is set to 25 m by default.
Tap the gate width value to enter a different width using the presented key pad.
Tap the ? button next to the gate width to view more information about this setting.

The gate width is set to 25 m by default.
Tap the gate width value to enter a different width using the presented key pad.
Tap the ? button next to the gate width to view more information about this setting.

Reset Lap Timing Data
Clears cumulative and historical lap timing results, including:
- average lap time
- lap count
- best lap time
Selecting this option begins the reset process and displays a progress screen.
Tap the screen before the process completes to abort and keep the current data.
Split Time from S/F
Split time can be calculated either from the start gate or from the previous split gate. Use this setting to control how split time is reported.
Enabled – split time is calculated from the start gate crossing
Disabled – split time is calculated from the previous split gate crossing (split-to-split time)

Write Results to SD
Control whether lap timing results are written to the inserted SD card.
Enabled – results are saved to the SD card
Disabled – results are not saved

Control whether lap timing results are written to the inserted SD card.
Enabled – results are saved to the SD card
Disabled – results are not saved

Alert at Split
Enable alerts when defined split gates are crossed.
Enabled – the unit will beep and flash LEDs when a valid split gate is crossed during an active lap
Disabled – no alerts are triggered

Enable alerts when defined split gates are crossed.
Enabled – the unit will beep and flash LEDs when a valid split gate is crossed during an active lap
Disabled – no alerts are triggered

Alert at Finish
Enable alerts when an active lap is completed.
Enabled – the unit will beep and the LEDs will flash when a lap is completed
Disabled – no alerts are triggered

Enable alerts when an active lap is completed.
Enabled – the unit will beep and the LEDs will flash when a lap is completed
Disabled – no alerts are triggered

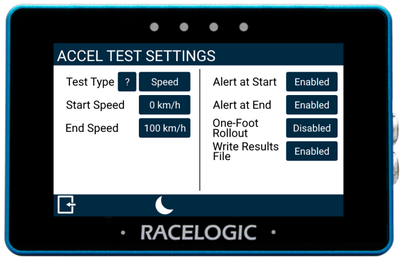
VMAX has been added as a test type in the Accel Test Settings.
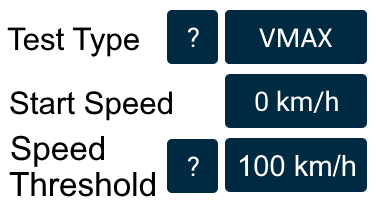
| Test Type | Parameter | Minimum Value | Maximum Value | Notes |
|---|---|---|---|---|
| VMAX | Start Speed (km/h or mph) | 0 | 998.9 | If <1, starts from stationary |
| Speed Threshold (km/h or mph) | 0 | 999.9 | Ends when speed exceeds threshold and acceleration stops |
Test results will automatically print when MFD Touch is connected to an RLVBACS026 Thermal Printer.
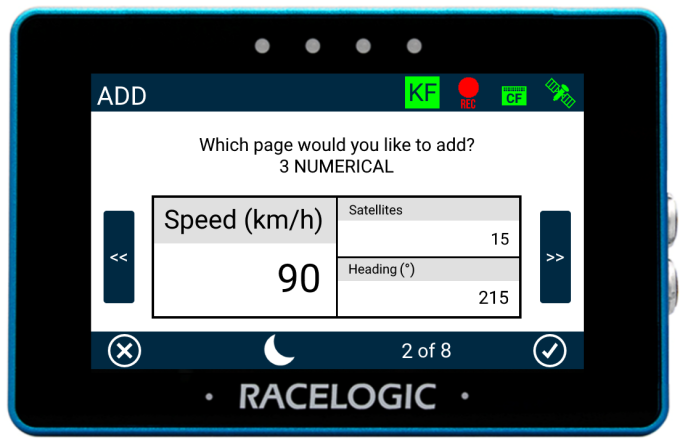
Users can now configure:
- Speed test
- Distance test
- 0-Speed-0 tests
- Test start/end alerts
- One-foot rollout
Users can also write test results directly to an SD card inserted in the MFD Touch.
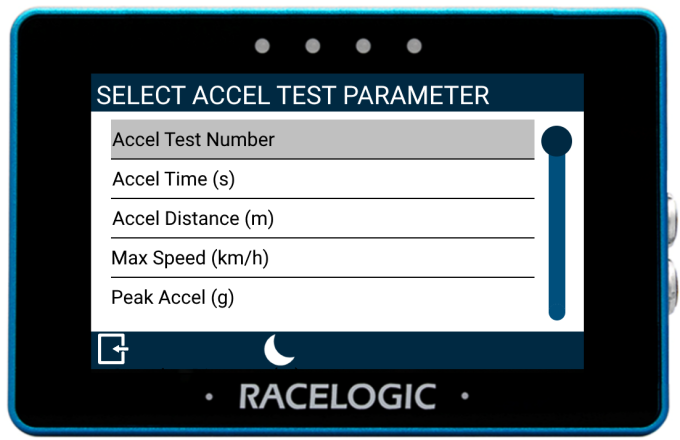
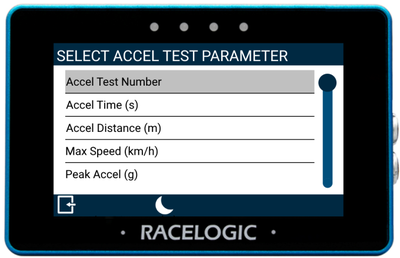
The acceleration test parameters can be displayed on multiple data screens for monitoring in real-time.

MFD Touch is now capable of displaying internal and external CAN data along with analogue/digital data.
This allows for additional channels to be monitored such as:
- ADAS channels
- Internal AD
- External IMU04
- External MIM01
- External ADC03


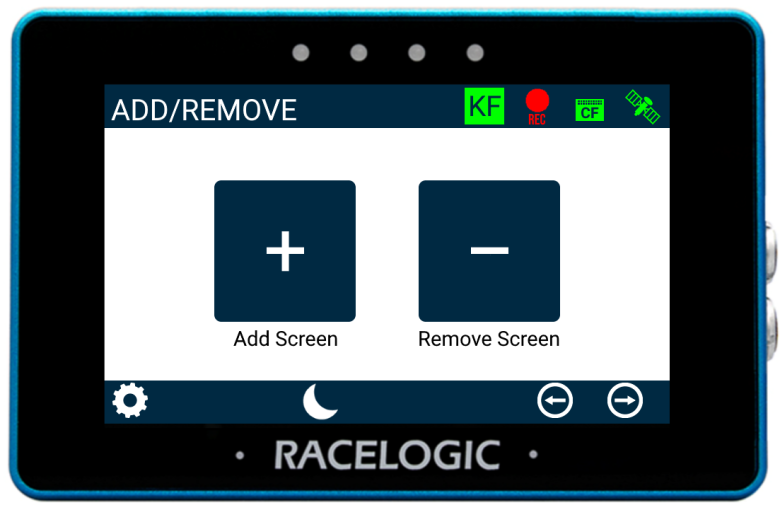
MFD Touch will now display a CF card icon and recording icon.
The CF card icon allows the user to know when a CF card is detected in the connected VBOX 3i, and the recording icon can be used to control the logging function of the VBOX 3i.


MFD Touch will now display a CF card icon and recording icon.
The CF card icon allows the user to know when a CF card is detected in the connected VBOX 3i, and the recording icon can be used to control the logging function of the VBOX 3i.

It is now possible to use the Screenshot button to save a full image of what is shown on a display screen to the inserted SD card.

It is now possible to use the Screenshot button to save a full image of what is shown on a display screen to the inserted SD card.
Several alerts and user feedback screens have been added to improve the understanding of the behaviours of the MFD Touch and connected VBOX 3i.
These include:
- A logging beep
- Start and end alerts for acceleration tests
- A 'No CAN' feedback screen
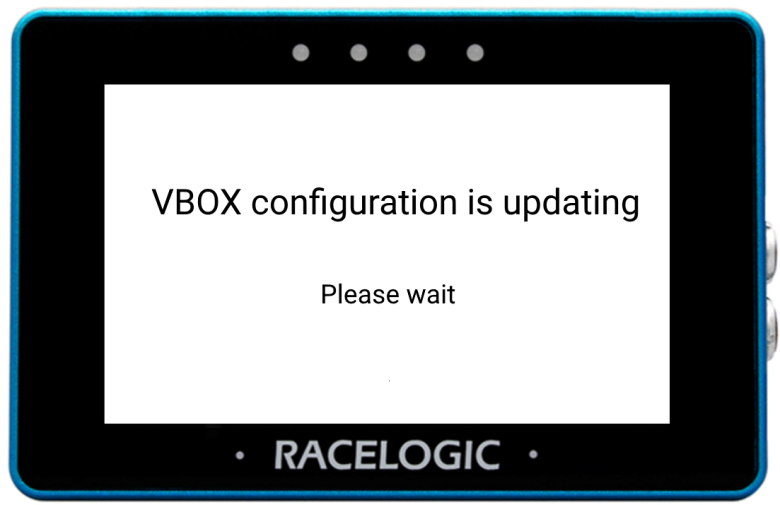
VBOX Manager will now cause a brief interrupt in the CAN communication between the VBOX 3i and MFD Touch to allow for the VBOX Manager to configure the VBOX 3i.
A notification screen will be shown on the MFD Touch when VBOX Manager is being used, which will restrict the ability to make changes to the MFD Touch.
Once the changes have been completed, the MFD Touch will regain CAN communication with the VBOX 3i.
The time and date have been added to the written results file for acceleration, deceleration, and trigger tests. This shows the start time and date for each completed run in the file.
Additional indicators have been added to allow users to quickly and easily identify the status of:
- The IMU Kalman Filter
- The dual antenna
- The media status
- The GNSS status