With a built-in database of almost every circuit in the world, it is very simple to display lap-times and a Track map.
To use, select Track Map from the Elements tab. Then, select the country and circuit from the list.
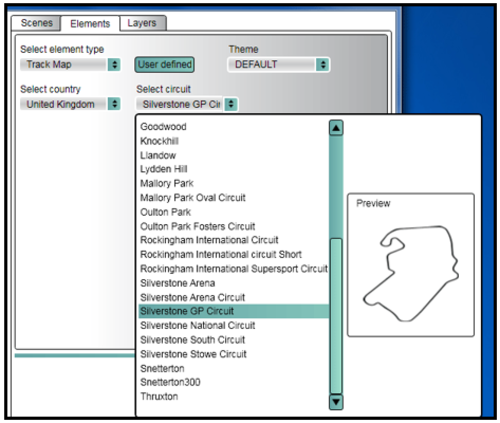
A track map of that circuit will then appear in the scene, which can be moved by clicking and dragging. You can also resize the track map by dragging the corners.
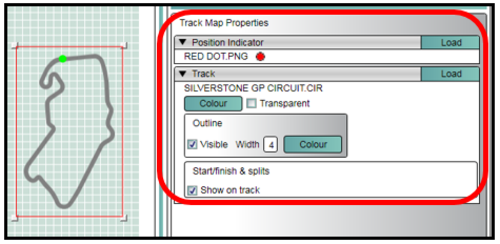
The track properties tab (highlighted) can also be used to change the colour, thickness and track pointer image.
An Auto Track Map element uses the current GPS co-ordinates to search the track map database and automatically loads a circuit map and start/finish line.
If an OLED is connected to the VVB, the start/finish line will be automatically synchronised.
An ‘Auto Track Map’ element must be added to the Video VBOX scene and uploaded to the Video VBOX. The size of the auto track map is fixed and will appear in the centre of this box.
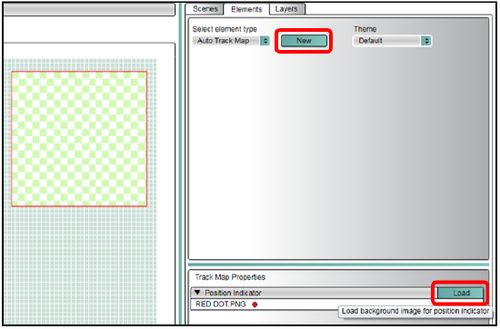
To add an auto track map element to your scene, select ‘Auto Map’ from the elements list, and then click the ‘New’ button.
You can specify the image used as a track position indicator. The default is a red dot.
If multiple circuit layouts are found at the current GPS location, you can select any of the matching tracks using an OLED display.

For some tracks, a ‘combo’ map is available which will cover all circuit layouts.
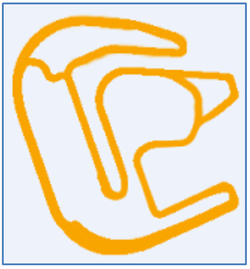
Combo Map example - Rockingham
If multiple tracks are found for the current location and no OLED display is at hand the track map widget will default to:
- The last matching track that user selected previously at that location.
NOTE
The OLED can only store 1 previously user selected track in its memory.
- The first matching ‘combo’ map (if option 1 is not possible)
- The first track alphabetically on the list (if option 1 and 2 are not possible)
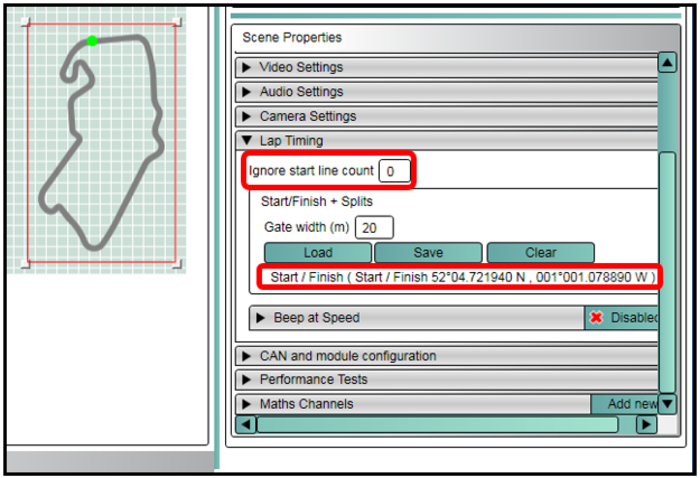
If you use a Track map from the database, then the correct start/finish line from the database will be used automatically.
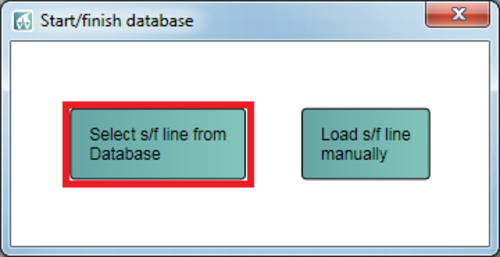
A start line can be selected from the database separately by pressing the 'load' and selecting 'load from database'.
This value allows for a parade lap or warm-up lap to be ignored in the total lap count.
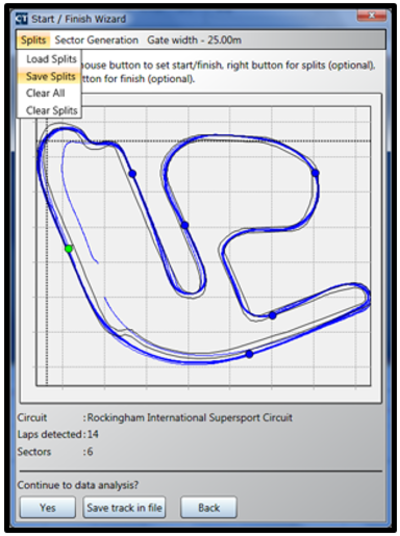
You can create your own start/finish file using the start/finish wizard in Circuit Tools, supplied with your Video VBOX.
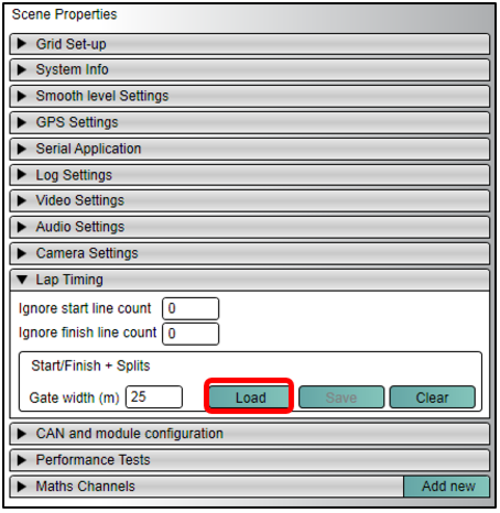
In Video VBOX Setup software, a user created split file can be loaded into the Scene using the Scene properties tab under Lap Timing → Load, from where you can choose the file (either from the built-in Database or your own file).
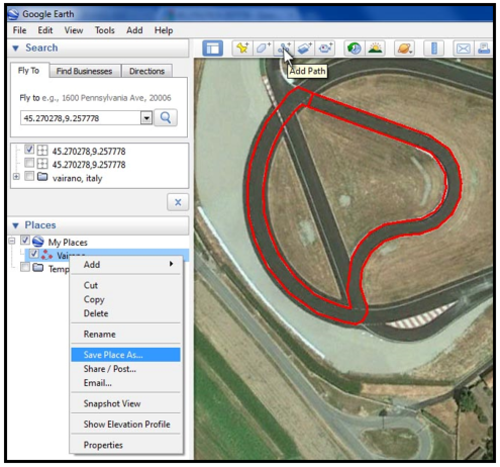
You can use Google Earth to draw around your track using the Add – Path tool.
Save this path as a ‘.kml’ file by right clicking on the entry in the ‘Places’ tab, and changing from ‘.kmz’ to ‘.kml’
Import this ‘.kml’ file into VBOX Tools software using File - Import - From Google Earth.
Then save this file as a ‘.vbo’ file and use this in the Video VBOX Setup software as the Track map in the same way as before.
Application notes describing the procedure for creating track maps and start/finish lines in Google Earth can be found on the links below.
NOTE
To enable lap-timing, you must first have a relevant start/finish line corresponding to your track as described previously.
To add a lap-timing element, first insert a Text element using the Elements tab – Text - New
Under Text Properties select Lap Timing in the Parameter pull down menu, and then you can select which parameter is displayed.
In this case we have current lap (rolling time) as the main display.
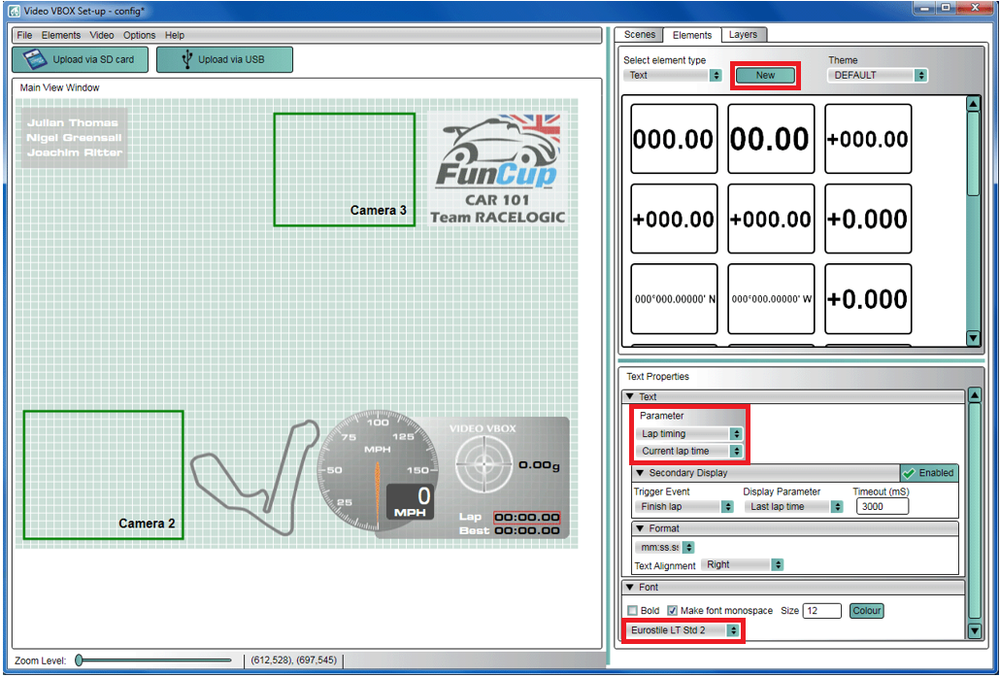
The font, size and colour can be selected in the same tab. If you want the main lap-timing display to hold the current lap-time as you cross the line for a short period of time, then enable the Secondary display with Finish lap as the trigger and Last lap time as the parameter.
If you are using an OLED display the start/finish data you have loaded into the scene will be transmitted to the display automatically, look out for the message Start/Finish and splits synchronised OK. If you have configured a scene with no start/finish line included, you can set one on the OLED display, which will then be imported into the scene.