VBOX HD Lite is supplied with a Swivel Neck Suction Mount (RLACS287) for mounting on to a vehicle windscreen. It is attached to the ¼” UNC screw thread fastener on the underside of the unit.
If you want to use other methods to mount the HD Lite unit, please see the list of compatible products and accessories on the Getting Started page.
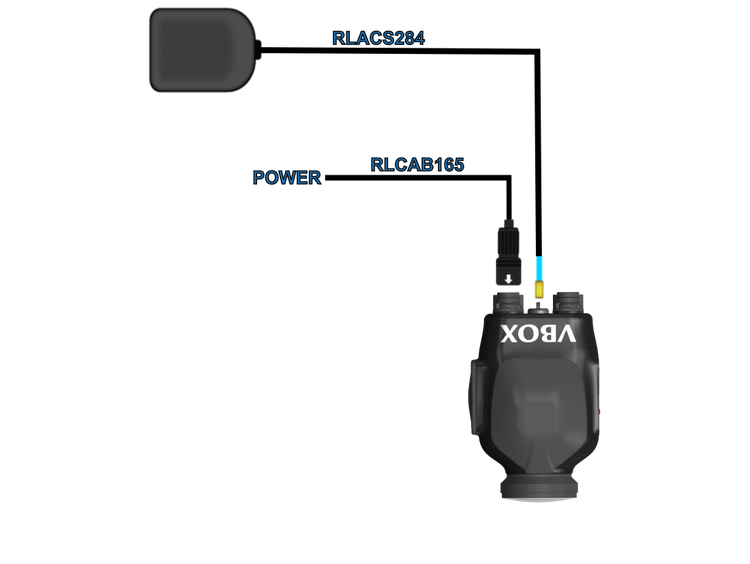
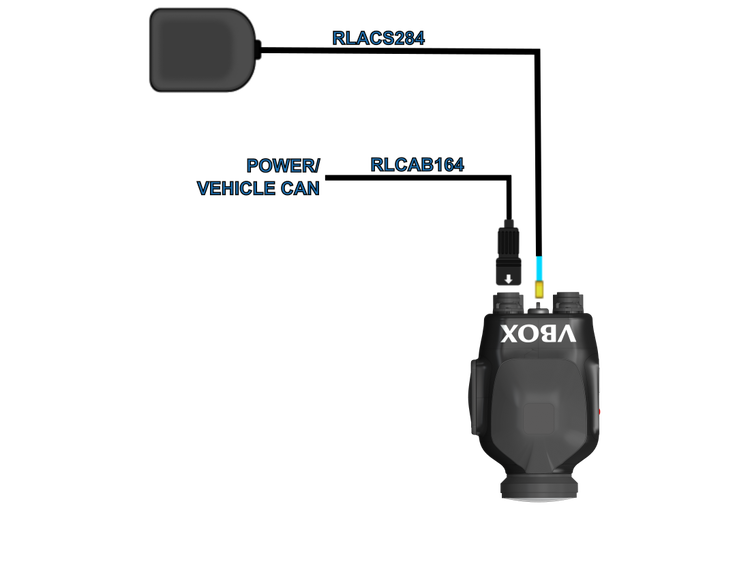
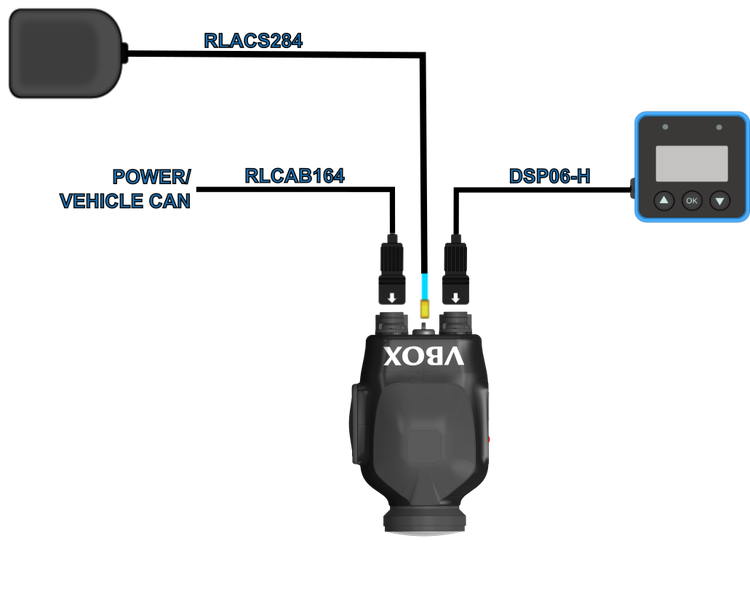
Connect the antenna to the VBOX HD Lite and insert the SD card.
Connect the Wi-Fi dongle to use the VBOX HD Lite Preview App to adjust the camera settings.
Power
VBOX HD Lite is powered by the supplied cigar Lighter power supply cable (RLCAB165). Plug it in the vehicle's 12 V cigar power socket and connect it to either of the Hirose connectors at the rear of the unit. The device will boot up automatically as soon as the power supply is connected.
On boot-up, you will hear three beeps in quick succession followed by a single beep. The LED will briefly flash red, then show solid white throughout the boot-up procedure. When the LED is solid green, the device is booted up and ready to record.
For any other LED behaviour, see the Status LED behaviour table.
You can find more detailed connector information on the PIN-OUTS page.
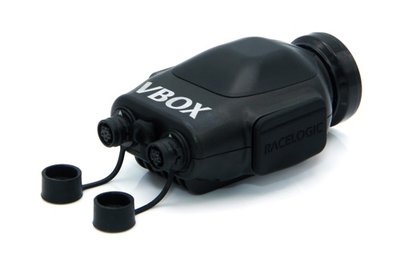
- 2 x 6-pin Hirose connectors for power and CAN / Serial.
- GNSS Antenna.
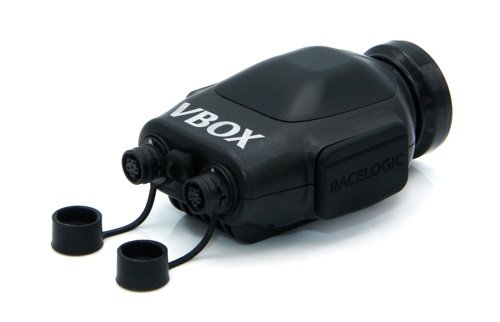
- 2 x 6-pin Hirose connectors for power and CAN / Serial.
- GNSS Antenna.
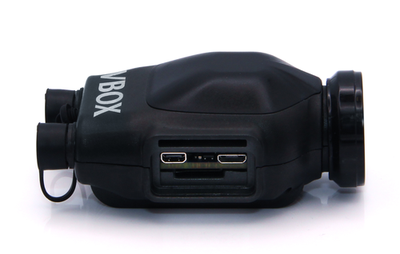
- Micro USB B Connector (currently not used)
- Micro HDMI for video preview via the VBOX HD Lite Preview app using the supplied Wi-Fi dongle.
- MicroSD card slot.

- Micro USB B Connector (currently not used)
- Micro HDMI for video preview via the VBOX HD Lite Preview app using the supplied Wi-Fi dongle.
- MicroSD card slot.
Camera | Resolution: 1920 x 1080p at 30 frames/second |
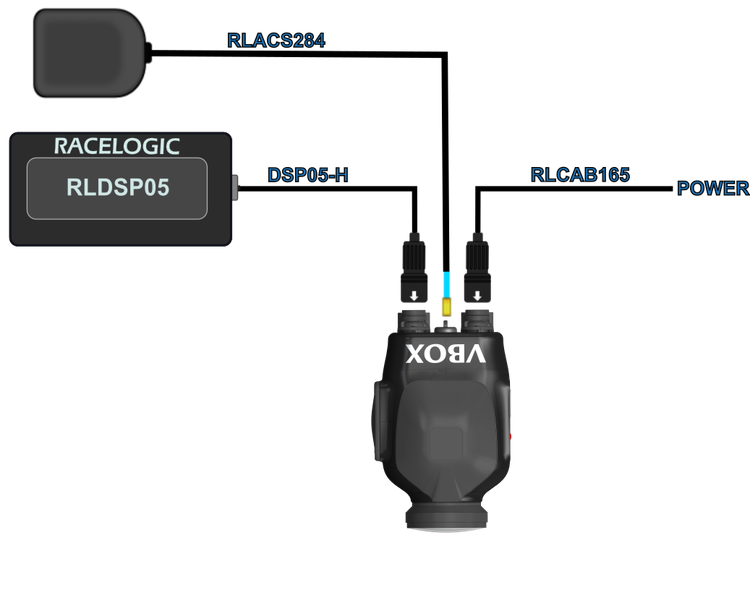
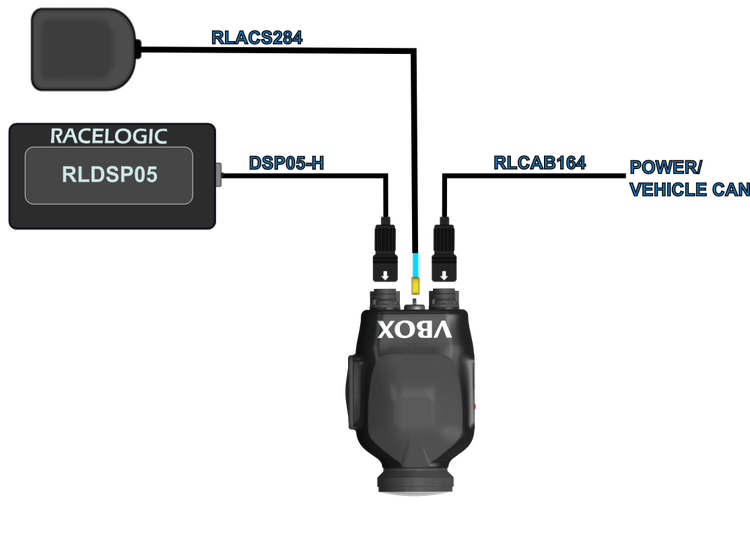
RS232 | For communication with OLED predictive lap timing Display |
CAN Bus | Users can log up to 8 CAN messages |
Micro SD Card | Fast 32 GB card supplied with device |
Micro HDMI - Wi-Fi | For camera setup/preview via the HD Lite preview app |
Micro USB-B | Currently not used |
Correct placement of the GNSS antenna is crucial to the quality of the data recorded by your VBOX HD Lite.
To get the best possible results, you should place the GNSS antenna in the centre of a metal roof. Do not mount the antenna close to the edges of the roof as reflected signals may interfere with your satellite signal.
You can find more information about how to place your GNSS antenna here.