As shipped, the Video VBOX can be used straight out of the box:
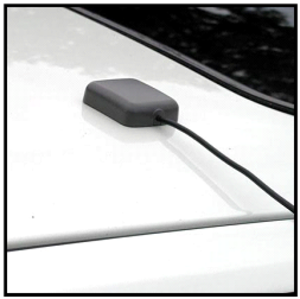
- Mount the GPS antenna in the centre of the roof of the vehicle. Keep away from roof bars.
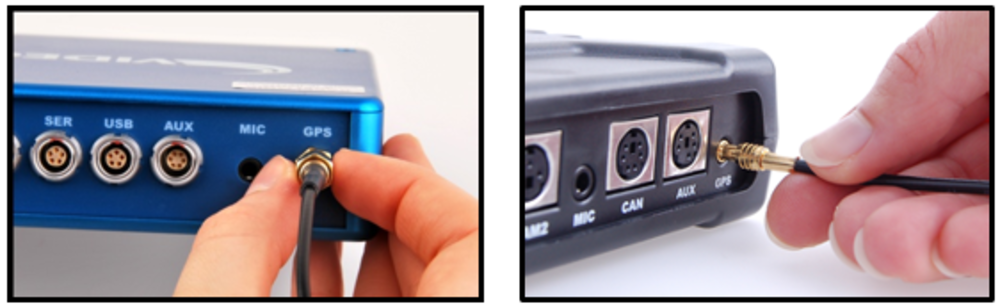
- Connect the antenna to the Video VBOX.
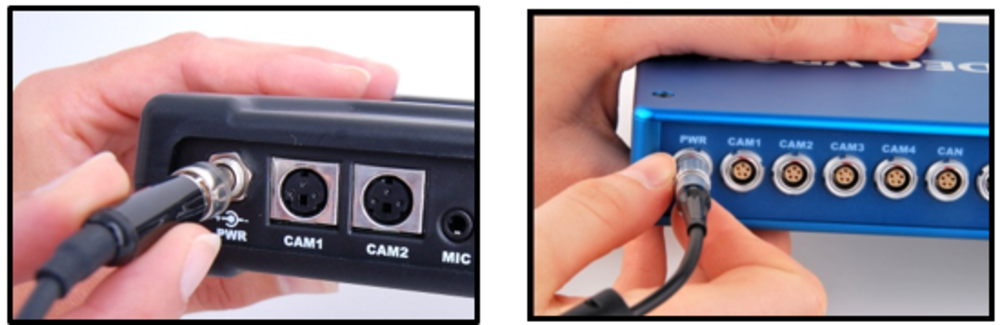
- Connect the power connector, it takes about 35 s to start.
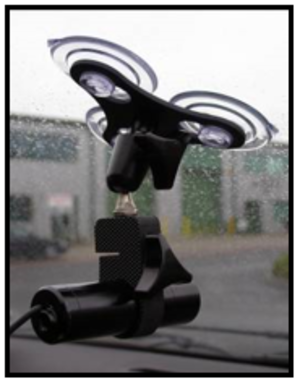
- Attach the camera to the windscreen using the forward-facing camera mount and keep the camera level using the markings on the camera.
- Connect the camera to CAM1.
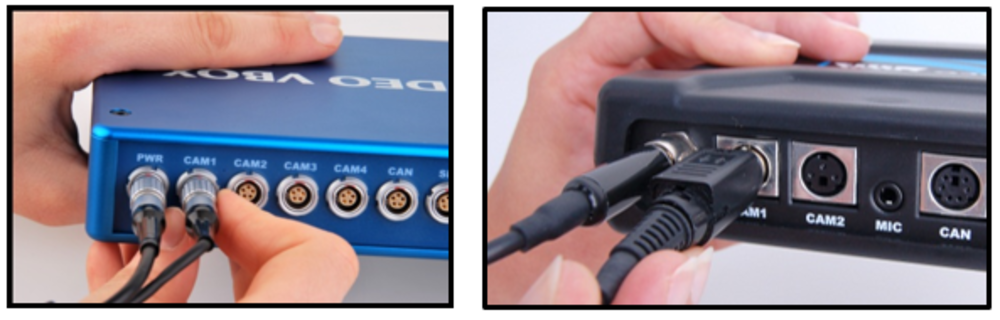
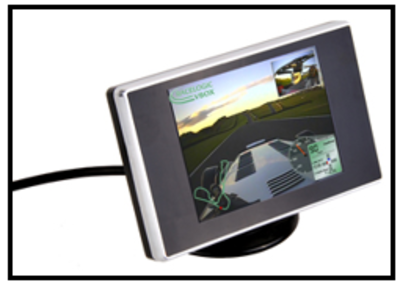
- The best way of aligning the camera is to use the optional Racelogic Preview monitor, which is plugged into AVOUT. Alternatively, you can use a Laptop connected via USB to get a live view.
- Take the car outside and wait for the Green GPS LED to illuminate.
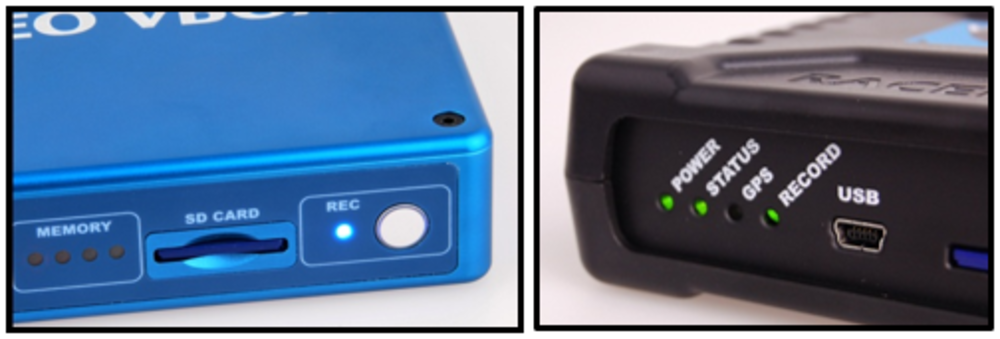
- Insert the SD card and you are now ready to drive, Video VBOX will start to record Video automatically over 2.5 km/h.
- The REC LED will illuminate when recording, and when you come to a stop, it will flash as the file is closed.
IMPORTANT
NEVER remove the SD card when this light is on or flashing – you will lose video. If you have come to a stop, but the REC LED is on, press the REC button to stop the video before removing the card.
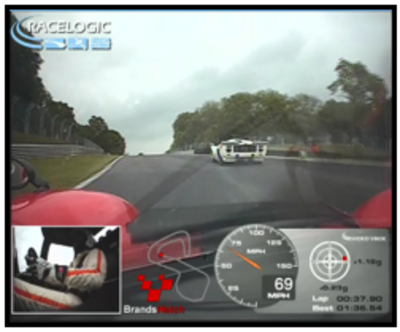
To have lap-timing information or a circuit map shown on the video, the default internal ‘Scene’ needs to be modified. To do this, you need to use Video VBOX Setup software, see here for more details.
USB driver installation program can be downloaded from here.
Always use the supplied USB Cable
When connecting the Video VBOX to your computer, make sure you are using the USB cable supplied.
Some ‘standard’ USB leads do not have a full-length USB connector and will disable communication between your PC and the Video VBOX LITE.
Mobile Phone Software
Ensure that you shut down any mobile phone software running on your computer before connecting. We are aware of conflicts which can arise when using this kind of software.
When purchasing SD cards, always buy a quality brand such as SanDisk, Kingston or Lexar.
Format: FAT32
If data is to be logged to a USB memory device, the optional RLCAB073 cable is required. Racelogic recommends good quality USB sticks - write speeds above 7 MB/s and good USB chip sets are essential.
To install the software insert the CD into the CD drive of your computer.
NOTE
- The software requires Microsoft .NET Framework 3.5 Service Pack 1 or higher to run. The installation CD contains the required .NET installation package.
- To play back the AVI Video files, the XVid Codec pack must also be installed. The installation CD contains the required installation package.
So that Racelogic can continue to provide you with notifications of the latest software releases and firmware upgrades and offer technical support, please register your Video VBOX.
Please register your unit here
For more video tutorials, see the Video VBOX Knowledgebase.