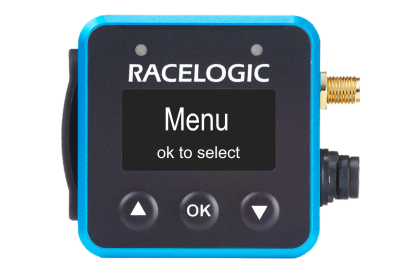
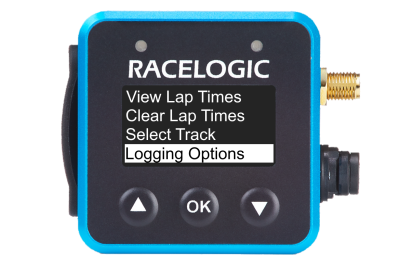
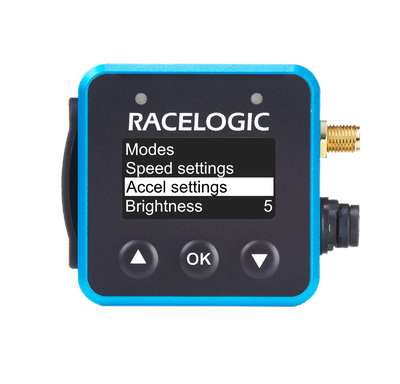
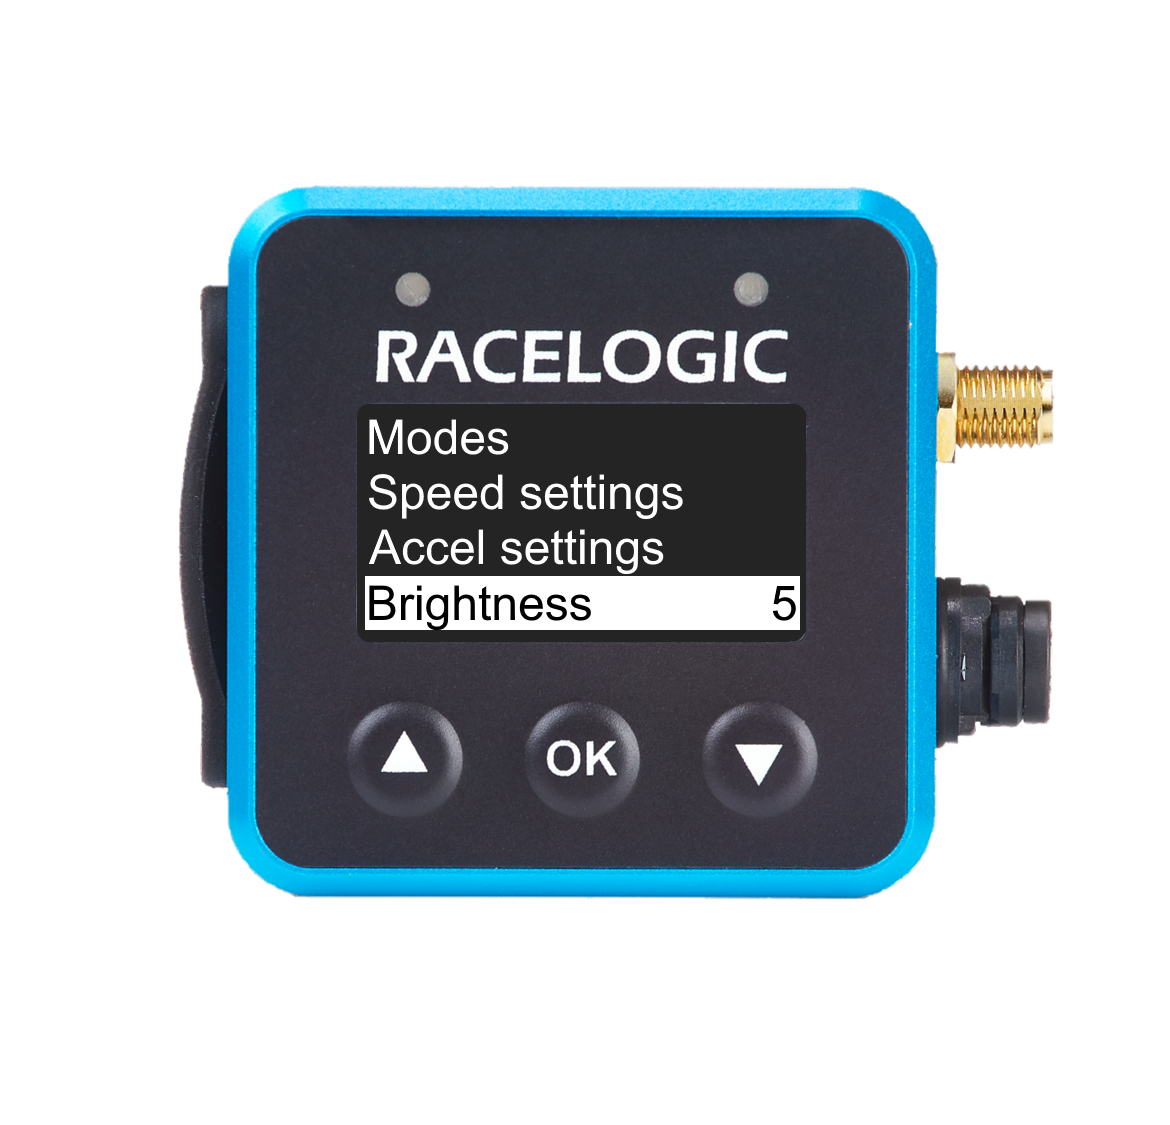
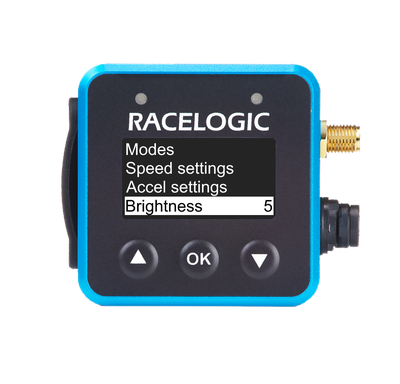
Access the main settings menu on VBOX Mini LapTimers by using the arrow buttons while on the Display screen to cycle trough the available display mode screens until you reach the Menu screen.
Press OK while on the Menu screen to open the settings.
Access the main settings menu on VBOX Mini LapTimers by using the arrow buttons while on the Display screen to cycle trough the available display mode screens until you reach the Menu screen.
Press OK while on the Menu screen to open the settings.

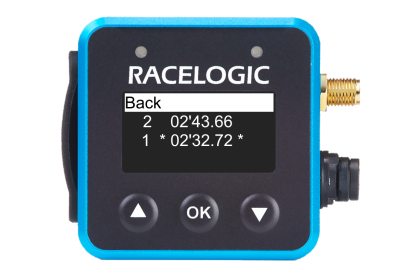
The VBOX Mini LapTimer will store all the lap times from your current session (maximum of 99 lap times). The lap times will be cleared when you set a new start line or when the lap timing data is reset.
Back
Press the OK button with this line highlighted to exit the Lap Times and go back to the main menu.
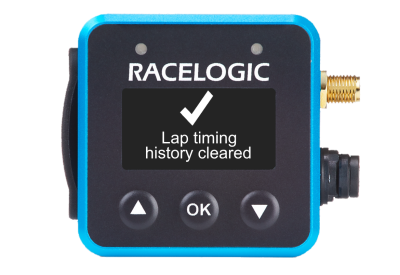
Selecting this option will wipe all stored lap times from the unit’s memory.
It will automatically take you back to the main menu after clearing the history.

Selecting this option will wipe all stored lap times from the unit’s memory.
It will automatically take you back to the main menu after clearing the history.
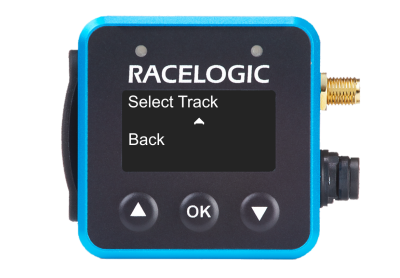
VBOX Mini LapTimer is pre-loaded with a track database that contains the start/finish coordinates for more than 800 tracks worldwide. You can find a list of the included tracks in the circuit database section of our website.
When the unit has acquired satellites, it will check the GPS location against Racelogic’s track map database and load the available layouts.
You must use this menu option to select the layout you are driving to allow the VBOX Mini LapTimer to load the correct start/finish line.
If there are no start/finish lines available for your location, you can set them manually or load them from an .SPL file.


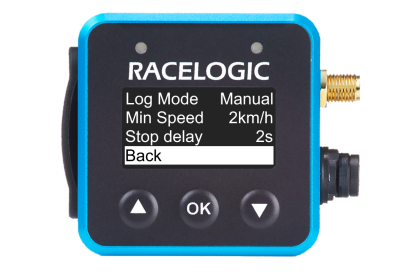
In this sub-menu, you can configure how VBOX Mini LapTimer’s logging is triggered.
There are three logging options.

In this sub-menu, you can configure how VBOX Mini LapTimer’s logging is triggered.
There are three logging options.
NOTE
You cannot configure logging mode when the Mini LapTimer is used as an OLED. In this case you need to do the configuration in the connected unit’s software e.g. Video VBOX Setup or or VBOX Video Setup.
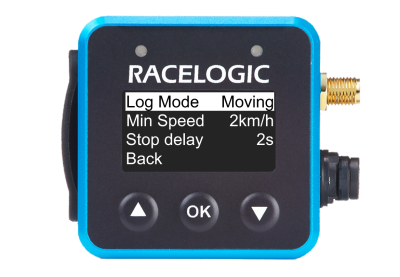
You can define the mode and speed that triggers the start and stop of logging.
Press the OK button to enter the selection menu and use the arrow buttons to select the mode you want to use.
Press the OK button again to confirm your selection.
You can define the mode and speed that triggers the start and stop of logging.
Press the OK button to enter the selection menu and use the arrow buttons to select the mode you want to use.
Press the OK button again to confirm your selection.

| Moving | Default. Logging when moving means that the Mini LapTimer starts logging when it detects movement. |
|---|---|
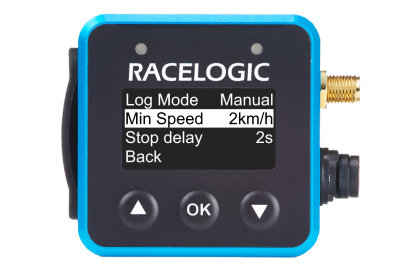
| Manual | Manual logging mode means that you choose when to start or stop logging – it will never start or stop automatically. You can control the logging with the OK button when you are in the speed mode display. |
| Always | When you have selected Always, the VBOX Mini LapTimer will start logging as soon as it detects power and media. You must stop the logging, by pressing the OK button when in speed mode. It is important that you manually stop the logging before you remove the SD card. |
Press the OK button to change the minimum speed. You will see two arrows (up and down) appear next to the value. Use the two arrow buttons on the device to increase/decrease the minimum speed value. Press the OK button again to confirm your selected value.
The default Min Speed is 10 km/h.

Press the OK button to change the minimum speed. You will see two arrows (up and down) appear next to the value. Use the two arrow buttons on the device to increase/decrease the minimum speed value. Press the OK button again to confirm your selected value.
The default Min Speed is 10 km/h.
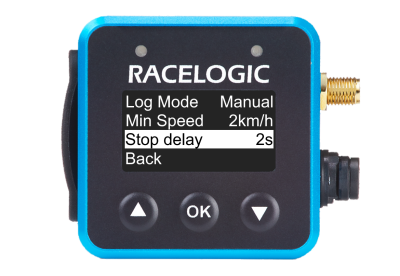
Press the OK button to change the logging delay time. You will see two arrows (up and down) appear next to the value. Use the two arrow buttons on the device to increase/decrease the logging delay time.
Press the OK button again to confirm your selected time.
The default stop delay is 3 seconds.
Press the OK button to change the logging delay time. You will see two arrows (up and down) appear next to the value. Use the two arrow buttons on the device to increase/decrease the logging delay time.
Press the OK button again to confirm your selected time.
The default stop delay is 3 seconds.


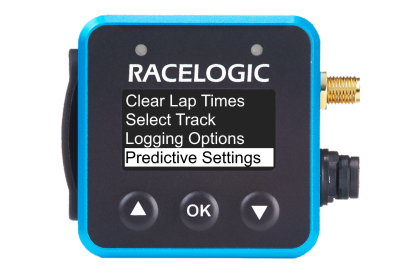
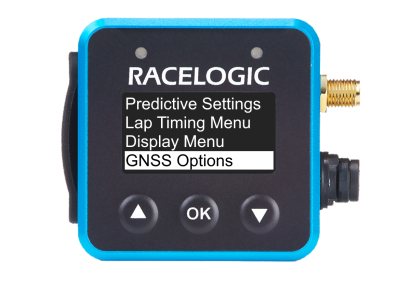
Press the OK button with this option highlighted to enter the Predicitve Settings menu to configure the Predictive Lap Timing mode on the Mini LapTimer.
Press the OK button with this option highlighted to enter the Predicitve Settings menu to configure the Predictive Lap Timing mode on the Mini LapTimer.

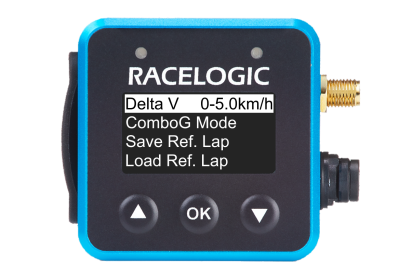
This range setting affects the sensitivity of the Delta-V LEDs. You can choose between 2 km/h, 5 km/h and 10 km/h – the default setting is 0 - 5 km/h.
Press the OK button when this setting is highlighted to cycle through the different speed range options. Press one of the arrow buttons to save the displayed speed range an go back to the Predictive Settings.
You can find more information on how this range affects the LEDs in the Delta-V LEDs section.
NOTE
If the VBOX Mini LapTimer is set to show speed in mph or knots, these values are the direct equivalents of the 3 km/h values.
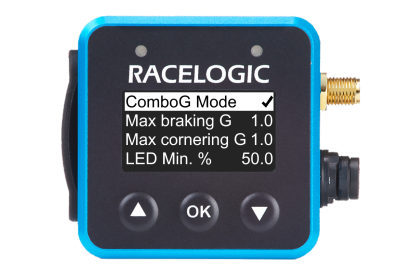
When you have selected this mode, the Mini LapTimer shows combined g information via the LEDs while also showing Delta-T information on the display. It encourages you to truly push your car at braking points and turns to improve lap times.
This mode is disabled by default.
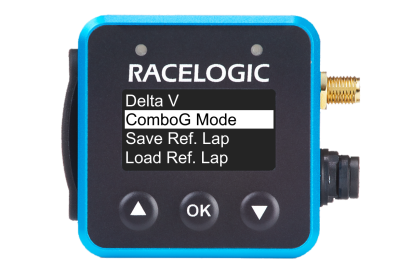
When you have selected this mode, the Mini LapTimer shows combined g information via the LEDs while also showing Delta-T information on the display. It encourages you to truly push your car at braking points and turns to improve lap times.
This mode is disabled by default.

Max Braking G
You can set the maximum braking g indicated by the LEDs (max is 1.9 g), by pressing the OK button. Each press will add 0.1 g to the value. Press one of the arrow buttons to save the displayed value and move to the next setting.
Default is 1.0.
Max Cornering G
You can set the maximum cornering g indicated by the LEDs (max is 1.9 g), by pressing the OK button. Each press will add 0.1 g to the value. Press one of the arrow buttons to save the displayed value and move to the next setting.
Default is 1.0.
LED Min. %
You can configure the minimum percentage for the LED to set when the LED colours appear. Press the OK button to change the percentage. You will see two arrows (up and down) appear next to the number. Use the two arrow buttons on the device to increase/decrease the percentage. Press the OK button again to confirm your selected value.
You can find more information on how this mode affects the LEDs, in the Combo G LEDs section.
Default is 50%.
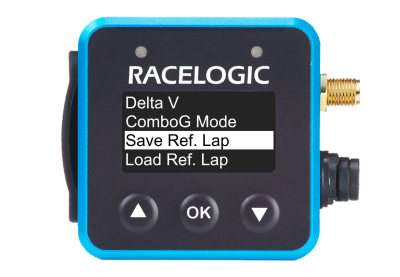
This setting allows you to save a reference lap for future use. Insert an SD card into the VBOX Mini LapTimer and use the menu options shown below.
When you have selected this, the "SAVE COMPLETE" message confirms that the lap has been saved successfully. The saved data will be stored on the SD card as LAP.REF in the ‘Data’ folder.

NOTE
The vehicle must be stationary before the Mini LapTimer can make the file transfer.
To load a reference lap stored from a previous session, save the desired file onto an SD card and load the card into the VBOX Mini LapTimer. You can name the file anything you want, however, you must save it in the 'Data' folder. Only one .REF file should be present in this folder at all times.
Reference laps will be reset either when you set a new start/finish or when you select the ‘reset lap timing data’ option from the lap timing menu.

NOTE
The vehicle must be stationary before the Mini LapTimer can make the file transfer.
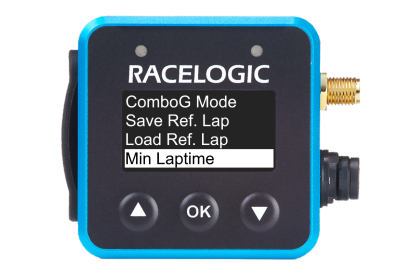
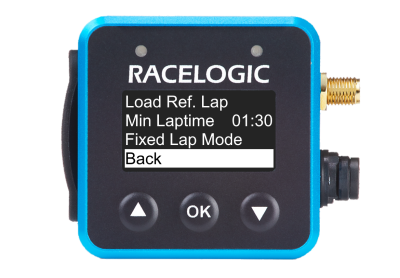
This setting allows you to set a minimum time for laps, making shorter laps invalid. Invalid laps will not be counted in the lap count, appear in the lap times or used as a reference lap.
Press the OK button to change the minimum lap time. You will see two arrows (up and down) appear next to the number. Use the two arrow buttons on the device to increase/decrease the minimum time. Press the OK button again to confirm your selected value.
The default setting is 00:20.
Press the OK button to toggle between the available settings:
- Fix Current
- Fix Stored (default)
This setting controls the function of the OK button when you are using the Predictive Lap Timing display mode.

Press the OK button to toggle between the available settings:
- Fix Current
- Fix Stored (default)
This setting controls the function of the OK button when you are using the Predictive Lap Timing display mode.
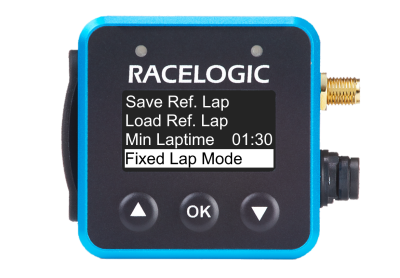
| Fix Current | When you have selected this option, pressing the OK button while in Predictive Lap Timing mode sets the currently driven lap as the fixed reference lap once the lap is completed. |
|---|---|
| Fix Stored | When you have selected this option, pressing the OK button while in Predictive Lap Timing mode sets the reference lap that is currently stored in the memory as the fixed reference. |
NOTE
If you choose to fix the current lap, this should override any Minimum Lap Time setting as you are making the decision to set the current and full lap as the reference.
Press the OK button with this line highlighted to exit the Predictive Settings and go back to the main menu.
Press the OK button with this line highlighted to exit the Predictive Settings and go back to the main menu.

Press the OK button with this option highlighted to enter the Lap Timing Menu to configure the Lap Timing Mode on the Mini LapTimer.
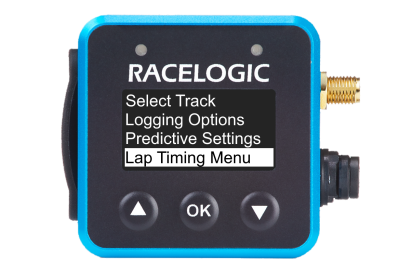
Press the OK button with this option highlighted to enter the Lap Timing Menu to configure the Lap Timing Mode on the Mini LapTimer.

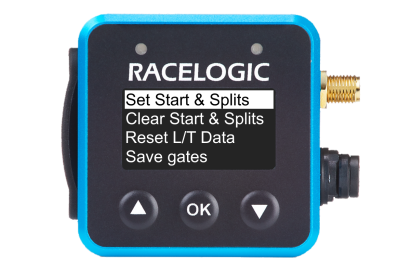
When you press the OK button a new start/finish point is set. After this, the VBOX Mini LapTimer will display “Set split 1”. Press the OK button to confirm the set split and use the Down button to navigate through additional split points to the Finish Line and Back options.
If a new start/finish or split line is set then the lap count, best lap, and all the best split time values will be reset automatically.

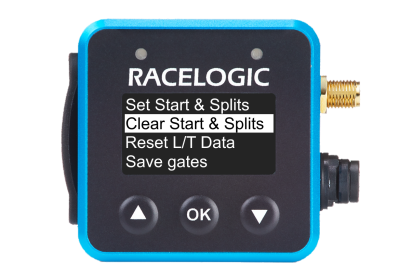
Press the OK button with this option highlighted to delete the saved start line and gates.

Press the OK button with this option highlighted to delete the saved start line and gates.
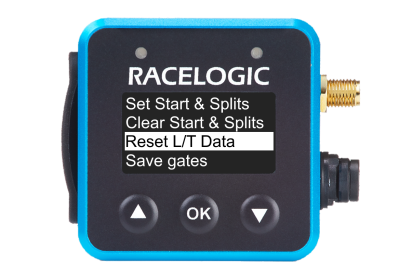
When you highlight this option, pressing the OK button will reset the stored reference lap, lap count, and all lap times.
This option fully resets predictive lap timing mode.

When you highlight this option, pressing the OK button will reset the stored reference lap, lap count, and all lap times.
This option fully resets predictive lap timing mode.
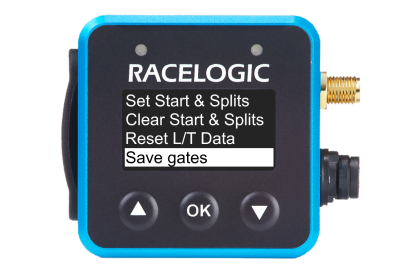
You can load or save Start/Finish, split, or finish lines on the VBOX Mini LapTimer. You can create or use these files in the Circuit Tools software package.
To save the lines you have created:
- Make sure that the SD card is inserted and that the vehicle is stationary.
- Press the MENU button to enter the Lap timing menu.
- Highlight the SAVE GATES TO CARD option and press the OK button to confirm.
The file will be saved as GATES.SPL in the Data folder on the SD card.

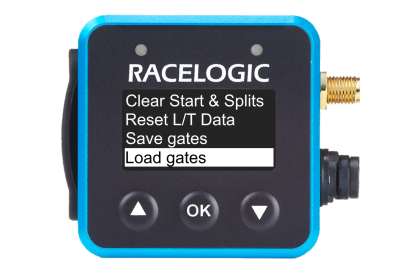
To Load lines you have created:
- Make sure that the SD card is inserted, with the Splits file saved as GATES.SPL in the data folder, and that the vehicle is stationary.
- Press the MENU button to enter the Lap timing menu.
- Highlight the LOAD GATES FROM CARD option and press the OK button to confirm.
If we release an updated track database file for the VBOX Mini LapTimer, this option will load an available track database file to the unit from the SD card.
You can find more information on this in the How to Load a Track Database article.

If we release an updated track database file for the VBOX Mini LapTimer, this option will load an available track database file to the unit from the SD card.
You can find more information on this in the How to Load a Track Database article.

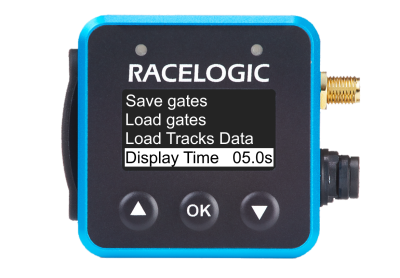
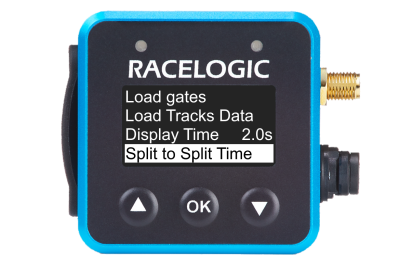
This setting lets you to set how long the split time is shown on the display when you cross a split line or the start/finish line. You have a choice of 2 s, 5 s, 10 s, 15 s or 20 s. The default setting is 5 s.
Highlight Display Time, and use the OK button to cycle through the options. Press one of the arrow buttons to move away from the setting and save the selected time.
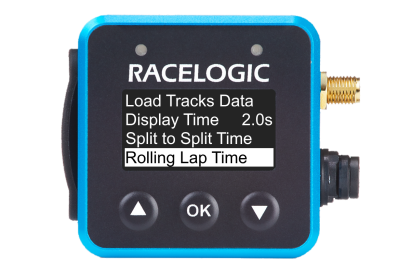
When you select this option the calculated split times will be split to split and not accumulative from the start of the lap.
This is disabled by default.
When you select this option the calculated split times will be split to split and not accumulative from the start of the lap.
This is disabled by default.

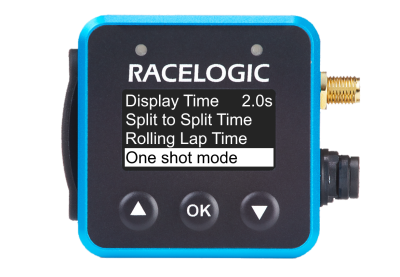
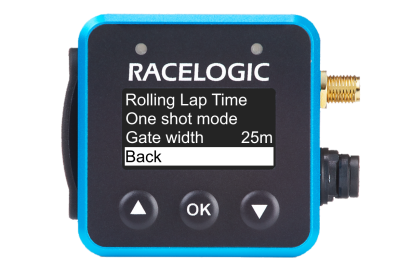
Selecting this function will show you a continuously counting lap time which briefly freezes as you cross the start/finish line.
This is enabled by default.

Selecting this function will show you a continuously counting lap time which briefly freezes as you cross the start/finish line.
This is enabled by default.
When you enable One Shot Mode, the unit will start timing when it detects movement after being stationary for more than 10 seconds. This will automatically reset when you come to a stop. After being stationary for 2 seconds, the screen counts down from 5 and will then show ARMED – Start when ready.
If you pull away before number 1 is displayed on the screen, nothing will change. During or after number 1 is displayed, the lap time measurement will start if you pull away. If a lap had been running up to this point, that time will be discarded.
After it has detected correct movement and a one-shot start has begun, you cannot trigger a normal start/finish line for 3 seconds.
This is disabled by default.

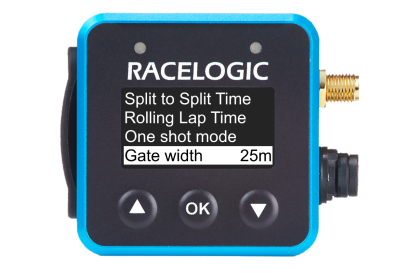
Press the OK button to change the gate width. You will see two arrows (up and down) appear next to the number. Use the two arrow buttons on the device to increase/decrease the width of the gate. Press the OK button again to confirm your selected distance.
The default width is 25 m.
Press the OK button to change the gate width. You will see two arrows (up and down) appear next to the number. Use the two arrow buttons on the device to increase/decrease the width of the gate. Press the OK button again to confirm your selected distance.
The default width is 25 m.

Press the OK button with this line highlighted to exit the Lap Timing menu and return to the main menu.
Press the OK button with this line highlighted to exit the Lap Timing menu and return to the main menu.

Press the OK button with this option highlighted to enter the Display Menu to configure how the various elements of the display will look like and behave.
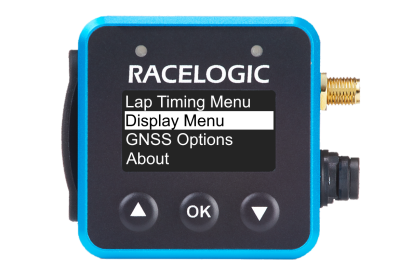
Press the OK button with this option highlighted to enter the Display Menu to configure how the various elements of the display will look like and behave.

This settings decides which options will be available on the display screen.
Choose between Basic Modes and Advanced Modes.
Advanced Modes provides the full functionality of the Mini LapTimer and Basic Modes reduces the amounts of visible Display modes, giving you the option to shorten the list of display modes to cycle through if you don't need them all.
The table below list the available display screens in each option.
Press the OK button to enter the selector, use the Up and Down buttons to move between the two options and press OK again to confirm your selection.

| Basic Modes (default) | Advanced Modes |
|---|---|
|
|
Press the OK button with this option highlighted to enter the Speed Settings menu to configure the following settings.
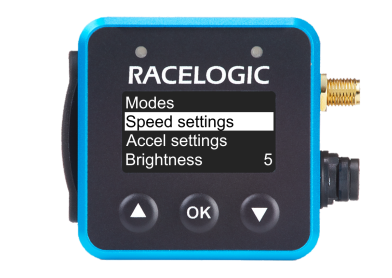
Press the OK button with this option highlighted to enter the Speed Settings menu to configure the following settings.

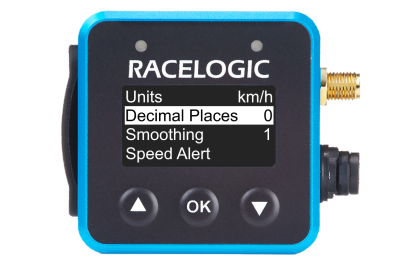
Press the OK button to toggle through the available options:
- km/h (default)
- mph
- kts

Press the OK button to toggle through the available options:
- km/h (default)
- mph
- kts

Define how many decimal places you want to see for the speed value on the display.
Press the OK button to cycle through the available options:
- 0 (default)
- 1
- 2
Define how many decimal places you want to see for the speed value on the display.
Press the OK button to cycle through the available options:
- 0 (default)
- 1
- 2

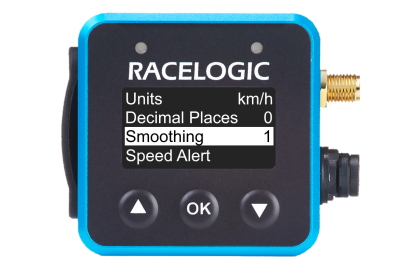
Define the smoothing level you the Mini LapTimer applies to the speed value on the display.
Press the OK button to cycle through the available smoothing levels: 1–5.
The default setting is 1.

Define the smoothing level you the Mini LapTimer applies to the speed value on the display.
Press the OK button to cycle through the available smoothing levels: 1–5.
The default setting is 1.
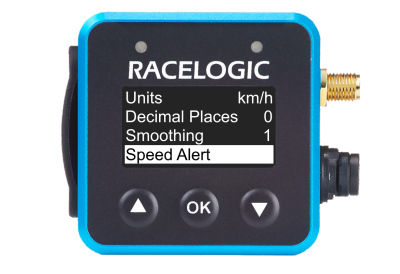
When enabled, Speed Alert will only operate when the VBOX Mini LapTimer is set to Speed Mode. The Speed Alert Mode is disabled by default.
When you enable Speed Alert, your Mini LapTimer will beep and have solid red LEDs when it logs a speed of more than the set speed alert value for longer than 1 second. The alert will stop when your logged speed goes below the set speed alert value.
Press the OK button with this option highlighted to enable the Speed Alert mode and make the Speed Alert settings available.

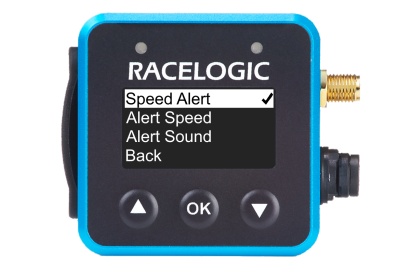
Speed Alert Enabled
Alert Speed
Press the OK button to change the Alert Speed. Use the two arrow buttons on the device to increase/decrease the speed to a set value between 0 and 999. Press the OK button again to confirm your selected speed.
Alert Sound
Press the OK button to toggle the Alert Sound on or off.
Alert Speed
Press the OK button to change the Alert Speed. Use the two arrow buttons on the device to increase/decrease the speed to a set value between 0 and 999. Press the OK button again to confirm your selected speed.
Alert Sound
Press the OK button to toggle the Alert Sound on or off.

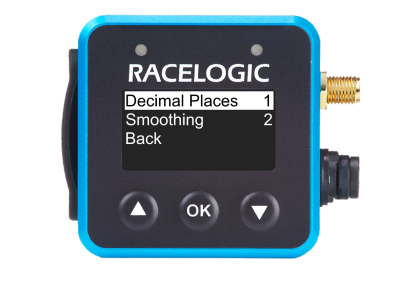
Press the OK button with this option highlighted to enter the Accel Settings menu to configure how you want to see the acceleration value displayed.
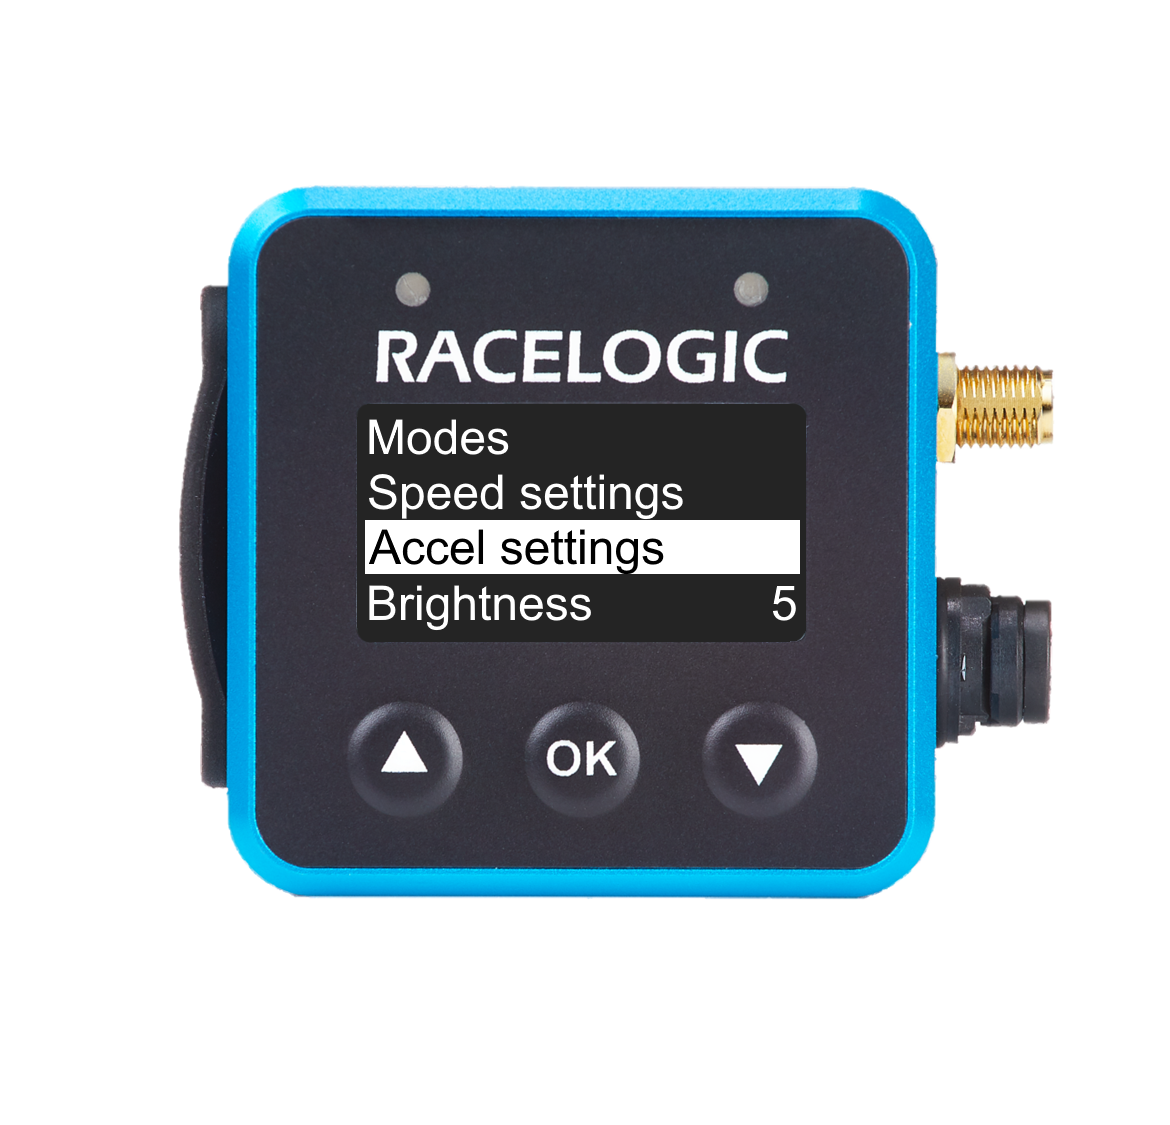
Press the OK button with this option highlighted to enter the Accel Settings menu to configure how you want to see the acceleration value displayed.
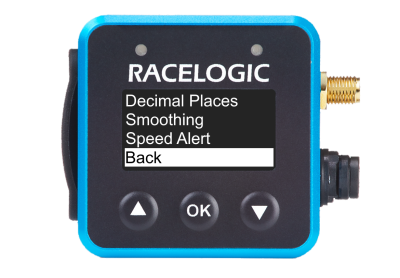
Decimal Places
Define how many decimal places you want to see for the acceleration value on the display.
Press the OK button to cycle through the available options:
- 0 (default)
- 1
- 2
Smoothing
Define the smoothing level you the Mini LapTimer applies to the acceleration value on the display.
Press the OK button to cycle through the available smoothing levels: 1–5.
The default setting is 2.
Back
Press the OK button with this option highlighted to exit the Accel Settings and go back to the Display Menu.

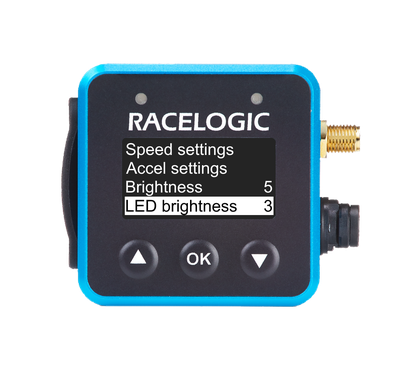
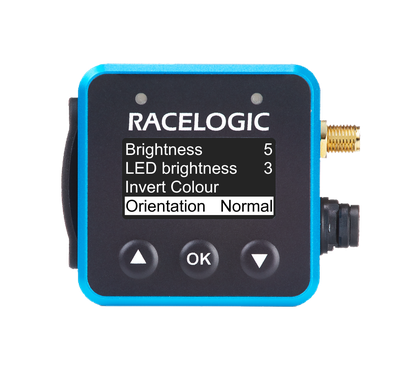
Press the OK button to toggle through five brightness settings. 1 is the darkest setting and 5 is the brightest setting. The display will change its brightness as you toggle through each setting to make it easier to find the correct level for you.
The default setting is 5.
Press the OK button to toggle through five brightness settings. 1 is the darkest setting and 5 is the brightest setting. The display will change its brightness as you toggle through each setting to make it easier to find the correct level for you.
The default setting is 5.
Press the OK button to toggle through five brightness settings for the LEDs. 1 is the darkest setting and 5 is the brightest setting. The LEDs will increase in brightness as you toggle through each setting to make it easier to find the correct level for you.
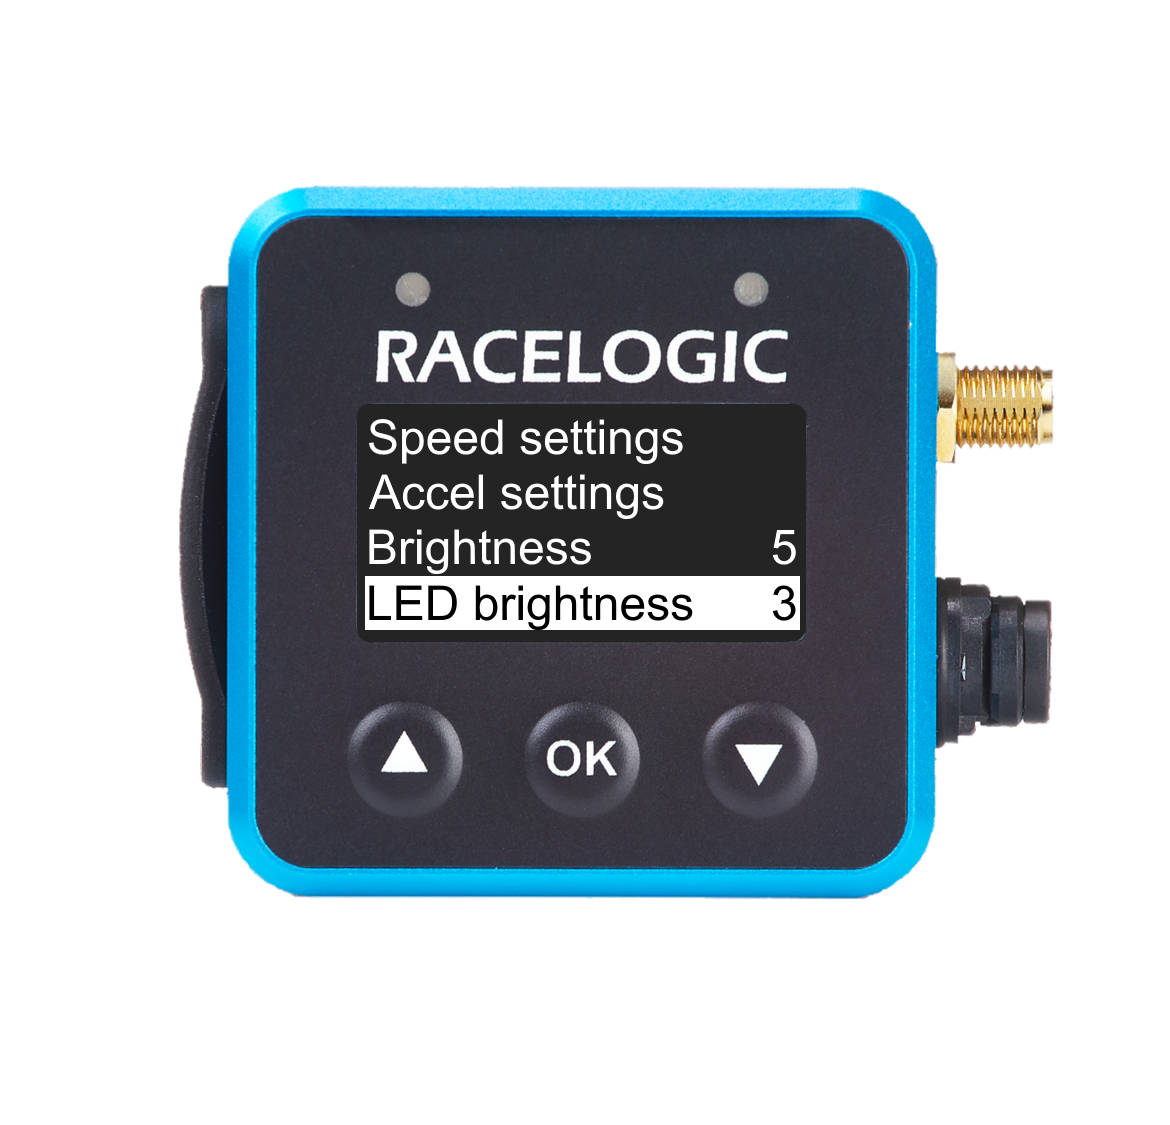
Press the OK button to toggle through five brightness settings for the LEDs. 1 is the darkest setting and 5 is the brightest setting. The LEDs will increase in brightness as you toggle through each setting to make it easier to find the correct level for you.
CAUTION
LED brightness level 5 is very bright and may cause glare or discomfort in low-light conditions.
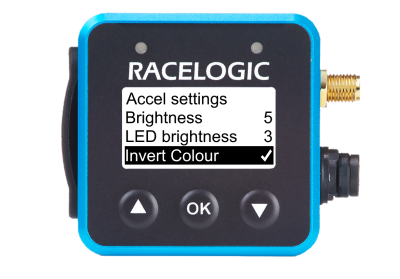
Press the OK button when an option is highlighted to toggle it on or off. When you select an option, a tick will appear next to it and the display applies the setting accordingly.
The Invert Colour (white background with black text) is the default option.
Press the OK button when an option is highlighted to toggle it on or off. When you select an option, a tick will appear next to it and the display applies the setting accordingly.
The Invert Colour (white background with black text) is the default option.

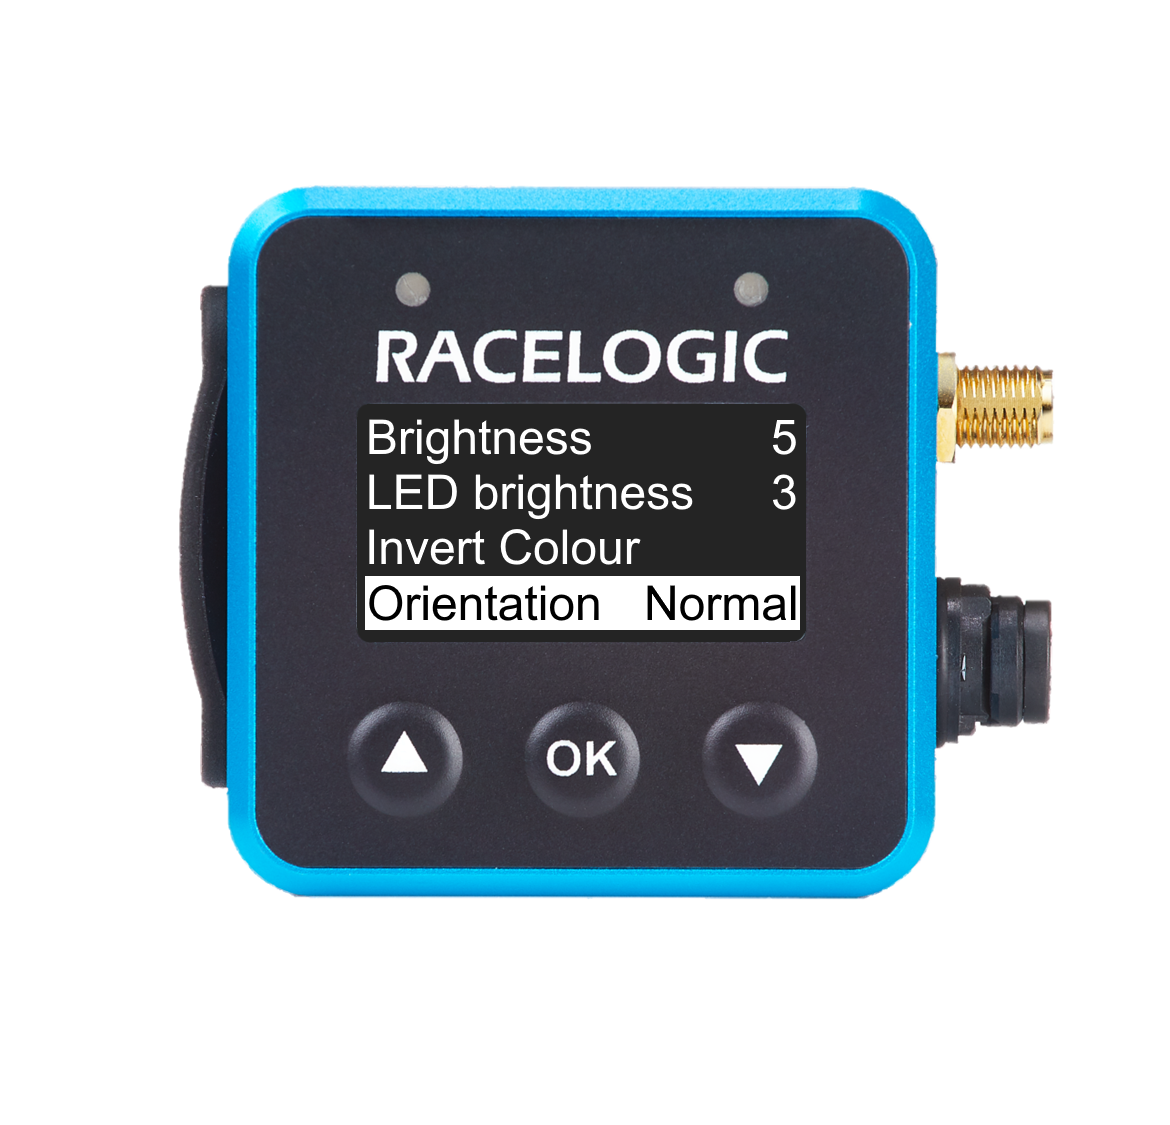
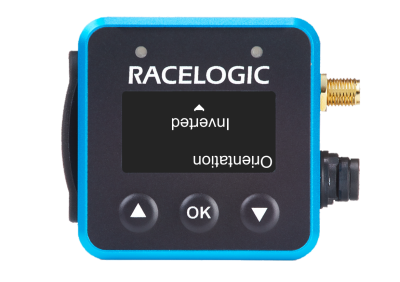
With this setting, you can define the orientation of the VBOX Mini LapTimer screen using the three options available: Normal, Inverted and Auto. When the default Auto is selected, the display will automatically rotate when it is turned upside down.
Normal
The display will have the same orientation as the Racelogic logo.
Inverted
The display will have the opposite orientation from the Racelogic logo.
Auto
The display will automatically rotate when the unit is rotated.
IMPORTANT
If you are fitting the VBOX Mini LapTimer in a permanent install or if you expect it to experience heavy vibrations during use, you may wish to fix the orientation as these can trigger the sensitive internal gyro to flip the screen while in use.
Press the OK button with this line highlighted to exit the Speed Settings and go back to the main menu.

Press the OK button with this line highlighted to exit the Speed Settings and go back to the main menu.
NOTE
You cannot access the GNSS Options menu when you are using the Mini LapTimer in OLED mode. If you need to perform a coldstart while in OLED mode you will have to do this on the connected unit.

NOTE
You cannot access the GNSS Options menu when you are using the Mini LapTimer in OLED mode. If you need to perform a coldstart while in OLED mode you will have to do this on the connected unit.
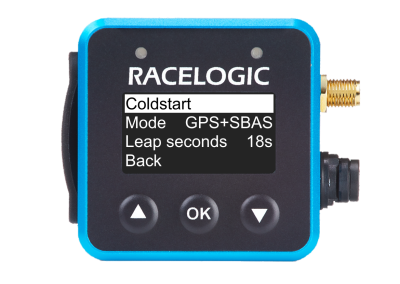
If the VBOX Mini LapTimer is struggling to acquire satellite lock, you may need to do a GPS coldstart. This may be necessary if you have not used the unit for a number of days or it has dramatically moved location since the last use.
Select MENU > GPS OPTIONS > COLDSTART.
If the VBOX Mini LapTimer is struggling to acquire satellite lock, you may need to do a GPS coldstart. This may be necessary if you have not used the unit for a number of days or it has dramatically moved location since the last use.
Select MENU > GPS OPTIONS > COLDSTART.

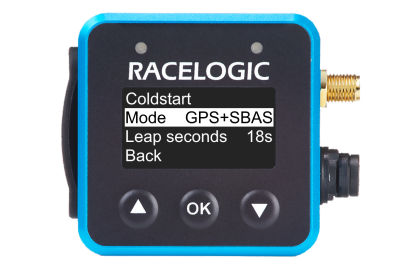
The GNSS Mode is the satellite constellations that you want to use. You have three options:
GPS+SBAS
Global Positioning System + Satellite-Based Augmentation System. This is the default setting.
GPS+GLO
Global Positioning System + GLONASS Navigation Satellite System.
GPS+BeiDu
Global Positioning System + BeiDou Navigation Satellite System.

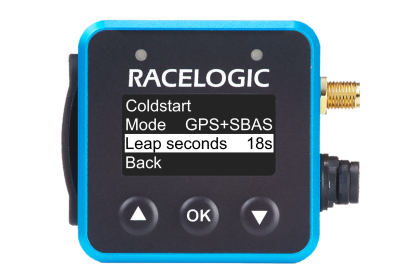
The number of leap seconds in this setting sets the current offset between GPS and UTC time. This is set by official bodies to compensate for the slowing of the rotation of the earth.
Refer to the What are GPS Leap Seconds? article for more information about leap seconds.

The number of leap seconds in this setting sets the current offset between GPS and UTC time. This is set by official bodies to compensate for the slowing of the rotation of the earth.
Refer to the What are GPS Leap Seconds? article for more information about leap seconds.
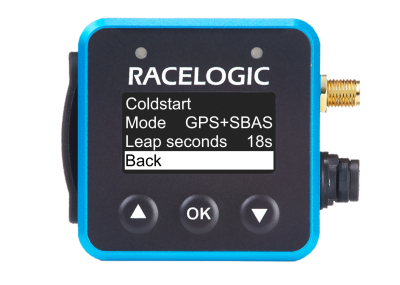
Press the OK button with this line highlighted to exit the GNSS Options and go back to the Main Menu.

Press the OK button with this line highlighted to exit the GNSS Options and go back to the Main Menu.
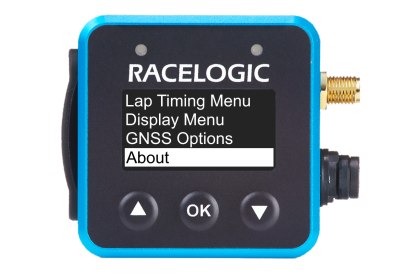
Press the OK button with this option highlighted to enter the About section, which includes information about the Mini LapTimer hardware and firmware.

Press the OK button with this option highlighted to enter the About section, which includes information about the Mini LapTimer hardware and firmware.
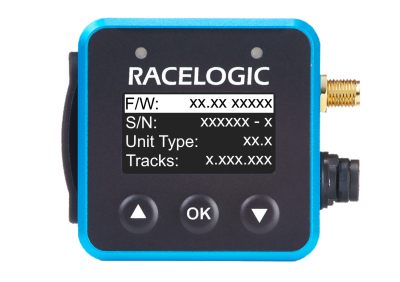
The About section includes the following information:
- The Installed firmware version
- The VBOX Mini LapTimer Serial Number
- The Unit Type
- The Track Database version
"X" represents an unknown character (digit or letter) to illustrate the format of the various version numbers.
The About section includes the following information:
- The Installed firmware version
- The VBOX Mini LapTimer Serial Number
- The Unit Type
- The Track Database version
"X" represents an unknown character (digit or letter) to illustrate the format of the various version numbers.

Press the Down button when on the About screen to move through the available information and navigate to the Back option at the bottom.
Press the OK button with this option highlighted to exit the About section and return to the Main Menu.

Press the Down button when on the About screen to move through the available information and navigate to the Back option at the bottom.
Press the OK button with this option highlighted to exit the About section and return to the Main Menu.

Press the OK button with this option highlighted to exit the Main Settings and return to the Display screen.

Press the OK button with this option highlighted to exit the Main Settings and return to the Display screen.
