- When purchasing SD cards, always buy a quality brand such as SanDisk, Kingston or Lexar.
- If data is to be logged to a USB storage device, the optional RLCAB073 cable or the RLACS237 start/stop logging switch with USB port is required. Racelogic recommend good quality USB storage media - write speeds above 7 MB/s (4 MB/s absolute minimum), a speed class of 10 (4 absolute minimum) and good USB chipsets are essential.
VBOX Video HD2 supports both FAT32 and exFAT file formats - this means that the majority of SD cards/ USB memory of any size can be used out of the box.
| File Format | Supported |
|---|---|
FAT32 |
|
exFAT |
|
NTFS |
IMPORTANT
If an SD card/ USB storage is formatted in the NTFS file format, it will need to be reformatted into an exFAT or FAT32 file system before it will work with a VBOX Video HD2 unit.
- exFAT reformatting can be done directly within Windows by right clicking on the media and selecting 'Format'.
- FAT32 reformatting for media with sizes up to 32 GB can be done directly within Windows by right clicking on the media and selecting 'Format'.
- If you would like to format media with sizes above 32 GB in to a FAT32 file system, this isn't something that can be done directly within windows as it is not the standard formatting for the file. However, many third party software programs can be used to reformat media to allow them to work correctly with our products - we can recommend the GUI Format Tool as a free option from the SD card organisation. The .exe file for the tool can be found at the bottom of this page.
Supplied or purchased SDHC cards are formatted in the FAT32 file format. This format is supported by the VBOX Video HD2.
NOTE
The 32 GB SD card supplied with the VBOX Video HD2 is formatted in the FAT32 file format.
Purchased SDXC cards will be formatted in exFAT or NTFS file formats; the exFAT format is supported by the VBOX Video HD2, the NTFS format is not supported by the VBOX Video HD2 (please reformat as per instructions above).
Purchased USB storage may be supplied in FAT32, exFAT or NTFS file formats; FAT32 and exFAT formats are supported by the VBOX Video HD2, the NTFS format is not supported by the VBOX Video HD2 (please reformat as per instructions above).
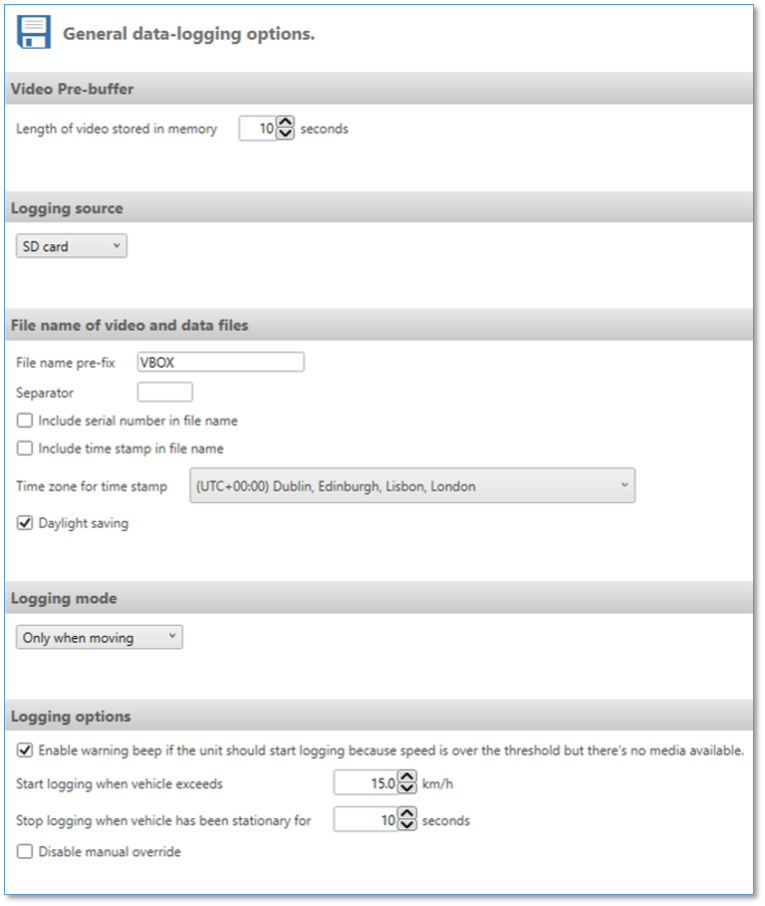
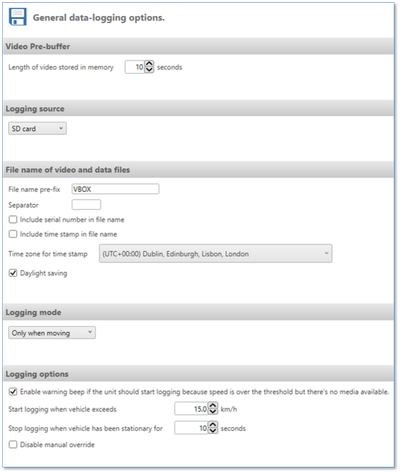
Out of the box, the VBOX Video HD2 is configured to log when movement is detected.
The minimum log speed is set to 15 km/h - when the unit detects speed values above this, logging will start.
There is also a ‘pre-logging buffer’ configured to capture 10 seconds of video data prior to the logging start point. This means that there will be an additional 10 seconds of video captured before 15 km/h is reached, so standing start, or the vehicle leaving the pit lane will all be captured.
The VBOX Video HD2 will stop logging after the vehicle speed has been under 15 km/h for 10 seconds.
These settings have been picked to ensure that every moment of track action is captured, while eliminating small files being created from noisy GPS signals when in and around the pit lanes.
VBOX Video HD2 is set to log to SD card first if both an SD card and USB device are connected, however this can be changed if desired.
Default logging settings can be changed using VBOX Video Setup software - as shown below.

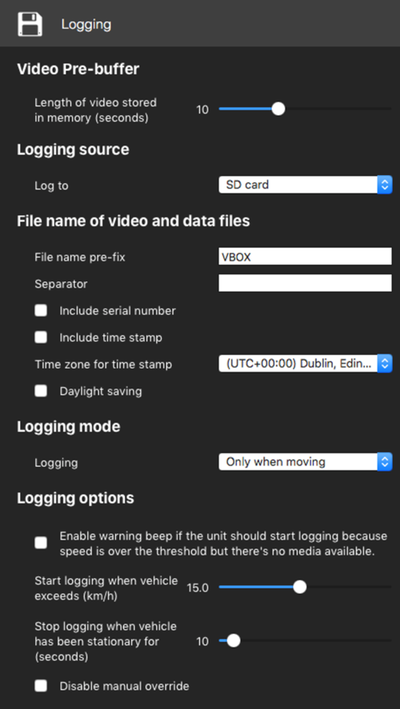
The logging behaviour of VBOX Video HD2 is totally user configurable, so can be altered to suit different requirements.
As well as logging Only when moving, the HD2 can also be set to log Continuously, Manually or by using Advanced logging options. For more information on logging settings, please click here.
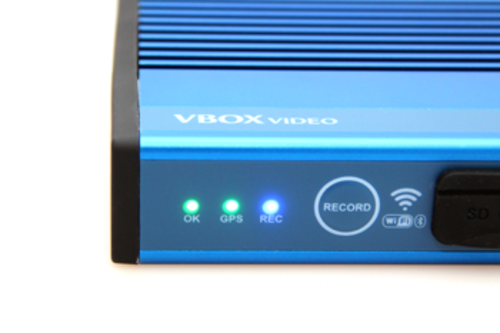
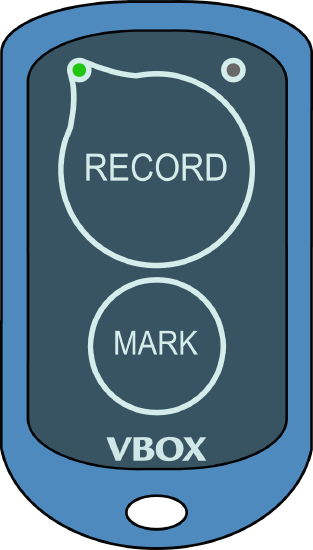
The Blue Record LED will be on when recording video. When you come to a stop, it will then flash as the file is closed and will go out when it is safe to remove the SD card.
IMPORTANT
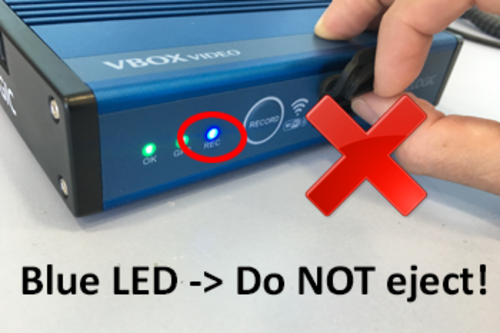
NEVER remove the SD card when the Blue Record LED is on or flashing - you will lose data/video!
NOTE
If for some reason the SD card is removed whilst still recording, it may need to be repaired using a PC before it can be reused.
If you have come to a stop, but the LED is on, press the 'RECORD' button to stop the video before removing the card.
Sometimes, due to poor satellite visibility in a garage or close to a building, the box may start recording, even if the car is stationary. Always check the Blue LED before ejecting the card.


The table below shows how much space is required for each video quality setting.
| Quality | Bit Rate | File Size |
|---|---|---|
| Low | 8 Mbit/s | ~ 3.5 GB/hr |
| Medium (default) | 12 Mbit/s | ~ 5.25 GB/hr |
| High | 16 Mbit/s | ~ 7 GB/hr |
NOTE
Files will record at a slightly higher bit rate in low light conditions.
There is an optional extra Wireless Logging Switch (RLACS224) that you can use to start/stop the logging on an HD2 unit. The switch was designed for in-car use and has a range of around 2 m.
The switch will automatically connect to the HD2 unit when they are powered on. To avoid confusion or accidental pairing to an incorrect unit, the pairing process uses the individual MAC code, a unique identifier for each logging switch.
To pair the logging switch with your HD2 unit, you must first select the correct setting in the VBOX Video Setup software.
- Insert the SD card you want to use into a computer and open the VBOX Video Setup Software.
- Add a new scene or select a previously saved scene.
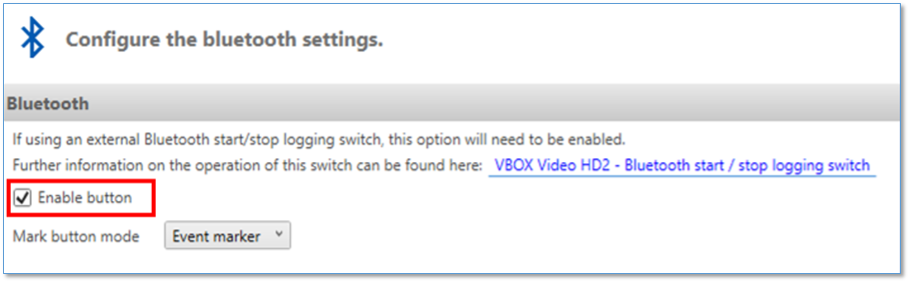
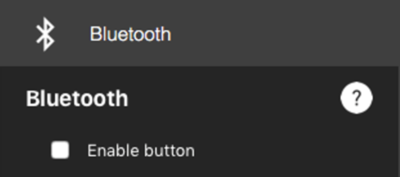
- Select Bluetooth in Settings and make sure that the Enable button is ticked.


- Save the configuration to the SD card and remove the card from your computer.
To pair a Wireless Logging Switch, you must first make sure that the HD2 unit is fully powered on.
- Power on the HD2 unit and wait for it to boot up.
- Insert the SD card into the fully booted VBOX Video HD2.
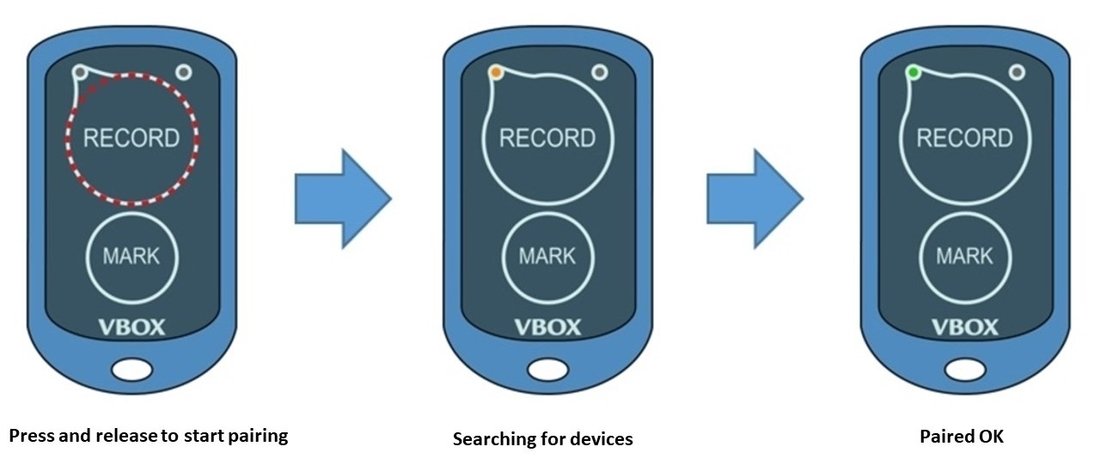
- Turn on the Wireless Logging Switch by holding it within 1 m of the HD2 unit and pressing the Record button. You should see the Record LED flashing orange while it searches for a VBOX Video HD2 to connect to.
If no other Wireless Logging Switch is paired with the HD2, and the unit is running Firmware Version v1.3.72 or later, the switch will automatically connect to the unit when you turn it on.
If another Wireless Logging Switch is paired with the HD2, you must remove the paired switch before you can pair the new one. - Once connected, the Record LED will flash green (roughly once every 3 seconds). You can now use the logging switch to start/stop recordings and add event marks to files.
NOTES
- Only one logging switch can be paired to a VBOX Video HD2 at any time.
- The logging switch will go into sleep mode after 1 minute of inactivity.
If, for some reason, the logging switch does not automatically connect with the unit, you can install a pairing file onto the HD2 by using the following steps:
- Once the scene has loaded, remove the SD card from the HD2 unit and insert the SD card provided with the switch.
- Upload the pairing file from a computer to the SD card and insert it back into the VBOX Video HD2.
- Within a few seconds, the HD2 unit will beep and the OK light will slowly flash orange.
- Power-cycle the unit HD2 unit.
- Remove the logging switch SD card and insert the SD card you are using for your recording.
If you do not have an SD card for your Wireless Switch:
Wireless Logging Switches purchased before the release of firmware version 1.2.45 (prior to October '16) were not supplied with an SD card and will require a pairing file, obtainable from Racelogic, to upgrade to firmware version 1.2.45 or later.
Remove the rear cover of the logging switch. You should see a 12-digit code (MAC Code) on a silver sticker on the inside of the rear cover.
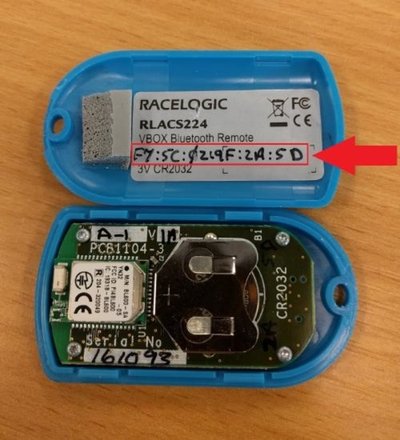
Contact Racelogic Support with this code who will in turn provide you with a pairing file via email.
NOTE
The pairing file will be deleted from the card once it has been installed onto the VBOX Video HD2 unit. We recommend that you back up a copy of the pairing file BEFORE you save it on the card and load it into the unit, in case you need to pair them again at a later date. If you require a new pairing file for any reason, contact Racelogic Support.
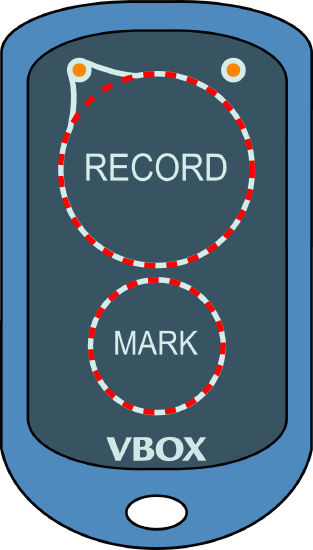
To un-pair a specific Wireless Logging Switch from an HD2 unit, you can either press and hold both buttons on the logging switch until both LEDs light orange or use the Camera Preview App.
Once you have paired the Wireless Logging Switch with the HD2 unit, the logging switch will start/stop the logging on the connected HD2.
NOTE
The HD2 unit will still follow the set logging conditions. Click here for more information on logging settings.
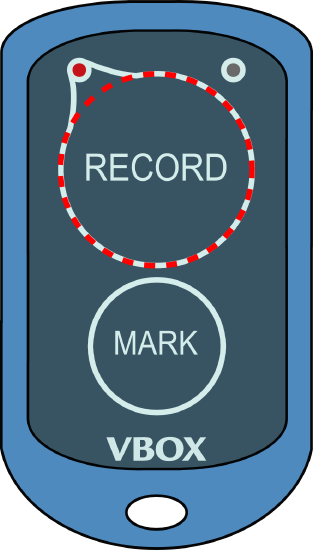
The RECORD button on the logging switch should always act as a manual override to control the logging on the HD2 unit, in the same way as pressing the button on the front panel of the HD2 unit itself.
- If the paired HD2 is recording, the RECORD LED on the logging switch will flash green (roughly once every two seconds).
- If the paired HD2 has no logging media inserted, and the manual logging control is activated, the RECORD LED on the logging switch will flash red.


Event Marking
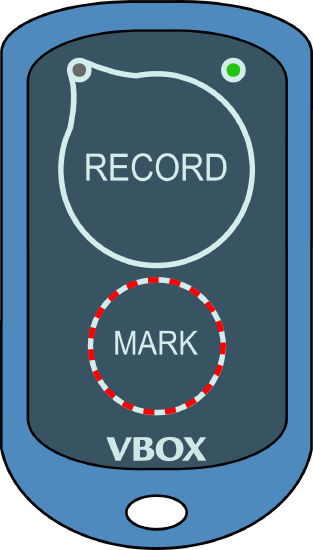
If the Mark button mode in the Bluetooth Settings is set to Event marker, you can press the MARK button to mark an event.
This will cause the MARK LED to flash green once, and an event marker will be logged in the .vbo data file.
Setting Gates
If the Mark button mode in the Bluetooth Settings is set to Set gates, you can press the MARK button to set start/finish and finish gates.
Press once to set the start/finish gate at your current location. If you want a separate finish gate, press the button again when you are in the location you want to set the gate.
Pressing the button will cause the MARK LED to flash green once, and the relevant gate will be logged in the .vbo data file.
Event Marking
If the Mark button mode in the Bluetooth Settings is set to Event marker, you can press the MARK button to mark an event.
This will cause the MARK LED to flash green once, and an event marker will be logged in the .vbo data file.
Setting Gates
If the Mark button mode in the Bluetooth Settings is set to Set gates, you can press the MARK button to set start/finish and finish gates.
Press once to set the start/finish gate at your current location. If you want a separate finish gate, press the button again when you are in the location you want to set the gate.
Pressing the button will cause the MARK LED to flash green once, and the relevant gate will be logged in the .vbo data file.

| Battery Type | CR2032 |
|---|---|
| Battery Life - continuous use* | Approximately 900 hours |
| Battery Life - standby use** | Approximately 3 years |
| Wireless Range | Approximately 2 metres |
* Continuous use means that the Wireless Logging Switch is displaying a logging state, so the logging LED would be illuminated and there would be a live Bluetooth link to the VBOX Video.
** Standby use means that the Wireless Logging Switch has no live Bluetooth link, is not searching for any devices and is essentially ‘asleep’. You can wake the logging switch at any time with a button press.
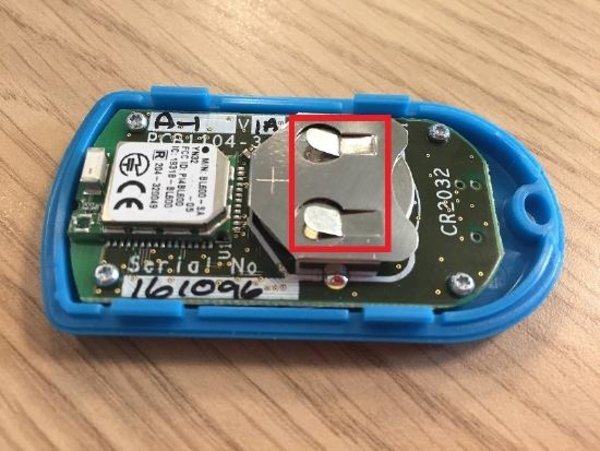
- Open the case using the bottom indent.
- Slide the battery out by gently pulling the two tabs (highlighted in the image below) forward.
- Insert the new battery and snap the case shut.
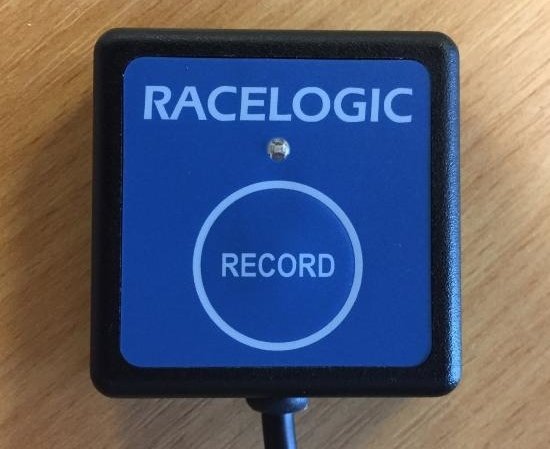
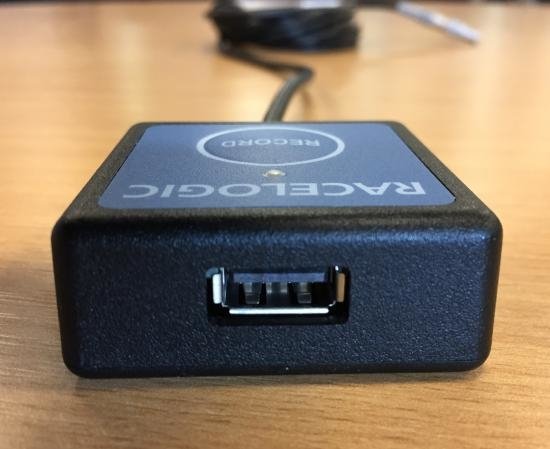
There is an optional wired start/stop logging switch, with USB port, available for use with the HD2 (RLACS237). This can be purchased from our online store.
The logging switch has a record button and LED, this replicates the behaviour of the 'Record' LED on the front panel of the HD2 unit. This allows the HD2 to be fitted in the vehicle without the need for the Record LED on the box to be visible, and has a 3 m long cable giving greater flexibility for fitting options.


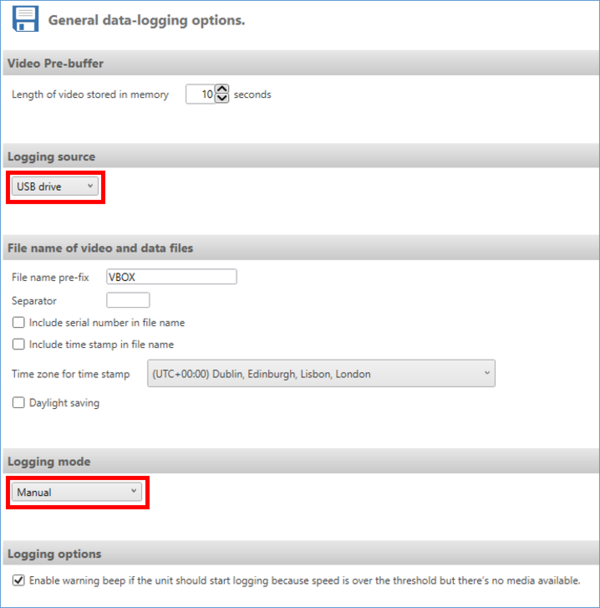
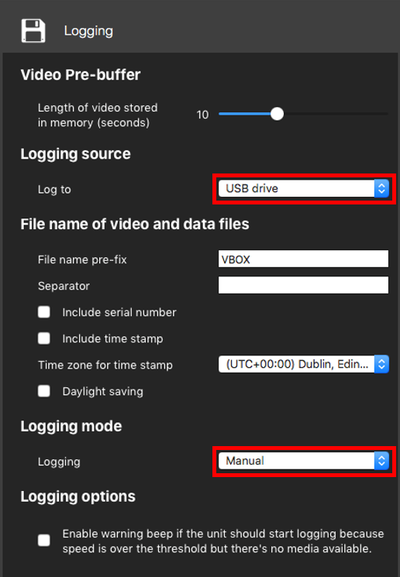
To use the USB function on the wired start/stop logging switch, the scene stored in the HD2 unit will need to be edited.
The 'Logging source' option found within the General settings (Windows, macOS) area will need to be set to 'USB drive' in the drop down list and the 'Logging mode' set to 'Manual', as shown below.
If the 'Logging mode' is not set to 'Manual', the wired start/stop logging switch will act as an override to the selected mode.
NOTE
As an extra feature, if there is an SD card present in the unit, the HD2 will revert logging back to the SD card should the USB stick become full during use or if the USB stick is absent/missing and recording is initiated.