This page contains information about the settings in the Predictive Lap Timing Menu on VBOX LapTimer (RLVBLAP-R and RLVBLAP-S).
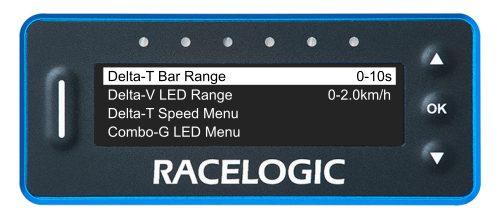
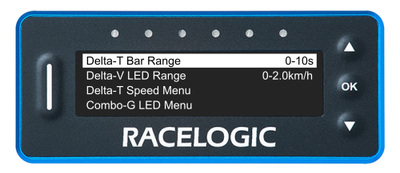
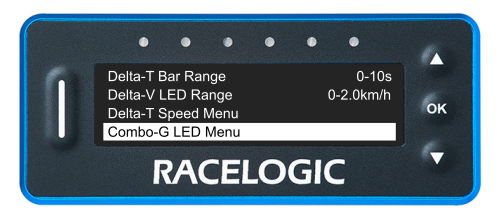
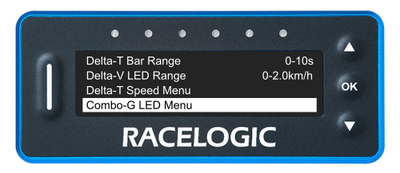
This setting enables the Delta-T bar during lap prediction and alters the amount of +/- time shown on the bar graph.
It will be set to Off by default.
Press the OK button with this setting highlighted to cycle through the available ranges:
- Off
- 0-2s
- 0-5s
- 0-10s
- 0-30s
The displayed option is the selected one. When you are happy with your selection, use the Down button to move to the next setting in this menu.
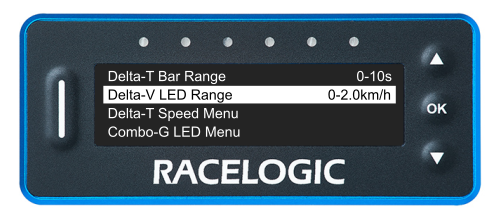
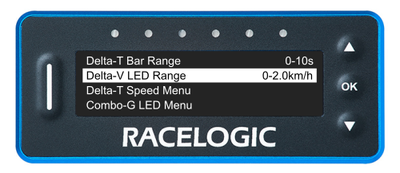
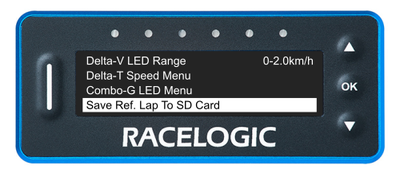
This range setting affects the sensitivity of the Delta-V LEDs.
Press the OK button with this setting highlighted to cycle through the available ranges:
- 0-2.0 km/h (0-1.2 mph)
- 0-5.0 km/h (0-3.1 mph)
- 0-10.0 km/h (0-6.2 mph)
The displayed option is the selected one. When you are happy with your selection, use the Down button to move to the next setting in this menu.
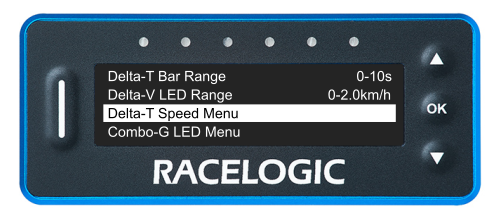
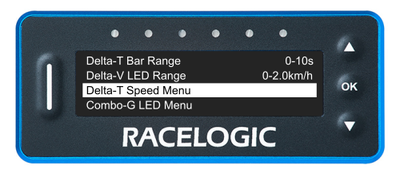
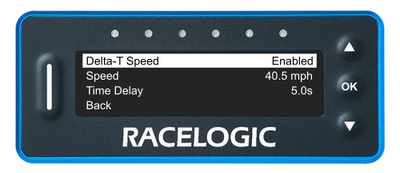
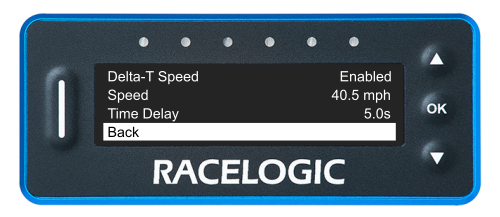
When enabled, this mode will change the Predictive Lap Timing display to show your current speed and Delta-T information when your speed drops below the specified threshold for a set amount of time.
This function is optimised for use with both 'Virtual safety car' conditions and pit lane speed limits.
The Delta-T Speed Mode is disabled by default.
When enabled, the default settings are:
Speed: 65 km/h
Time Delay: 1.5 seconds
The display will return to the Predictive Lap Timing mode when your speed increases to 5 km/h over the configured Delta-T Speed value.
Example
If you have set your LapTimer to Predictive Lap Timing Mode and you have enabled Delta-T Speed:
- When your speed drops below 65 km/h for more than 1.5 seconds, the display will change to show your current speed alongside your Delta-T.
- When your speed increases to 70 km/h, the display will revert to the configured Predictive Lap Timing mode.
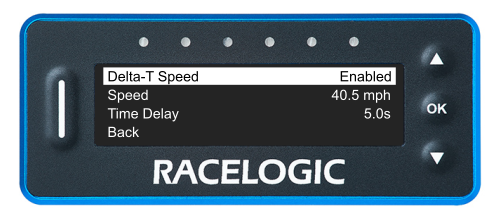
Press the OK button with this setting highlighted to toggle between Enabled and Disabled for Delta-T Speed.
Press the OK button with this setting highlighted to toggle between Enabled and Disabled for Delta-T Speed.
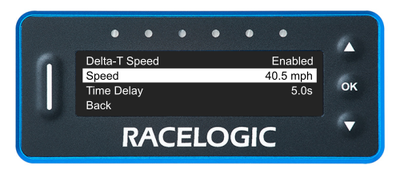
This setting specifies the speed that will trigger the Delta-T speed functionality.
Press the OK button with this setting highlighted to enter the value screen. Use the Up and Down buttons to increase or decrease the speed to a value between 1 and 999 km/h.
Press the OK button to confirm the selected value and return to the Delta-T Speed Menu.
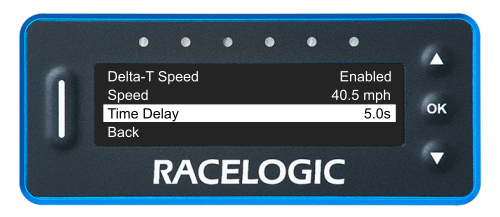
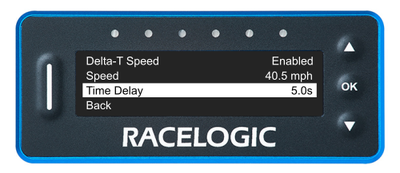
Press the OK button with this setting highlighted to enter the value screen. Use the Up and Down buttons to increase or decrease the delay for the Delta-T Speed to a value between 0.5 and 5.0 seconds.
Press the OK button to confirm the selected value and return to the Delta-T Speed Menu.
Press the OK button with this setting highlighted to enter the value screen. Use the Up and Down buttons to increase or decrease the delay for the Delta-T Speed to a value between 0.5 and 5.0 seconds.
Press the OK button to confirm the selected value and return to the Delta-T Speed Menu.
Press the OK button with this option highlighted to navigate back to the Predictive Lap Timing Menu.
Press the OK button with this option highlighted to navigate back to the Predictive Lap Timing Menu.

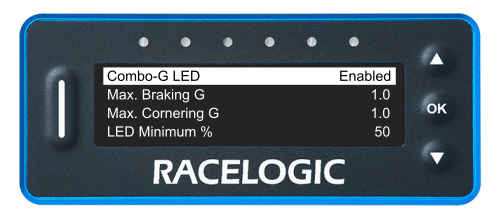
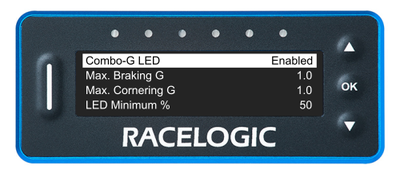
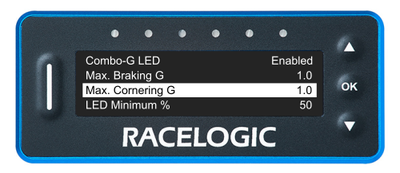
When you have enabled the Combo-G LED feature, the LapTimer will display the combined g information via the LEDs while also displaying the Delta-T information on the display. It encourages you to truly push your car at braking points and turns to improve lap times.
This feature is disabled by default.
Press the OK button with this setting highlighted to toggle between Enabled and Disabled for Combo-G LED. The displayed mode is the selected mode. Move away from the setting to confirm it.
Press the OK button with this setting highlighted to toggle between Enabled and Disabled for Combo-G LED. The displayed mode is the selected mode. Move away from the setting to confirm it.
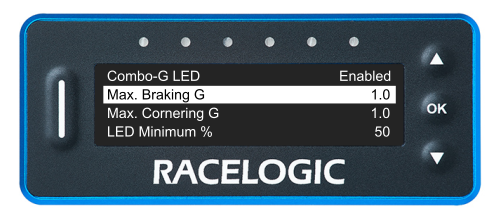
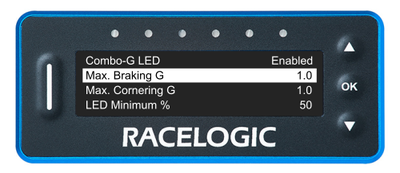
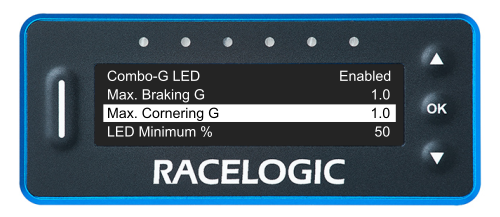
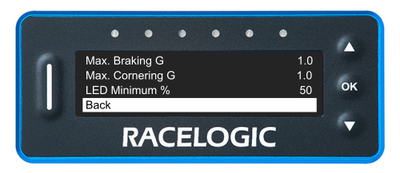
Press the OK button with this setting highlighted to enter the value screen. Use the Up and Down buttons to increase or decrease the Max. Braking G to a value between 0.1 and 2.0.
Press the OK button to confirm the selected value and return to the Combo-G LED Menu.
Press the OK button with this setting highlighted to enter the value screen. Use the Up and Down buttons to increase or decrease the Max. Braking G to a value between 0.1 and 2.0.
Press the OK button to confirm the selected value and return to the Combo-G LED Menu.
Press the OK button with this setting highlighted to enter the value screen. Use the Up and Down buttons to increase or decrease the Max. Braking G to a value between 0.1 and 2.0.
Press the OK button to confirm the selected value and return to the Combo-G LED Menu.
Press the OK button with this setting highlighted to enter the value screen. Use the Up and Down buttons to increase or decrease the Max. Braking G to a value between 0.1 and 2.0.
Press the OK button to confirm the selected value and return to the Combo-G LED Menu.
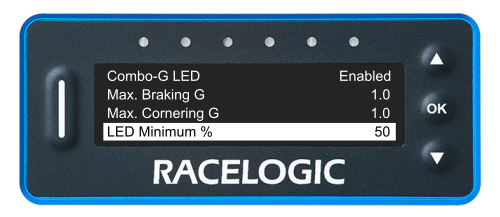
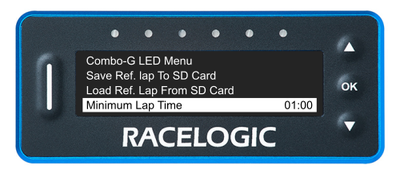
Configure the minimum percentage for the LED, to define when the LED colours will appear to notify the driver. The default is 50 %.
You can find more information on how this mode affects the LEDs in the LED Behaviour information.
Press the OK button with this setting highlighted to enter the value screen. Use the Up and Down buttons to increase or decrease the Minimum LED Percentage to a value between 0 and 100.
Press the OK button to confirm the selected value and return to the Combo-G LED Menu.
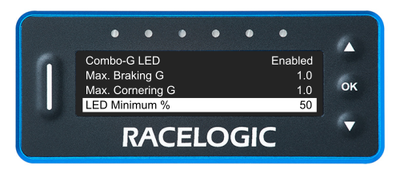
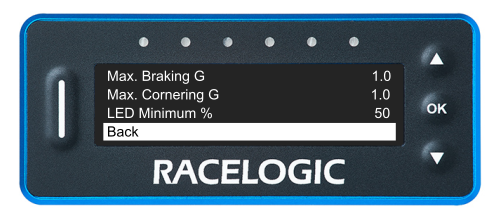
Press the OK button with this option highlighted to navigate back to the Predictive Lap Timing Menu.
Press the OK button with this option highlighted to navigate back to the Predictive Lap Timing Menu.
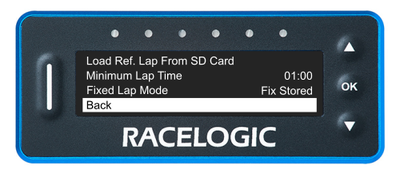
This setting allows you to save a reference lap for future use.
Make sure that you have an SD Card inserted in the LapTimer unit before you use this feature.
Press the OK button with this option highlighted to save the current reference lap to the SD card.
When the saving process is complete, the unit will display a message to confirm that the lap has been saved successfully.
The saved data will be stored on the SD card as LAP.REF in the 'Data' folder on the SD Card.
NOTE
The vehicle must be stationary before the LapTimer can transfer the file to the SD card.
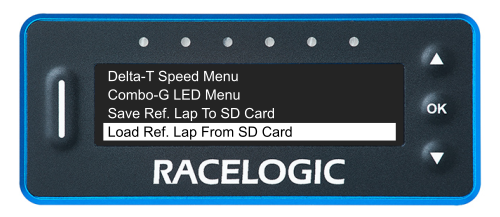
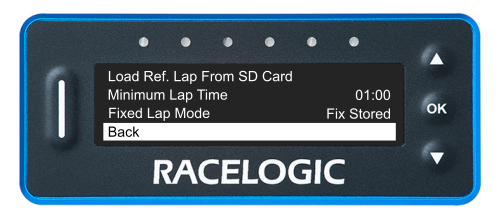
You can load a reference lap stored from a previous session into the unit.
The name can be anything, but you must:
- Make sure it is in the .REF file format.
- Copy it to the Data folder on the SD Card.
- Only have one .REF file present in the Data folder when you insert it into the LapTimer unit.
Insert the card into the LapTimer and press the OK button with this setting highlighted to load the reference lap from the card.

The reference lap will be reset whenever:
- You set a new start/finish
- You Reset Lap Timing Data in the Lap Timing Menu
- You long-press the OK button while in Predictive Lap Timing Mode
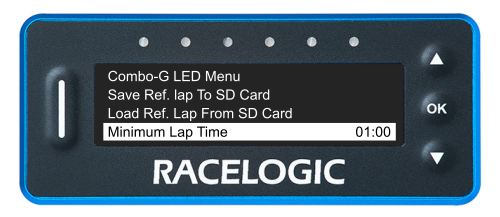
This setting allows you to set a minimum time for laps, making shorter laps invalid. Invalid laps will not be counted in the lap count, appear in the lap times or used as a reference lap.
Press the OK button with this setting highlighted to enter the value screen.
Use the Up and Down buttons to increase or decrease the Minimum Lap Time to a value between 00:00 and 60:00.
Press the OK button to confirm the selected value and return to the Predictive Lap Timing Menu.
Press the OK button with this setting highlighted to swap between the available options.
Fix Current
When you have selected this option, you can set the lap you are currently driving as the fixed reference lap by pressing the OK button while in the Predictive Lap Timing mode. The lap will be fixed when it has been completed.
Fix Stored (Default)
When you have selected this option, you can set the reference lap that is currently stored in the memory as the fixed reference by pressing the OK button while in the Predictive Lap Timing mode.

NOTE
If you choose to fix the current lap, it will override the Minimum Lap Time setting as you are setting the current and full lap as the reference.
Press the OK button with this option highlighted to navigate back to the Main Menu.
Press the OK button with this option highlighted to navigate back to the Main Menu.