
Start a new scenario configuration in SatGen 4.
Load and open an existing SatGen scenario configuration file from your device.
Save your configured scenario to a location on your device.
Save a SatGen scenario configuration file of your currently configured scenario to a location on your device.
Check if your software is up-to-date and enable or disable the automatic updates feature.
See the software version you are using.
Close SatGen 4.
Recent Files
A list of the most recently opened files in SatGen 4, with the previously opened file at the top.
You can use the Import feature to import a file with an already existing route. The route will be added to SatGen 4 as waypoints that you can edit further to adapt your scenario.
Click the Import button to open the Import Menu in SatGen 4.


Tick this box to make SatGen 4 use the KML height in the file as the stop time.
You can decide to make SatGen 4 repeat the KML file up to 99 times. Use the up and down arrows to adjust the value.

Tick this box before you load the NMEA file to enable the NMEA data smoothing.
You can adjust the NMEA smoothing level with the up and down buttons next to the level value.
This option is enabled by default. Untick this box if you do not want to use RMC/VTG ground speed to smooth your NMEA data.
NOTE
All imported NMEA trajectories will skip fractional-second samples and start on the first whole second.

There are no additional parameters to configure for imported VBOX Files.
NOTE
All imported VBOX trajectories will skip fractional-second samples and start on the first whole second.

NOTE
Latitude and Longitude fields are required, while Altitude and Delay fields are optional.
Select the delimiter used in the .csv file. Your options are:
- Comma
- Colon
- Equals Sign
- Semicolon
- Space
Select the coordinates format applicable to the .csv file you want to import. Your options are:
- Degrees
- Radian

The Best Fit button works as a one-click method to automatically fit your configured route in the map view.
This will adjust the zoom on your map to the best view for your current route.

The Best Fit button works as a one-click method to automatically fit your configured route in the map view.
This will adjust the zoom on your map to the best view for your current route.

Create a straight-line route between the set waypoints.
Set two or more waypoints. The set map provider (the default map will depend on your country or region) will calculate the best route for a vehicle.
Set two or more waypoints. The set map provider (the default map will depend on your country or region) will choose the nearest available transport route.
NOTE
Bing and OpenStreet maps do not currently support rail routing
Set two or more waypoints. The set map provider (the default map will depend on your country or region) will suggest a route in walking pace.
NOTES
- SatGen 4 will automatically apply a default target speed and a relevant Dynamics mode depending on the selected Routing mode.
- OpenStreet (Map Provider) does not have native routing modes. It will instead use the routing mode of the previously selected Map Provider.
Click this button to remove all the waypoints from the map.
Enter coordinates, address, place name, or similar, to search for a specific location on the map.
Click on the waypoint icon on the right-hand side of the search bar to add a new waypoint at the centre of the map.
NOTE
This feature requires an Internet connection.
Click on the map type section in the bottom left corner to cycle through the available map types, such as:
- Satellite
- Map
- Hybrid
NOTE
The map types may vary depending on the map provider.
Use the plus (+) and minus (-) buttons to zoom in and out on the map.
Click on the Set Start Position button to pinpoint the first waypoint in the route and have it added to the script.
Click on the IntelliPrompt button to see the available command options.
These are the available script commands that you can use to define and update the route:
Click on the IntelliPrompt button to see the available command options.
These are the available script commands that you can use to define and update the route:

| Name | Function | Command |
|---|---|---|
Accel |
|
|
Heading |
Change heading by ±xxx degrees, using radius of yyy meters
|
|
Height |
|
|
Repeat |
|
|
Satellite |
|
|
Speed |
|
|
StartHeading |
|
|
StartHeight |
|
|
StartLatitude |
|
|
StartLongitude |
|
|
Vspeed |
|
|
Wait |
|
|
Click the Preview button to execute and preview the route generated from the script.

Click the Preview button to execute and preview the route generated from the script.

The script status will be displayed underneath the script window. This status will display in red, yellow or green depending on the status.
If there is an error, it will be red and provide information about the line that includes the error and what kind of error it is.
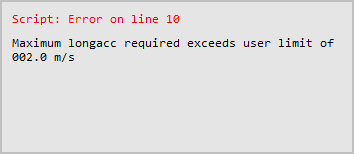
If there is an error, it will be red and provide information about the line that includes the error and what kind of error it is.

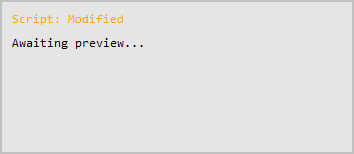
If the script is being updated, it will be displayed in yellow.

If the script is being updated, it will be displayed in yellow.
If the script is operational, it will be displayed in green with the route's total distance and time below.
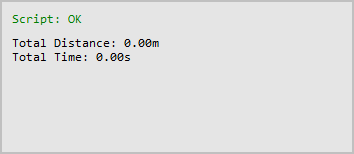
If the script is operational, it will be displayed in green with the route's total distance and time below.

This Best Fit button works as a one-click method to automatically fit your configured route in the map view.
This will adjust the zoom on your map to the best view for your current route.
Use the plus (+) and minus (-) buttons to zoom in and out on the map.
Click on the map type section in the bottom left corner to cycle through the available map types, such as:
- Satellite
- Map
- Hybrid
NOTE
The map types may vary depending on the map provider.
When you click on the Advanced button, SatGen will display the advanced options pop-up:

The Atmospheric Models include the Ionospheric Model and the Tropospheric Model.
- Klobuchar
By using this setting, the software will add ionospheric delays to the simulation and add ionospheric delay parameters in the navigation message.
- None
Select None if you do not want to apply ionospheric delay to your simulation and navigation message.
When you select Klobuchar as the Ionospheric Model, you will see a Gear icon appear next to it. Click on the Gear to access and expand the 8 parameters the Klobuchar model is comprised of.
There are 4 alpha parameters and 4 beta parameters.
You can edit the parameters by clicking on the up and down arrows next to the values.
Click the Revert button to set the parameters back to the default values.
Click on the Gear icon again to collapse the parameters.

- Unb3M
By using this setting, the software will add tropospheric delays to the simulation and add tropospheric delay parameters in the navigation message.
- None
Select None if you do not want to apply tropospheric delay to your simulation and navigation message.
There are currently no editable parameters for this model.

The default leap seconds (1 to 18 between 1981 and 2017) are fixed and cannot be edited or deleted.
You can, however, add new leap seconds to the list by using the date and value options under the list of leap seconds and clicking on the Add button.
Date: Select a month and year (from February 2017 onwards). The leap second will be added for the 1st of the selected month.
Value: Choose between + 1 or - 1 second.
When you have added a new leap second, it will be added to the bottom of the displayed list. You can see the date and value you selected, and the red cross behind the leap second will be dark red and clickable.
Click the red cross behind an added leap second to delete it.
You will see the help button in multiple locations in the software.
Clicking on this button will take you to the SatGen 4 documentation on the Racelogic Support Centre.