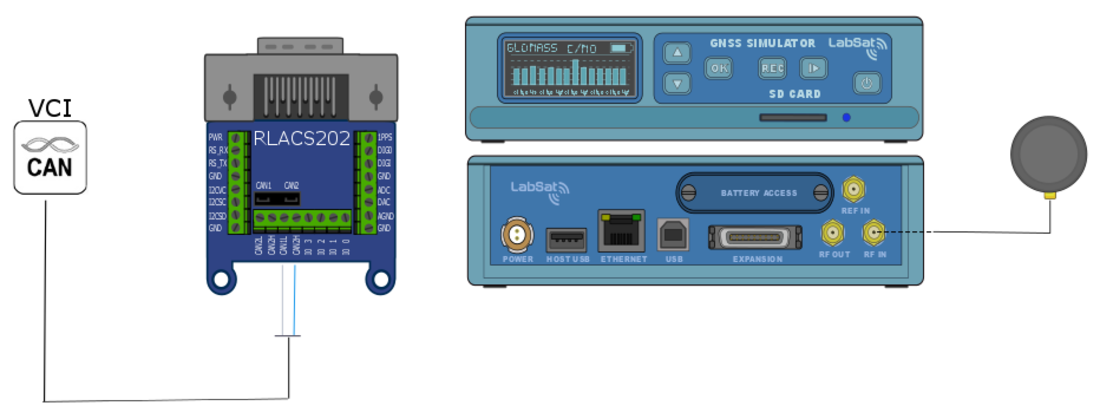
- Connect the 'CAN1 High' and 'CAN1 Low' ports of the expansion connector to the appropriate wires/cable.
- Connect the LabSat 3 antenna (RLACS198) to the 'RF IN' port.
- Power up the LabSat 3 and navigate to the ‘CAN’ section of the menu. Set the CAN recording type to ‘Log file’ and set the baud rate for both CAN channels.
- Fit the expansion connector to the LabSat.
- Pressing the ‘REC’ button on the front of the LabSat will begin the recording. The LabSat will record all CAN data available on the connected Bus.
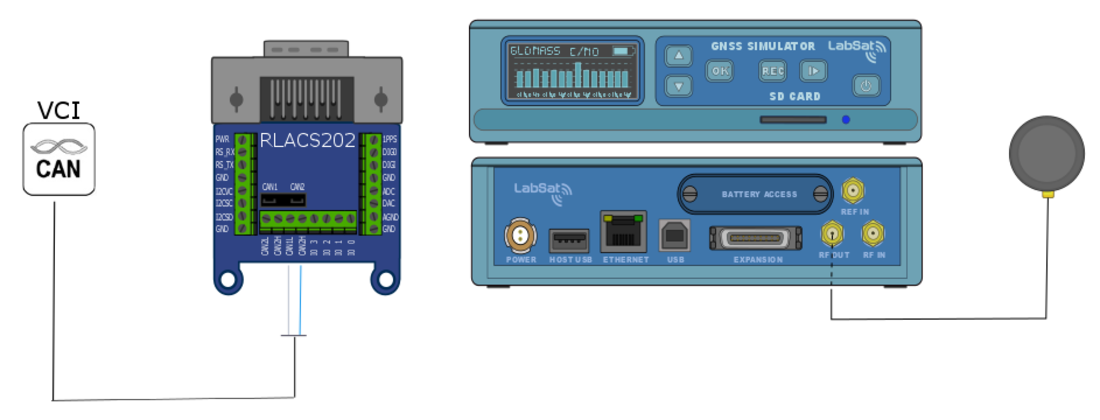
- Connect the 'CAN1 High' and 'CAN1 Low' ports of the expansion connector to the appropriate wires/cable.
- Connect the device under test to the LabSat 3 'RF OUT' port.
- Power up the LabSat 3 and select the previously recorded CAN scenario.
- Fit the expansion connector to the LabSat.
- Pressing the 'Play' button on the front of the LabSat will begin the replay. The LabSat will replay all CAN data originally recorded.
If you need further information about using LabSat 3 for recording and replaying Arbitrated CAN data, contact Racelogic Support.