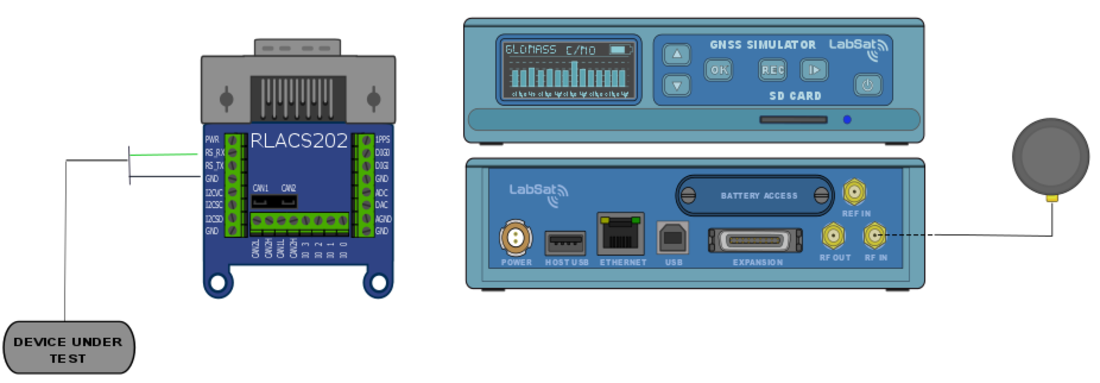
- Connect the ‘RS_Rx’ and ‘GRN’ ports of the expansion connector to the appropriate wires/cable.
- Power up the LabSat 3 and navigate to the ‘Digital’ section of the menu. Select the ‘RS232’ option.
- Fit the expansion connector to the LabSat.
- Pressing the ‘REC’ button on the front of the LabSat will begin the recording. The LabSat will record all serial messages available.
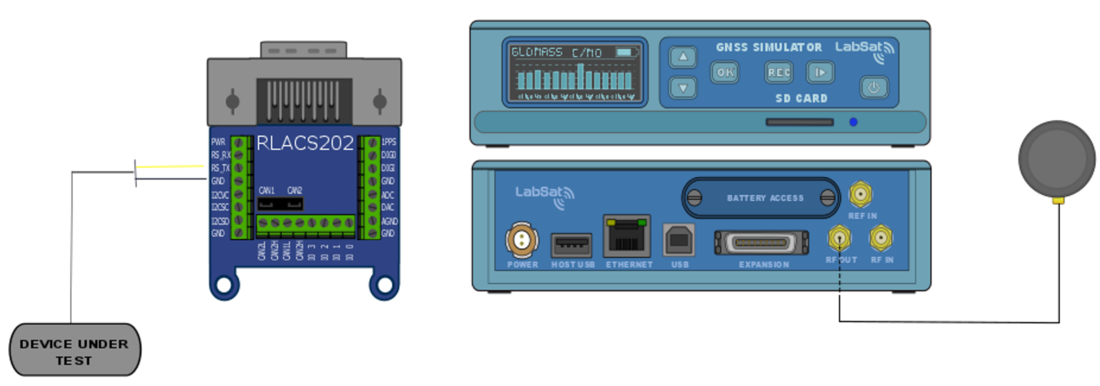
- Connect to the ‘RS_Tx’ and ‘GRN’ ports on the LabSat 3 expansion connector.
- Press the ‘Play’ button on the front of the LabSat to start the scenario replay.
If you need further information about using LabSat 3 for recording and replaying RS232 data, contact Racelogic Support.