04 - LabSat3W Synology Configuration
Hardware Connection
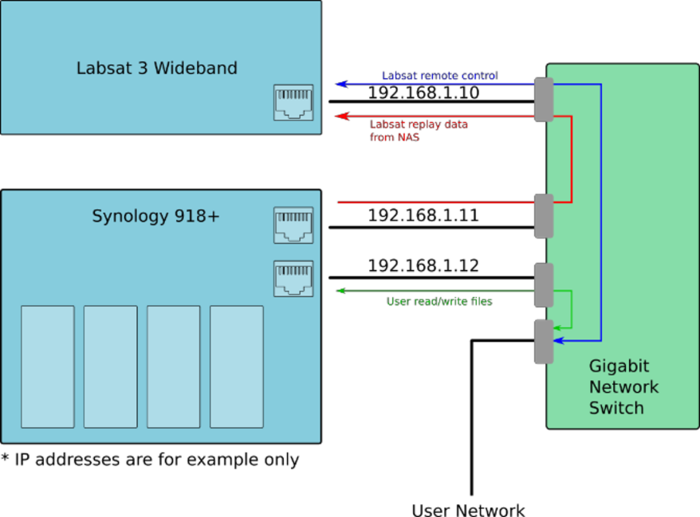
LabSat 3 Wideband is connected to the Synology NAS though a Gigabit network switch. This ensures that maximum bandwidth is available between the LabSat and the Synology NAS while also allowing control of LabSat via LAN. The secondary LAN port on the Synology NAS provides a data path to the rest of the user network allowing files to be copied to and from the NAS.
Initial Setup
Synology 918+ 4-Bay NAS with DSM 6.2 - 4x new installed Western Digital 10 TB WD Red drives (WD100EFAX).
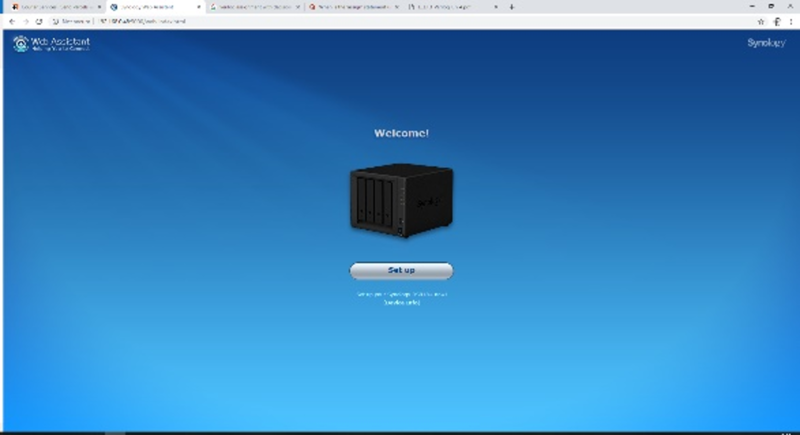
- After installing new Hard drives, connect to the website http://find.synology.com/ to locate the NAS on the network. This page will search for Synology drives on your network and display them. Select the correct device and press ‘Connect’.
- Once connected, a picture of the NAS should appear. Press ‘Set up’.
- If prompted to install the latest DiskStation Manager software click ‘Install Now’. This will ensure that the NAS is up to date.
- Next, set up a server name along with a username and password. In this example, we use ‘Labsat40TB’ for the server name, ‘labsat’ for the username and ‘racelogic’ for the password. Once done, click ‘Next’.
- On the DSM update page, click ‘Notify me of DSM updates and let me install them manually’. Click ‘Next’.
- For our example setup, On the ‘Set up QuickConnect’ page, click ‘Skip this step’.
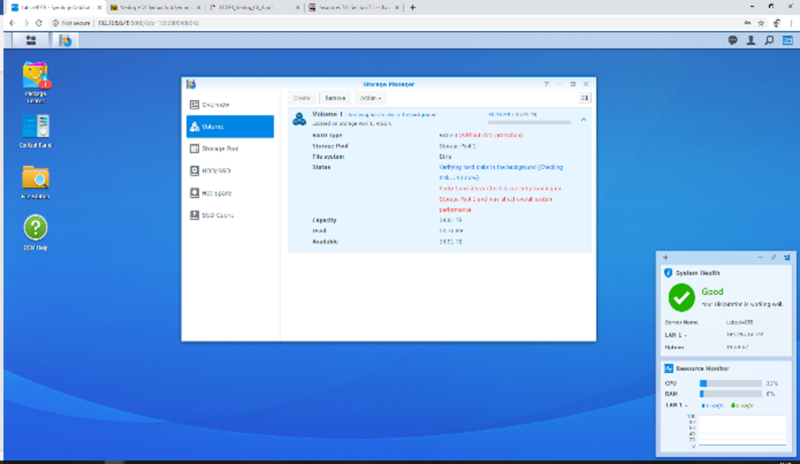
- The Synology should now show its windows style web interface. At this point, the Synology has 4 disks install but doesn’t know what format to use or which RAID mode to use. There are several different RAID modes that give different benefits such as maximum performance or maximum redundancy. In this example we will use RAID 0 which configures the disks for maximum performance.
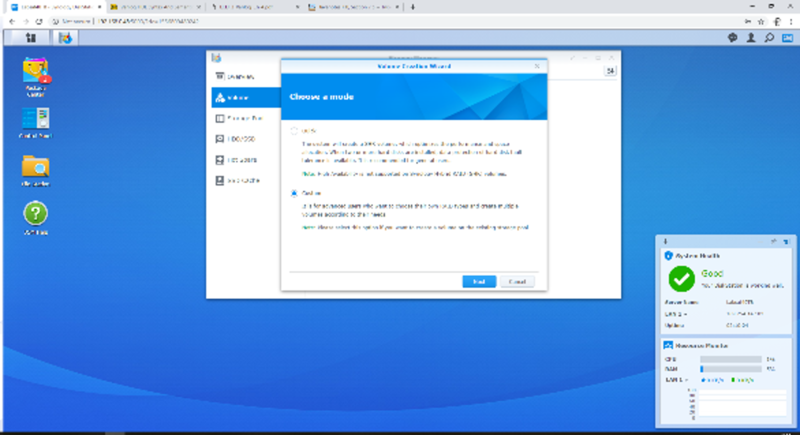
- Open the ‘Storage Manager’ application and with ‘Volume’ highlighted, click ‘Create’.
- Select ‘Custom’, then click ‘Next’.
- Select ‘Better performance’ for the storage pool type, then click ‘Next’.
-
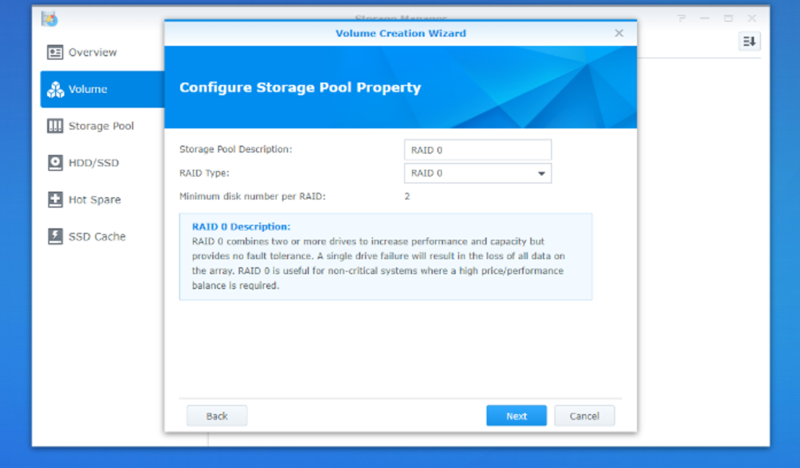
For ‘Raid Type’ select RAID 0. This does not have fault tolerance but does provide good performance. Click ‘Next’.
-
Make sure all disks are selected. Click ‘Next’ then ‘OK’ to confirm that all data on the disks will be erased.
-
The Synology will now format and check the disks. This process is very slow and depending on disk size, can take a day to complete.
-
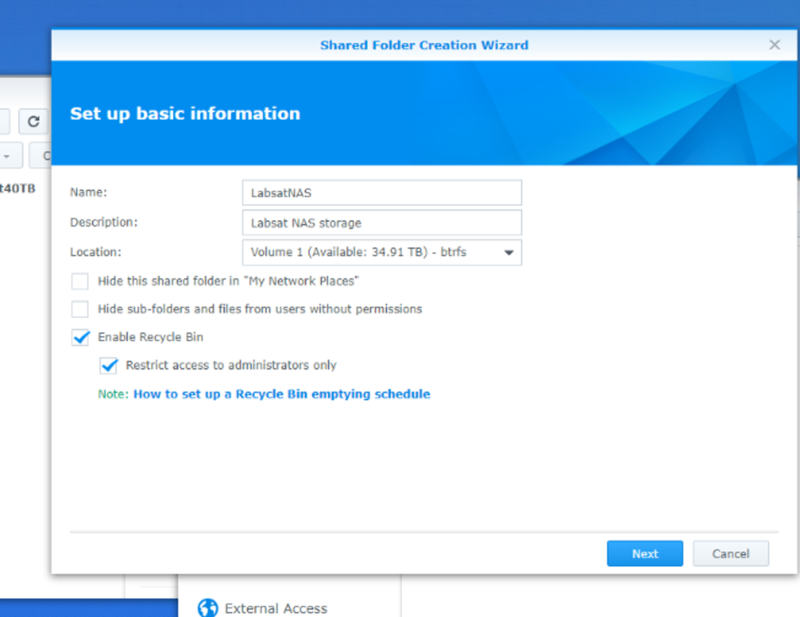
Click on ‘File Station’ then ‘create’ and ‘create new shared folder’.
-
Set up a network share name and description. Click ‘Next’.
-
In this example we will not use encryption. Click ‘Next’.
-
Click ‘Next’ on advanced setting page for default selection.
-
Click ‘Apply’ to confirm creation.
-
Click ‘OK’ on shared folder page to accept default permissions.
-
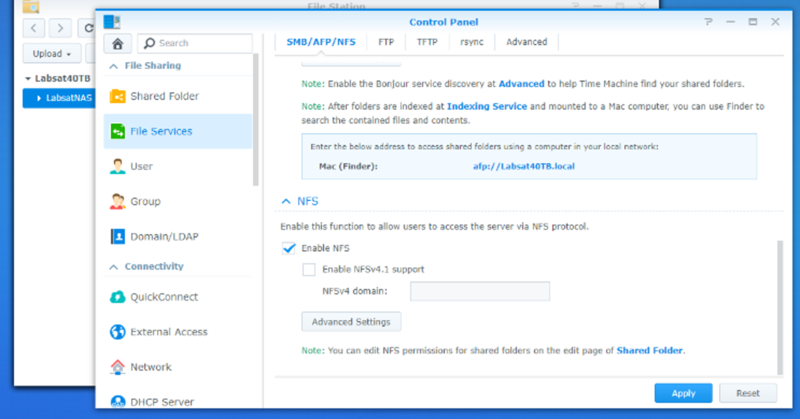
With the share setup, it is necessary to enable NFS. To do this, select, ‘Control Panel’ then ‘File Services’. Scroll to the bottom of the page and tick the ‘Enable NFS’ box then ‘Apply’.
- Go to ‘Control Panel’ then ‘File Services’ and select ‘Advanced settings’. Select SMB3 for maximum SMB protocol & SMB1 for minimum SMB protocol, then apply.
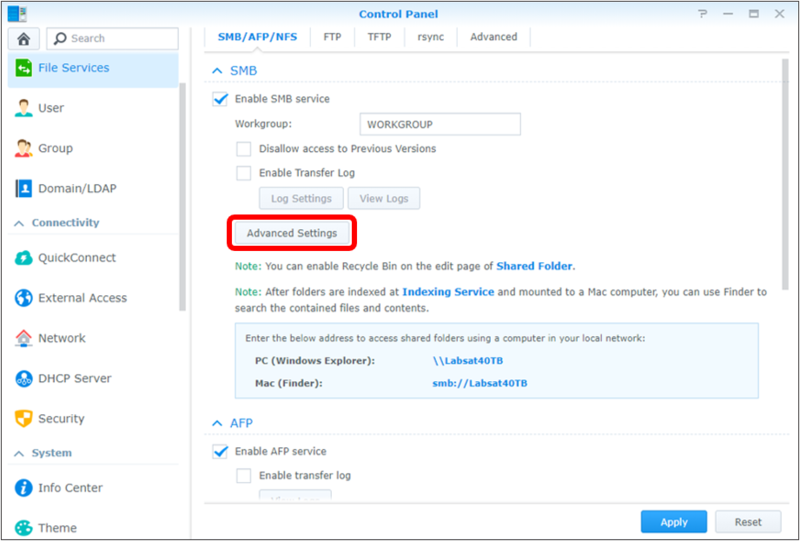
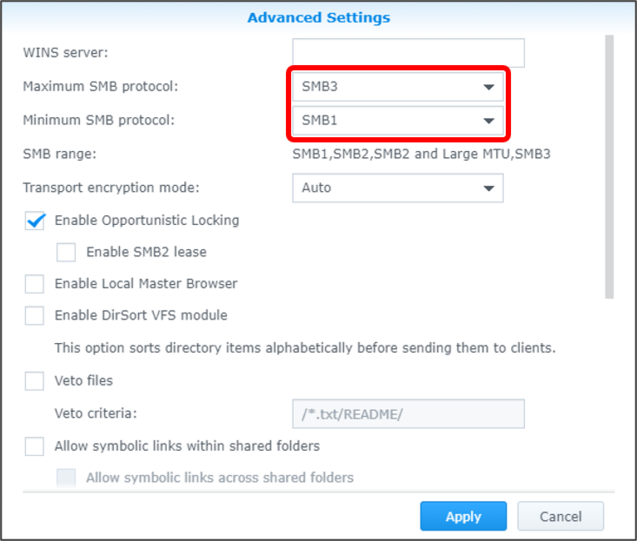
Note: The latest Synology DSM sets the minimum SMB protocol to 2.0 and max to 3.0. This stops LabSat 3 Wideband from mounting as it uses SMB 1.0. Therefore it is necessary to configure Synology for minimum SMB version of 1.0 (SMB1).