14 - Video VBOX Layers and Groups
Layers
Each element that is added to the scene is put on a new layer and each new layer appears above the previous layer. You can change the order of the layers using the Layers tab.
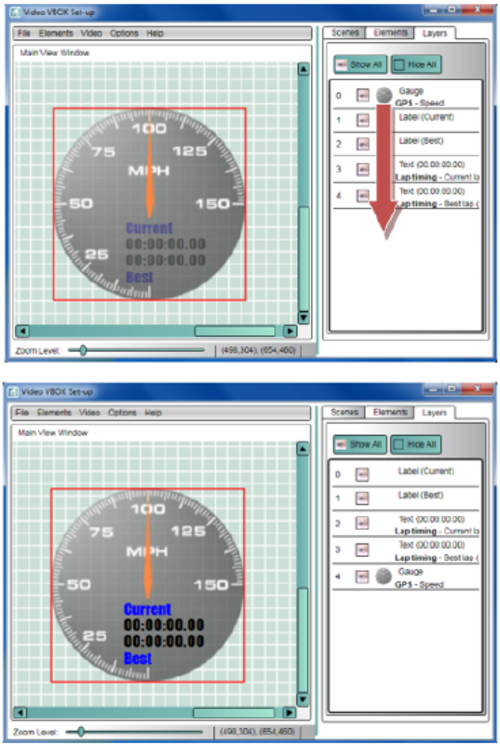
In the example below, four Lap-timing elements have been created first, followed by a gauge. The gauge now obscures the text elements (even though it is slightly transparent).
To correct this, select the Layers tab and click and drag the Gauge layer 0 to a point past layer 4.
With the gauge now occupying layer 4, the lap-timing elements are now more visible.
Groups
If you have multiple elements which are part of one item, then you can group them together which makes moving, deleting, copying and pasting much easier.
Using the previous example, you can group all of the lap-timing elements into one group. To do this, select the Layers tab and hold the CTRL key down and select the layers you wish to group. Once they are selected, right click and select Add to group. You will then be prompted for a name for this group.
You can now select any element of this group and move them all at once.
.png?revision=1)
Groups are represented in different colours in the Layers tab.
.png?revision=1)
It is also possible to add/remove an element to/from a group by right clicking on an element in the main view window.
.png?revision=1)
Groups of elements can be saved or exported for loading into separate scenes - simply drag around the elements you wish to save and right click.
.png?revision=1)
To create a temporary group, simply hold down the left hand mouse button and drag around multiple elements. They will then be locked together until another item is selected. This is helpful for moving groups of elements around.
Saving a group
Once a group has been created, it can be Saved or Exported for use in other Scenes. In this example we are saving just the Lap Timing Elements.
To Save a Group of Elements, first select all the Elements to be saved and right-click on this selection.
Select Save Group, name your Group and select Save.
This saved Group will now be available to import from the Elements tab by selecting Grouped from the Select Element type dropdown.
.png?revision=1)
Note: it is not possible to edit an element within a saved group. The element must be removed from the group before it can be edited. This is done by Right-clicking the element and selecting Remove from group.