Connecting AiM Devices to VBOX Video HD2

Introduction
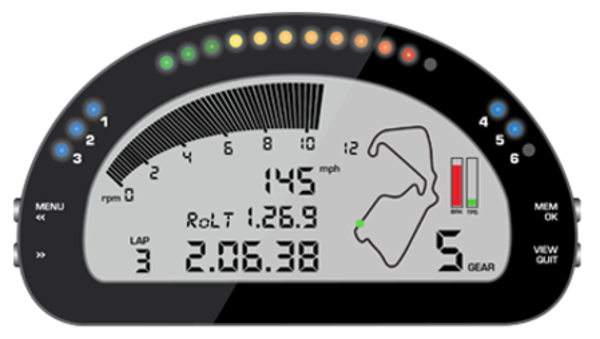
CAN data transmitted from AiM devices listed below can be received by VBOX Video HD2 and used for producing full colour HD graphics that are overlaid onto the video in real-time, making your videos more exciting and informative. All the AiM CAN channels have been incorporated into the VBOX database so you can select the channels in VBOX Video HD2 Setup that you want to log.
Compatibility:
- AiM Dash Loggers: MyChron4, MyChron5, MXG, MXL, MXL Pista, MXL Pro05, MXL Strada, MXL2, MXS, Solo 2 DL and SoloDL.
- AiM Data Loggers: EVO3 Pista, EVO3 Pro, EVO4, EVO4S and EVO5.
- AiM Bridges: ECU Bridge.
In order for the HD2 System to capture CAN data from an AiM device, the following conditions need to be met:
- The correct scene file is loaded on the unit from VBOX Video HD2 Setup software.
- The AiM device is setup correctly within RaceStudio2 or RaceStudio3 AiM software.
- There is a successful hardware connection between VBOX Video HD2 and the AiM device, using the same CAN bus and Baud Rate.
VBOX Video HD2 Setup
Scene files for use with AiM devices are available to download here.
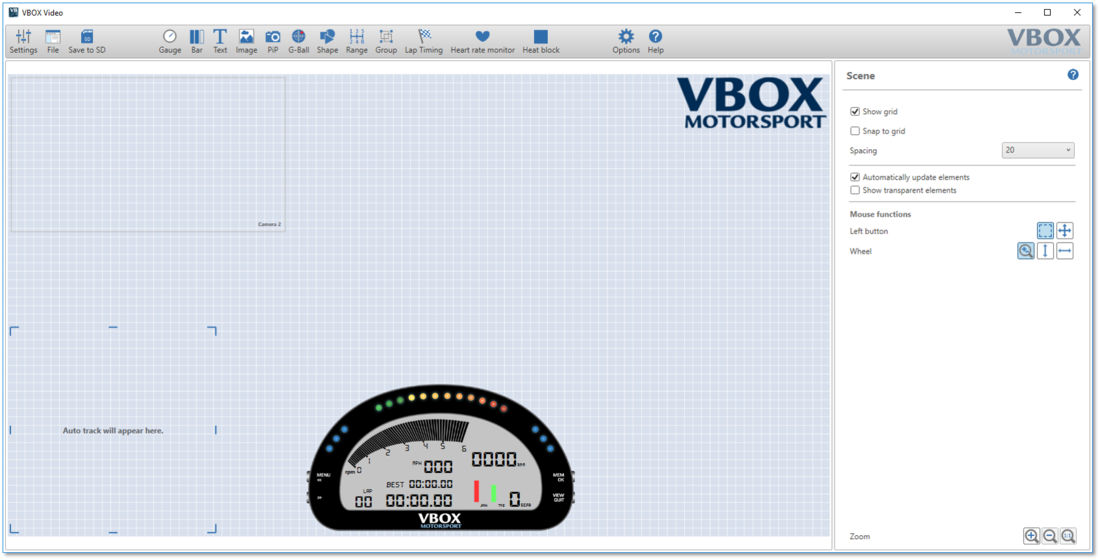
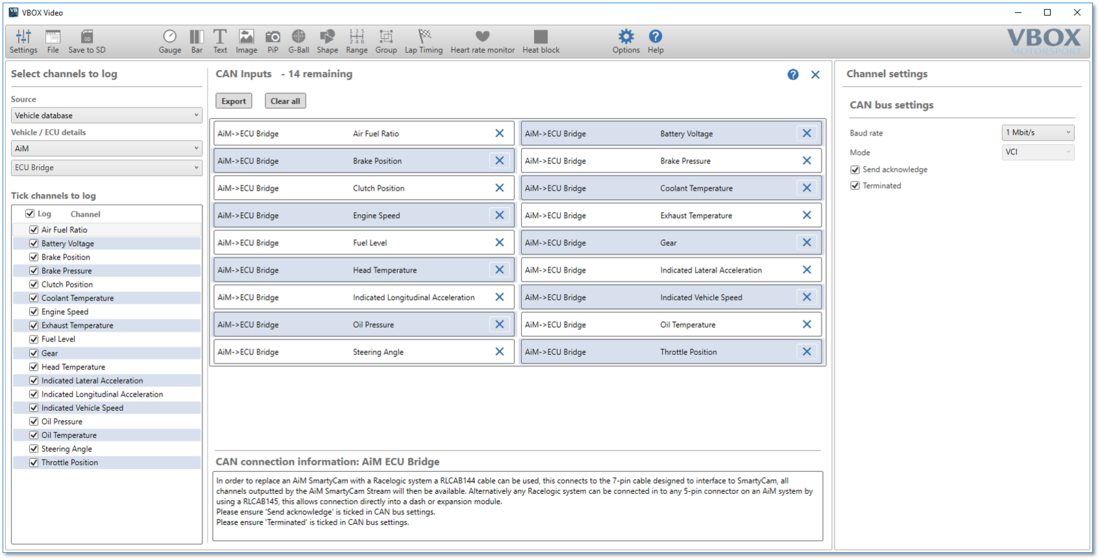
The scenes already have the AiM CAN protocol to receive the data, and the CAN Baud Rate is set to 1 Mbit/s, which matches the Default Baud Rate of AiM devices. Please ensure that the 'Send acknowledge' and 'Terminated' boxes are ticked within the 'CAN' menu in 'Settings'.
All of the available AiM CAN channels are already selected within the scene. If you would like to remove any these channels, navigate to the 'CAN' menu within 'Settings' and either untick the channel from within the 'Tick channels to log' section or click on the 'X' next to the channel within the 'CAN Inputs' section.
Once you are satisfied with the scene, it can be saved to an SD card using the ‘Save to SD’ button. Instructions on how to complete the upload to the HD2 Unit can be found here.
AiM Device Setup
In most cases, the AiM device will be already correctly configured for use with VBOX Video HD2, if it is not working correctly, then please follow the steps below:
- Connect the compatible AiM device to a PC and depending on the product, open either AiM software program RaceStudio2 or RaceStudio3.
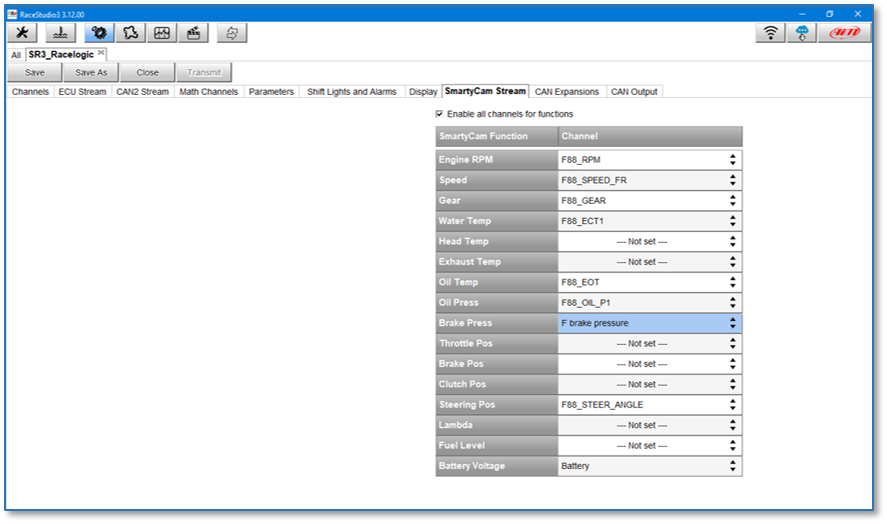
- Ensure the correct vehicle is selected and then click on the 'SmartyCam Stream' tab. This will list all of the standard SmartyCam channels that are transmitted from the AiM device alongside vehicle specific CAN channels which are chosen by the software to match these standard channels.
Note: The VBOX Video HD2 Setup software mirrors these SmartyCam channels within the AiM channel selection. Make sure that the channel selection is the same in both pieces of software.
- Check that the CAN channels from the vehicle match the required SmartyCam Stream channels.
- If SmartyCam channels are not matched automatically to the vehicle CAN channels, drop downs enable you to choose from the available vehicle channels. Selecting 'Enable all channels for functions' enables you to select from any vehicle CAN channel, unticking limits the selection to vehicle channels deemed by the software as relevant to the SmartyCam channel.
- Once you are satisfied with the setup, select ‘Transmit’ to save the configuration to the AiM device.