Robot Modes - Vehico
VB3iD-RTK is compatible with Vehico robot systems, allowing the user to complete high accuracy ADAS tests.
Hardware configuration
For successful integration with the Vehico system, the user will need the following equipment in each Vehicle: -
- 1 x VB3iD-RTK system
- 1 x IMU04 (connected to the VBOX via the RLCAB119)
- 1 x DGPS Radio and antenna
- 1 x ADAS vehicle to vehicle communication radio and antenna
- 1 x CAN Hub (optional)
.png?revision=1)
VBOX Manager Configuration
Enabling Vehico Mode
- Connect VBOX Manager to the VBOX.
- Enter the 'SETUP' menu of VBOX Manager.
- Select the 'Robot Modes' option and choose 'Configure'.
 |
 |
- Scroll to 'Vehico' and select,
 |
 |
- Click on 'Disabled' and select 'Enable'.
 |
 |
 |
- Scroll to 'Auto Configure' and select.
 |
|
|
Configuration Settings
Selecting the ‘Vehico - Auto Configure' option within VBOX Manager will automatically configure the VBOX to work with the Vehico system by applying the following settings:
- Dynamic Mode – 'High'
- Log Rate – '100 Hz'
- Hi Dynamic KF – 'Disabled'
- DGPS Mode – 'RTCM v3*'
- Dual Antenna Mode – 'Disabled'
- IMU Integration – 'Enabled'
- IMU Roof Mount – 'Disabled'
- On units without a CAN Hub:
- VCI CAN bus – 'RS232 port'
- VCI CAN Rate – '500 kbit/s'
- VCI Termination – 'Enabled’
- On units with a CAN Hub:
- VCI CAN Rate – '500 kbit/s'
- VCI2 Termination – 'Enabled’
- The following CAN IDs will also be switched on, more information on these is available here:-
- 329
- 32A
- The following CAN pass through channels will be applied:-
- 600 - X Acceleration
*Please note that the user must manually select the correct DGPS serial rate that relates to the radio system they are using.
**1.000 m is the default dual antenna separation. If it is not possible to gain a 1 m separation, then the user will have to enter the required separation value in the 'Dual Antenna' area of VBOX Manager.
Once the option has been selected, the VBOX Kalman Filter position clamp will change from 2 mm per sample to 1 mm per sample, offering a smoother position and heading transition once GNSS lock as been established after a GNSS signal degrade/denial phase. This is a safety feature that prevents sudden position corrections.
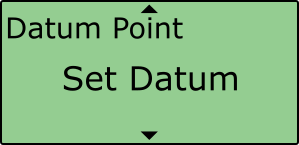
Setting the Datum Point
The Datum point is the origin point of the local X-Y coordinate system, from which all positional information will reference. Selecting will use the current location of the GPS antenna as the Datum point.
 |
|
|
Setting the Track Direction
The track direction dictates the direction which the Vehico system will consider it’s ‘North’ value. VBOX 3i will automatically work out the heading and apply this heading as the track direction.
- After setting the 'Datum Point' drive along the track to another location.
- Scroll to 'Track Dir.' and select.
 |
|
|
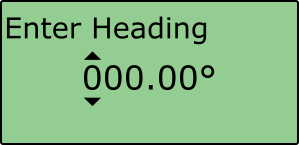
Setting the Heading
Alternatively to setting the 'Track Direction', a numerical heading value can be manually entered.
- Scroll to 'Enter Heading' and select.
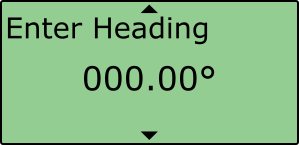
- Enter the heading value by pressing the scroll wheel to move along the digits and rotating to the desired number, selecting past the final digit will store the value.
 |
|
|
Saving, Loading and Clearing the Datum Point, Track Direction and Heading
Once the user has defined the Datum point and track direction, it is possible to save this information to be recalled at a later date. To do this the user must save the information by pressing the ‘Save’ option within VBOX Manager, doing this will allow the user to either create a new file or overwrite an existing file.
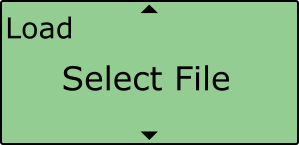
Once saved, it is possible to load this information into the VBOX using the ‘Load’ option on VBOX Manager, allowing the user to select the required file.
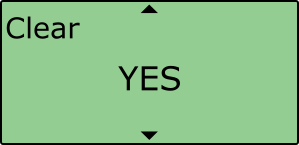
To clear the current track direction and datum point, the user can use the ‘Clear’ function. Selecting this option will clear the current track direction before setting the current antenna location as the datum point.
 |
 |
 |
Setting the ADAS mode
The user will still need to manually set the VBOXs as either a ‘Subject Vehicle’ or ‘Target Vehicle’ in the '1 Target' ADAS mode. More information on this is available here.
Channel Changes
- Once Vehico mode is enabled, the Latdif_tg1 and Lngdif_tg1 channels also change function, being populated with the Target’s position with regards to the Datum, i.e the x and y position in metres.
- Longitudinal and lateral acceleration values will be also output in m/s² rather than g
- As the Vehico system allows the user to define a Track direction, the VBOX’s Robot_Head value is calculated with reference to the ‘y’ direction (Track Direction) in the image below, as opposed to using North as the reference.
.png?revision=1)
Disabling Vehico Mode
Please note that the VBOX will continue to operate in ‘Vehico mode’ until either a different Robot mode is selected (DSD, ABD) or ‘Off’ is selected from within VBOX Manager.