ADAS Dual Antenna Configuration
To configure the VBOX 3i Dual Antenna Configuration within an ADAS test, please follow the steps below:
These steps can be repeated on multiple vehicles if required. A more in depth guide is available here.
Dual Antenna Separation
- Ensure the antennas are positioned and connected to the VBOX 3i correctly, as described here.
- Connect VBOX Manager to the VBOX.
- Enter the 'SETUP' menu of VBOX Manager.
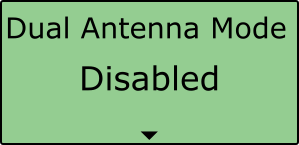
- Select 'Dual Antenna' and then click on the 'Dual Antenna Mode' menu.
 |
 |
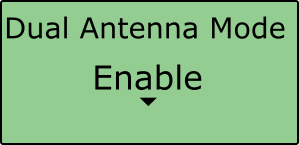
- Scroll to 'Enable' and select.
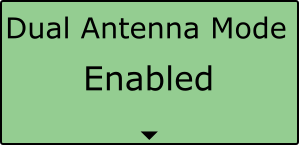
- Once the 'OK' confirmation screen has cleared, 'Enabled' will be displayed.
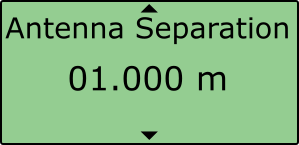
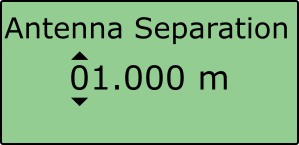
- Scroll to 'Antenna Separation' and select. Enter the distances measured between Antenna A and Antenna B by pressing the scroll wheel to move along the digits and rotating to the desired number, selecting past the final digit will store the value. More information on this can be found here.
 |
 |
- Driving forward should now show a green 'DUAL' LED.
Roll Mode (optional)
If you intend to test roll and pitch measurements rather than slip and pitch, follow the steps below. More information on this can be found here.
- Navigate back to the 'Dual Antenna' menu.
- Scroll to the 'Antenna Orientation' menu and select.
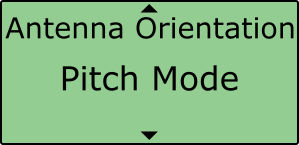
- Scroll to 'Roll Mode' and select.
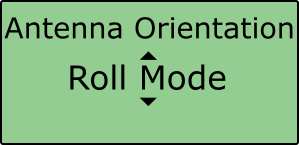
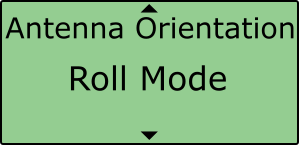
- Once the 'OK' confirmation screen has cleared, 'Roll Mode' will be displayed.
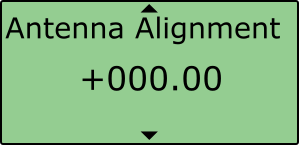
Align Antennas
If you are using a slip and pitch configuration rather than a roll and pitch, it is important to get the alignment of the antennas as close as possible to the centreline of the vehicle to measure the slip angle with the most precision. Any residual errors in this alignment can be removed using the Auto Align feature. More information on this can be found here.
- Ensure you have dual antenna lock.
- Navigate back to the 'Dual Antenna' menu.
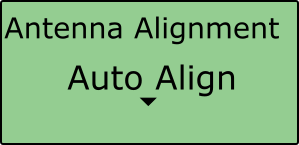
- Scroll to the 'Antenna Alignment' menu, select and then choose then 'Auto Align'.
 |
 |
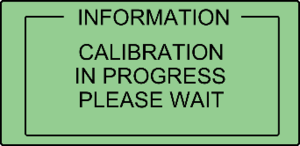
- You are then required to drive in a straight line for a short period of time, whilst maintaining a constant speed greater than 25 km/h.
- Once the calibration is complete, the VBOX Manager will display 'CALIBRATION COMPLETE'
 |
 |
Note: Any existing alignment should be cleared using the 'Clear' function.
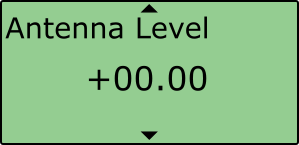
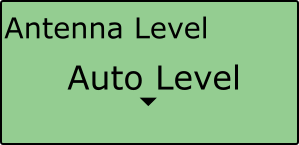
Level Antennas
If the roof of your vehicle is not perfectly flat in relation to the ground, you can automatically remove any offset by performing the Auto Level feature. More information on this can be found here.
- Ensure you have dual antenna lock and you are on a flat, level section of road.
- Navigate back to the 'Dual Antenna' menu.
- Scroll to the 'Antenna Level' menu and, select and then choose then 'Auto Level'.
 |
 |
Note: Any existing offset should be cleared using the 'Clear' function.