06 - VBOX Speed Sensor Digital Input

You can use the Digital Input on the VBOX Speed Sensor to program the position of virtual lines which lets you set Start/Finish and Split lines. Racelogic can provide different triggers and switches to use with this feature. For more information on available Digital input accessories, click here.
Note: If you are making your own switch, you must make sure that you have a connection to the Lap Input (pin 6) before you do anything else. This pin should be connected to one side of a momentary switch. The other side of the switch should be connected to the Ground pin of the VBOX Speed Sensor so that when the switch is pressed the Lap Input pin will be shorted to Ground. You can also use the Digital Input on the VBOX Speed Sensor for a Brake Trigger.
Configuration
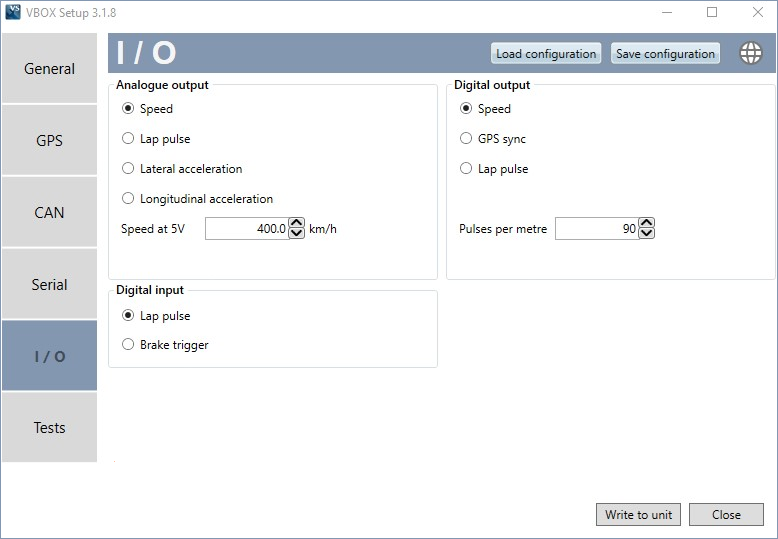
Use the VBOX Setup Software to set the function of the Digital Input to either Lap pulse or Brake Trigger mode.
 |
Lap pulse mode
To measure lap and split times at a new circuit, you must first program the speed sensor with the location of the Start/Finish line and split lines. Select Lap pulse under Digital input and when you are at the desired locations around the circuit you use the digital input switch as described below to set the different gates.
Note: You must be moving at a speed of >5 km/h and follow the normal line along the circuit. The speed sensor notes the point and direction of travel and creates a 25 m wide virtual line, perpendicular to your line of travel.
To set a start/finish line: Press and immediately release the input switch as you cross the start/finish line.
To set a separate finish line: Press and hold the input switch (longer than 1.5 seconds) when you cross the finish line.
After you have set a Start/Finish or Finish line you can view the latitude and longitude of this line position in the ‘Tests’ page of the setup software. If the software was already connected, you must press ‘Connect’ to refresh the settings.
Set a Split line: Press the input switch twice in quick succession when you cross the point you wish the line to be set at.
When the Split line has been marked, the SATS LED will quickly flash green 5 times. In each case, the VBOX Speed Sensor will recognise the lead edge of the first pulse as the activation to set the associated virtual line at the exact point that the user first presses the switch.
To clear all Virtual lines: Press the input switch shortly once, then press and hold (longer than 1.5 seconds).
Coldstart: Perform a coldstart by grounding the input while connecting the speed sensor to power - all the LEDs will light up red.
Brake Trigger mode
If you wish to measure various parameters from the point a trigger is activated to the point the vehicle stops, you should set the Digital input mode to Brake Trigger mode.
When you activate the trigger (typically a switch that is fitted to the brake pedal), the VBOX Speed Sensor will begin measuring associated trigger stop parameters and will stop the measurements when the vehicle becomes stationary and the speed sensor will calculate the time and distance for a 'Brake Trigger to 0 km/h' test.
Important: Currently, trigger stop test results are only valid when recorded over CAN. They will not be valid if recorded via Test Suite Online.